![]()
The perfect emulation setup to study and develop the Linux kernel v5.2.1, kernel modules, QEMU, gem5 and x86_64, ARMv7 and ARMv8 userland and baremetal assembly, ANSI C, C++ and POSIX. GDB step debug and KGDB just work. Powered by Buildroot and crosstool-NG. Highly automated. Thoroughly documented. Automated tests. "Tested" in an Ubuntu 18.04 host.
The source code for this page is located at: https://github.com/cirosantilli/linux-kernel-module-cheat. Due to a GitHub limitation, this README is too long and not fully rendered on github.com. Either use: README.adoc, https://cirosantilli.com/linux-kernel-module-cheat or build the docs yourself.
- 1. Getting started
- 1.1. QEMU Buildroot setup
- 1.2. gem5 Buildroot setup
- 1.3. Docker host setup
- 1.4. Prebuilt setup
- 1.5. Host kernel module setup
- 1.6. Userland setup
- 1.7. Baremetal setup
- 1.8. Build the documentation
- 2. GDB step debug
- 2.1. GDB step debug kernel boot
- 2.2. GDB step debug kernel post-boot
- 2.3. tmux
- 2.4. GDB step debug kernel module
- 2.5. GDB step debug early boot
- 2.6. GDB step debug userland processes
- 2.7. GDB call
- 2.8. GDB view ARM system registers
- 2.9. GDB step debug multicore userland
- 2.10. Linux kernel GDB scripts
- 2.11. Debug the GDB remote protocol
- 3. KGDB
- 4. gdbserver
- 5. CPU architecture
- 6. init
- 7. initrd
- 8. Device tree
- 9. KVM
- 10. User mode simulation
- 11. Kernel module utilities
- 12. Filesystems
- 13. Graphics
- 14. Networking
- 15. Linux kernel
- 15.1. Linux kernel configuration
- 15.2. Kernel version
- 15.3. Kernel command line parameters
- 15.4. printk
- 15.5. Linux kernel entry point
- 15.6. Kernel module APIs
- 15.7. Kernel panic and oops
- 15.8. Pseudo filesystems
- 15.9. Pseudo files
- 15.10. kthread
- 15.11. Timers
- 15.12. IRQ
- 15.13. Kernel utility functions
- 15.14. Linux kernel tracing
- 15.15. Linux kernel hardening
- 15.16. User mode Linux
- 15.17. UIO
- 15.18. Linux kernel interactive stuff
- 15.19. DRM
- 15.20. Linux kernel testing
- 15.21. Linux kernel build system
- 16. Xen
- 17. QEMU
- 17.1. Introduction to QEMU
- 17.2. Disk persistency
- 17.3. gem5 qcow2
- 17.4. Snapshot
- 17.5. Device models
- 17.6. QEMU monitor
- 17.7. Debug the emulator
- 17.8. Tracing
- 17.9. QEMU GUI is unresponsive
- 18. gem5
- 18.1. gem5 vs QEMU
- 18.2. gem5 run benchmark
- 18.3. gem5 kernel command line parameters
- 18.4. gem5 GDB step debug
- 18.5. gem5 checkpoint
- 18.6. Pass extra options to gem5
- 18.7. gem5 exit after a number of instructions
- 18.8. m5ops
- 18.9. gem5 arm Linux kernel patches
- 18.10. m5out directory
- 18.11. m5term
- 18.12. gem5 Python scripts without rebuild
- 18.13. gem5 fs_bigLITTLE
- 18.14. gem5 unit tests
- 18.15. gem5 build options
- 19. Buildroot
- 19.1. Introduction to Buildroot
- 19.2. Custom Buildroot configs
- 19.3. Find Buildroot options with make menuconfig
- 19.4. Change user
- 19.5. Add new Buildroot packages
- 19.6. Remove Buildroot packages
- 19.7. BR2_TARGET_ROOTFS_EXT2_SIZE
- 19.8. Buildroot rebuild is slow when the root filesystem is large
- 19.9. Report upstream bugs
- 19.10. libc choice
- 20. Userland content
- 21. Userland assembly
- 22. x86 userland assembly
- 22.1. x86 registers
- 22.2. x86 addressing modes
- 22.3. x86 data transfer instructions
- 22.4. x86 binary arithmetic instructions
- 22.5. x86 logical instructions
- 22.6. x86 shift and rotate instructions
- 22.7. x86 bit and byte instructions
- 22.8. x86 control transfer instructions
- 22.9. x86 miscellaneous instructions
- 22.10. x86 random number generator instructions
- 22.11. x86 x87 FPU instructions
- 22.12. x86 SIMD
- 22.13. x86 system instructions
- 22.14. x86 thread synchronization primitives
- 22.15. x86 assembly bibliography
- 22.15.1. x86 official bibliography
- 22.15.1.1. Intel 64 and IA-32 Architectures Software Developer’s Manuals
- 22.15.1.1.1. Intel 64 and IA-32 Architectures Software Developer’s Manuals Volume 1
- 22.15.1.1.2. Intel 64 and IA-32 Architectures Software Developer’s Manuals Volume 2
- 22.15.1.1.3. Intel 64 and IA-32 Architectures Software Developer’s Manuals Volume 3
- 22.15.1.1.4. Intel 64 and IA-32 Architectures Software Developer’s Manuals Volume 4
- 22.15.1.1. Intel 64 and IA-32 Architectures Software Developer’s Manuals
- 22.15.1. x86 official bibliography
- 23. ARM userland assembly
- 23.1. Introduction to the ARM architecture
- 23.2. ARM branch instructions
- 23.3. ARM load and store instructions
- 23.4. ARM data processing instructions
- 23.5. ARM miscellaneous instructions
- 23.6. ARM SIMD
- 23.7. ARMv8 architecture extensions
- 23.8. ARM assembly bibliography
- 23.8.1. ARM non-official bibliography
- 23.8.2. ARM official bibliography
- 23.8.2.1. ARMv7 architecture reference manual
- 23.8.2.2. ARMv8 architecture reference manual
- 23.8.2.3. ARMv8 architecture reference manual db
- 23.8.2.4. Programmer’s Guide for ARMv8-A
- 23.8.2.5. Arm A64 Instruction Set Architecture: Future Architecture Technologies in the A architecture profile Documentation
- 23.8.2.6. ARM processor documentation
- 24. ELF
- 25. IEEE 754
- 26. Baremetal
- 26.1. Baremetal GDB step debug
- 26.2. Baremetal bootloaders
- 26.3. Semihosting
- 26.4. gem5 baremetal carriage return
- 26.5. Baremetal host packaged toolchain
- 26.6. Baremetal C++
- 26.7. GDB builtin CPU simulator
- 26.8. ARM baremetal
- 26.9. How we got some baremetal stuff to work
- 26.10. Baremetal tests
- 27. Android
- 28. Benchmark this repo
- 29. About this repo
- 29.1. Supported hosts
- 29.2. Common build issues
- 29.3. Run command after boot
- 29.4. Default command line arguments
- 29.5. Documentation
- 29.6. asciidoctor/link-target-up.rb
- 29.7. Clean the build
- 29.8. ccache
- 29.9. Rebuild Buildroot while running
- 29.10. Simultaneous runs
- 29.11. Build variants
- 29.12. Directory structure
- 29.13. Test this repo
- 29.14. Bisection
- 29.15. path_properties
- 29.16. Update a forked submodule
- 29.17. Release
- 29.18. Design rationale
- 29.19. Soft topics
- 29.20. Bibliography
1. Getting started
Each child section describes a possible different setup for this repo.
If you don’t know which one to go for, start with QEMU Buildroot setup getting started.
Design goals of this project are documented at: Section 29.18.1, “Design goals”.
1.1. QEMU Buildroot setup
1.1.1. QEMU Buildroot setup getting started
This setup has been mostly tested on Ubuntu. For other host operating systems see: Section 29.1, “Supported hosts”. For greater stability, consider using the latest release instead of master: https://github.com/cirosantilli/linux-kernel-module-cheat/releases
Reserve 12Gb of disk and run:
git clone https://github.com/cirosantilli/linux-kernel-module-cheat
cd linux-kernel-module-cheat
./build --download-dependencies qemu-buildroot
./run
You don’t need to clone recursively even though we have .git submodules: download-dependencies fetches just the submodules that you need for this build to save time.
If something goes wrong, see: Section 29.2, “Common build issues” and use our issue tracker: https://github.com/cirosantilli/linux-kernel-module-cheat/issues
The initial build will take a while (30 minutes to 2 hours) to clone and build, see Benchmark builds for more details.
If you don’t want to wait, you could also try the following faster but much more limited methods:
but you will soon find that they are simply not enough if you anywhere near serious about systems programming.
After ./run, QEMU opens up leaving you in the /lkmc/ directory, and you can start playing with the kernel modules inside the simulated system:
insmod hello.ko
insmod hello2.ko
rmmod hello
rmmod hello2
This should print to the screen:
hello init
hello2 init
hello cleanup
hello2 cleanup
which are printk messages from init and cleanup methods of those modules.
Sources:
Quit QEMU with:
Ctrl-A X
See also: Section 13.1.1, “Quit QEMU from text mode”.
All available modules can be found in the kernel_modules directory.
It is super easy to build for different CPU architectures, just use the --arch option:
./build --arch aarch64 --download-dependencies qemu-buildroot
./run --arch aarch64
To avoid typing --arch aarch64 many times, you can set the default arch as explained at: Section 29.4, “Default command line arguments”
I now urge you to read the following sections which contain widely applicable information:
-
Linux kernel
Once you use GDB step debug and tmux, your terminal will look a bit like this:
[    1.451857] input: AT Translated Set 2 keyboard as /devices/platform/i8042/s1│loading @0xffffffffc0000000: ../kernel_modules-1.0//timer.ko
[    1.454310] ledtrig-cpu: registered to indicate activity on CPUs             │(gdb) b lkmc_timer_callback
[    1.455621] usbcore: registered new interface driver usbhid                  │Breakpoint 1 at 0xffffffffc0000000: file /home/ciro/bak/git/linux-kernel-module
[    1.455811] usbhid: USB HID core driver                                      │-cheat/out/x86_64/buildroot/build/kernel_modules-1.0/./timer.c, line 28.
[    1.462044] NET: Registered protocol family 10                               │(gdb) c
[    1.467911] Segment Routing with IPv6                                        │Continuing.
[    1.468407] sit: IPv6, IPv4 and MPLS over IPv4 tunneling driver              │
[    1.470859] NET: Registered protocol family 17                               │Breakpoint 1, lkmc_timer_callback (data=0xffffffffc0002000 <mytimer>)
[    1.472017] 9pnet: Installing 9P2000 support                                 │    at /linux-kernel-module-cheat//out/x86_64/buildroot/build/
[    1.475461] sched_clock: Marking stable (1473574872, 0)->(1554017593, -80442)│kernel_modules-1.0/./timer.c:28
[    1.479419] ALSA device list:                                                │28      {
[    1.479567]   No soundcards found.                                           │(gdb) c
[    1.619187] ata2.00: ATAPI: QEMU DVD-ROM, 2.5+, max UDMA/100                 │Continuing.
[    1.622954] ata2.00: configured for MWDMA2                                   │
[    1.644048] scsi 1:0:0:0: CD-ROM            QEMU     QEMU DVD-ROM     2.5+ P5│Breakpoint 1, lkmc_timer_callback (data=0xffffffffc0002000 <mytimer>)
[    1.741966] tsc: Refined TSC clocksource calibration: 2904.010 MHz           │    at /linux-kernel-module-cheat//out/x86_64/buildroot/build/
[    1.742796] clocksource: tsc: mask: 0xffffffffffffffff max_cycles: 0x29dc0f4s│kernel_modules-1.0/./timer.c:28
[    1.743648] clocksource: Switched to clocksource tsc                         │28      {
[    2.072945] input: ImExPS/2 Generic Explorer Mouse as /devices/platform/i8043│(gdb) bt
[    2.078641] EXT4-fs (vda): couldn't mount as ext3 due to feature incompatibis│#0  lkmc_timer_callback (data=0xffffffffc0002000 <mytimer>)
[    2.080350] EXT4-fs (vda): mounting ext2 file system using the ext4 subsystem│    at /linux-kernel-module-cheat//out/x86_64/buildroot/build/
[    2.088978] EXT4-fs (vda): mounted filesystem without journal. Opts: (null)  │kernel_modules-1.0/./timer.c:28
[    2.089872] VFS: Mounted root (ext2 filesystem) readonly on device 254:0.    │#1  0xffffffff810ab494 in call_timer_fn (timer=0xffffffffc0002000 <mytimer>,
[    2.097168] devtmpfs: mounted                                                │    fn=0xffffffffc0000000 <lkmc_timer_callback>) at kernel/time/timer.c:1326
[    2.126472] Freeing unused kernel memory: 1264K                              │#2  0xffffffff810ab71f in expire_timers (head=<optimized out>,
[    2.126706] Write protecting the kernel read-only data: 16384k               │    base=<optimized out>) at kernel/time/timer.c:1363
[    2.129388] Freeing unused kernel memory: 2024K                              │#3  __run_timers (base=<optimized out>) at kernel/time/timer.c:1666
[    2.139370] Freeing unused kernel memory: 1284K                              │#4  run_timer_softirq (h=<optimized out>) at kernel/time/timer.c:1692
[    2.246231] EXT4-fs (vda): warning: mounting unchecked fs, running e2fsck isd│#5  0xffffffff81a000cc in __do_softirq () at kernel/softirq.c:285
[    2.259574] EXT4-fs (vda): re-mounted. Opts: block_validity,barrier,user_xatr│#6  0xffffffff810577cc in invoke_softirq () at kernel/softirq.c:365
hello S98                                                                       │#7  irq_exit () at kernel/softirq.c:405
                                                                                │#8  0xffffffff818021ba in exiting_irq () at ./arch/x86/include/asm/apic.h:541
Apr 15 23:59:23 login[49]: root login on 'console'                              │#9  smp_apic_timer_interrupt (regs=<optimized out>)
hello /root/.profile                                                            │    at arch/x86/kernel/apic/apic.c:1052
# insmod /timer.ko                                                              │#10 0xffffffff8180190f in apic_timer_interrupt ()
[    6.791945] timer: loading out-of-tree module taints kernel.                 │    at arch/x86/entry/entry_64.S:857
# [    7.821621] 4294894248                                                     │#11 0xffffffff82003df8 in init_thread_union ()
[    8.851385] 4294894504                                                       │#12 0x0000000000000000 in ?? ()
                                                                                │(gdb)
1.1.2. How to hack stuff
Besides a seamless initial build, this project also aims to make it effortless to modify and rebuild several major components of the system, to serve as an awesome development setup.
1.1.2.1. Your first Linux kernel hack
Let’s hack up the Linux kernel entry point, which is an easy place to start.
Open the file:
vim submodules/linux/init/main.c
and find the start_kernel function, then add there a:
pr_info("I'VE HACKED THE LINUX KERNEL!!!");
Then rebuild the Linux kernel, quit QEMU and reboot the modified kernel:
./build-linux
./run
and, surely enough, your message has appeared at the beginning of the boot:
<6>[ 0.000000] I'VE HACKED THE LINUX KERNEL!!!
So you are now officially a Linux kernel hacker, way to go!
We could have used just build to rebuild the kernel as in the initial build instead of build-linux, but building just the required individual components is preferred during development:
-
saves a few seconds from parsing Make scripts and reading timestamps
-
makes it easier to understand what is being done in more detail
-
allows passing more specific options to customize the build
The build script is just a lightweight wrapper that calls the smaller build scripts, and you can see what ./build does with:
./build --dry-run
When you reach difficulties, QEMU makes it possible to easily GDB step debug the Linux kernel source code, see: Section 2, “GDB step debug”.
1.1.2.2. Your first kernel module hack
Edit kernel_modules/hello.c to contain:
pr_info("hello init hacked\n");
and rebuild with:
./build-modules
Now there are two ways to test it out: the fast way, and the safe way.
The fast way is, without quitting or rebooting QEMU, just directly re-insert the module with:
insmod /mnt/9p/out_rootfs_overlay/lkmc/hello.ko
and the new pr_info message should now show on the terminal at the end of the boot.
This works because we have a 9P mount there setup by default, which mounts the host directory that contains the build outputs on the guest:
ls "$(./getvar out_rootfs_overlay_dir)"
The fast method is slightly risky because your previously insmodded buggy kernel module attempt might have corrupted the kernel memory, which could affect future runs.
Such failures are however unlikely, and you should be fine if you don’t see anything weird happening.
The safe way, is to fist quit QEMU, rebuild the modules, put them in the root filesystem, and then reboot:
./build-modules
./build-buildroot
./run --eval-after 'insmod hello.ko'
./build-buildroot is required after ./build-modules because it re-generates the root filesystem with the modules that we compiled at ./build-modules.
You can see that ./build does that as well, by running:
./build --dry-run
--eval-after is optional: you could just type insmod hello.ko in the terminal, but this makes it run automatically at the end of boot, and then drops you into a shell.
If the guest and host are the same arch, typically x86_64, you can speed up boot further with KVM:
./run --kvm
All of this put together makes the safe procedure acceptably fast for regular development as well.
It is also easy to GDB step debug kernel modules with our setup, see: Section 2.4, “GDB step debug kernel module”.
1.1.2.3. Your first QEMU hack
Not satisfied with mere software? OK then, let’s hack up the QEMU x86 CPU identification:
vim submodules/qemu/target/i386/cpu.c
and modify:
.model_id = "QEMU Virtual CPU version " QEMU_HW_VERSION,
to contain:
.model_id = "QEMU Virtual CPU version HACKED " QEMU_HW_VERSION,
then as usual rebuild and re-run:
./build-qemu
./run --eval-after 'grep "model name" /proc/cpuinfo'
and once again, there is your message: QEMU communicated it to the Linux kernel, which printed it out.
You have now gone from newb to hardware hacker in a mere 15 minutes, your rate of progress is truly astounding!!!
Seriously though, if you want to be a real hardware hacker, it just can’t be done with open source tools as of 2018. The root obstacle is that:
-
Silicon fabs don’t publish reveal their design rules
-
which implies that there are no decent standard cell libraries. See also: https://www.quora.com/Are-there-good-open-source-standard-cell-libraries-to-learn-IC-synthesis-with-EDA-tools/answer/Ciro-Santilli
-
which implies that people can’t develop open source EDA tools
-
which implies that you can’t get decent power, performance and area estimates
The only thing you can do with open source is purely functional designs with Verilator, but you will never know if it can be actually produced and how efficient it can be.
If you really want to develop semiconductors, your only choice is to join an university or a semiconductor company that has the EDA licenses.
While hacking QEMU, you will likely want to GDB step its source. That is trivial since QEMU is just another userland program like any other, but our setup has a shortcut to make it even more convenient, see: Section 17.7, “Debug the emulator”.
1.1.2.4. Your first glibc hack
We use glibc as our default libc now, and it is tracked as an unmodified submodule at submodules/glibc, at the exact same version that Buildroot has it, which can be found at: package/glibc/glibc.mk. Buildroot 2018.05 applies no patches.
Let’s hack up the puts function:
./build-buildroot -- glibc-reconfigure
with the patch:
diff --git a/libio/ioputs.c b/libio/ioputs.c
index 706b20b492..23185948f3 100644
--- a/libio/ioputs.c
+++ b/libio/ioputs.c
@@ -38,8 +38,9 @@ _IO_puts (const char *str)
   if ((_IO_vtable_offset (_IO_stdout) != 0
        || _IO_fwide (_IO_stdout, -1) == -1)
       && _IO_sputn (_IO_stdout, str, len) == len
+      && _IO_sputn (_IO_stdout, " hacked", 7) == 7
       && _IO_putc_unlocked ('\n', _IO_stdout) != EOF)
-    result = MIN (INT_MAX, len + 1);
+    result = MIN (INT_MAX, len + 1 + 7);

   _IO_release_lock (_IO_stdout);
   return result;
And then:
./run --eval-after './c/hello.out'
outputs:
hello hacked
Lol!
We can also test our hacked glibc on User mode simulation with:
./run --userland userland/c/hello.c
I just noticed that this is actually a good way to develop glibc for other archs.
In this example, we got away without recompiling the userland program because we made a change that did not affect the glibc ABI, see this answer for an introduction to ABI stability: https://stackoverflow.com/questions/2171177/what-is-an-application-binary-interface-abi/54967743#54967743
Note that for arch agnostic features that don’t rely on bleeding kernel changes that you host doesn’t yet have, you can develop glibc natively as explained at:
-
https://stackoverflow.com/questions/2856438/how-can-i-link-to-a-specific-glibc-version/52550158#52550158 more focus on symbol versioning, but no one knows how to do it, so I answered
Tested on a30ed0f047523ff2368d421ee2cce0800682c44e + 1.
1.1.2.5. Your first Binutils hack
Have you ever felt that a single inc instruction was not enough? Really? Me too!
So let’s hack the GNU GAS assembler, which is part of GNU Binutils, to add a new shiny version of inc called… myinc!
GCC uses GNU GAS as its backend, so we will test out new mnemonic with an GCC inline assembly test program: userland/arch/x86_64/binutils_hack.c, which is just a copy of userland/arch/x86_64/binutils_nohack.c but with myinc instead of inc.
The inline assembly is disabled with an #ifdef, so first modify the source to enable that.
Then, try to build userland:
./build-userland
and watch it fail with:
binutils_hack.c:8: Error: no such instruction: `myinc %rax'
Now, edit the file
vim submodules/binutils-gdb/opcodes/i386-tbl.h
and add a copy of the "inc" instruction just next to it, but with the new name "myinc":
diff --git a/opcodes/i386-tbl.h b/opcodes/i386-tbl.h
index af583ce578..3cc341f303 100644
--- a/opcodes/i386-tbl.h
+++ b/opcodes/i386-tbl.h
@@ -1502,6 +1502,19 @@ const insn_template i386_optab[] =
     { { { 1, 1, 1, 1, 0, 0, 0, 0, 0, 0, 0, 0, 0, 0, 0, 0, 0, 0, 0, 0,
 	  0, 0, 1, 1, 1, 1, 0, 0, 0, 1, 0, 0, 0, 0, 0, 0, 1, 1, 1, 0,
 	  1, 0, 0, 0, 0, 1, 0, 0, 0, 0, 0 } } } },
+  { "myinc", 1, 0xfe, 0x0, 1,
+    { { 0, 0, 0, 0, 0, 0, 0, 0, 0, 0, 0, 0, 0, 0, 0, 0, 0, 0, 0, 0,
+        0, 0, 0, 0, 0, 0, 0, 0, 0, 0, 0, 0, 0, 0, 0, 0, 0, 0, 0, 0,
+        0, 0, 0, 0, 0, 0, 0, 0, 0, 0, 0, 0, 0, 0, 0, 0, 0, 0, 0, 0,
+        0, 0, 0, 0, 0, 0, 0, 0, 0, 0, 0, 0, 0, 0, 0, 0, 0, 0, 0, 0,
+        0, 0, 0, 0, 0, 0, 0, 0, 0, 0, 0, 0, 0, 0, 0, 0 } },
+    { 0, 1, 0, 1, 0, 0, 0, 0, 0, 0, 0, 0, 0, 0, 0, 0, 0, 0, 0, 0,
+      0, 1, 0, 1, 0, 0, 0, 0, 1, 0, 0, 0, 1, 0, 0, 0, 0, 0, 0, 0,
+      0, 0, 0, 0, 0, 0, 0, 0, 0, 0, 0, 0, 0, 0, 0, 0, 0, 0, 0, 0,
+      0, 0, 0, 0, 0, 0 },
+    { { { 1, 1, 1, 1, 0, 0, 0, 0, 0, 0, 0, 0, 0, 0, 0, 0, 0, 0, 0, 0,
+	  0, 0, 1, 1, 1, 1, 0, 0, 0, 1, 0, 0, 0, 0, 0, 0, 1, 1, 1, 0,
+	  1, 0, 0, 0, 0, 1, 0, 0, 0, 0, 0 } } } },
   { "sub", 2, 0x28, None, 1,
     { { 0, 0, 0, 0, 0, 0, 0, 0, 0, 0, 0, 0, 0, 0, 0, 0, 0, 0, 0, 0,
         0, 0, 0, 0, 0, 0, 0, 0, 0, 0, 0, 0, 0, 0, 0, 0, 0, 0, 0, 0,
Finally, rebuild Binutils, userland and test our program with User mode simulation:
./build-buildroot -- host-binutils-rebuild
./build-userland --static
./run --static --userland userland/arch/x86_64/binutils_hack.c
and we se that myinc worked since the assert did not fail!
Tested on b60784d59bee993bf0de5cde6c6380dd69420dda + 1.
1.1.2.6. Your first GCC hack
OK, now time to hack GCC.
For convenience, let’s use the User mode simulation.
If we run the program userland/c/gcc_hack.c:
./build-userland --static
./run --static --userland userland/c/gcc_hack.c
it produces the normal boring output:
i = 2
j = 0
So how about we swap ++ and -- to make things more fun?
Open the file:
vim submodules/gcc/gcc/c/c-parser.c
and find the function c_parser_postfix_expression_after_primary.
In that function, swap case CPP_PLUS_PLUS and case CPP_MINUS_MINUS:
diff --git a/gcc/c/c-parser.c b/gcc/c/c-parser.c
index 101afb8e35f..89535d1759a 100644
--- a/gcc/c/c-parser.c
+++ b/gcc/c/c-parser.c
@@ -8529,7 +8529,7 @@ c_parser_postfix_expression_after_primary (c_parser *parser,
 		expr.original_type = DECL_BIT_FIELD_TYPE (field);
 	    }
 	  break;
-	case CPP_PLUS_PLUS:
+	case CPP_MINUS_MINUS:
 	  /* Postincrement.  */
 	  start = expr.get_start ();
 	  finish = c_parser_peek_token (parser)->get_finish ();
@@ -8548,7 +8548,7 @@ c_parser_postfix_expression_after_primary (c_parser *parser,
 	  expr.original_code = ERROR_MARK;
 	  expr.original_type = NULL;
 	  break;
-	case CPP_MINUS_MINUS:
+	case CPP_PLUS_PLUS:
 	  /* Postdecrement.  */
 	  start = expr.get_start ();
 	  finish = c_parser_peek_token (parser)->get_finish ();
Now rebuild GCC, the program and re-run it:
./build-buildroot -- host-gcc-final-rebuild
./build-userland --static
./run --static --userland userland/c/gcc_hack.c
and the new ouptut is now:
i = 2
j = 0
We need to use the ugly -final thing because GCC has to packages in Buildroot, -initial and -final: https://stackoverflow.com/questions/54992977/how-to-select-an-override-srcdir-source-for-gcc-when-building-buildroot No one is able to example precisely with a minimal example why this is required:
1.1.3. About the QEMU Buildroot setup
This is our reference setup, and the best supported one, use it unless you have good reason not to.
It was historically the first one we did, and all sections have been tested with this setup unless explicitly noted.
Read the following sections for further introductory material:
1.2. gem5 Buildroot setup
1.2.1. About the gem5 Buildroot setup
This setup is like the QEMU Buildroot setup, but it uses gem5 instead of QEMU as a system simulator.
QEMU tries to run as fast as possible and give correct results at the end, but it does not tell us how many CPU cycles it takes to do something, just the number of instructions it ran. This kind of simulation is known as functional simulation.
The number of instructions executed is a very poor estimator of performance because in modern computers, a lot of time is spent waiting for memory requests rather than the instructions themselves.
gem5 on the other hand, can simulate the system in more detail than QEMU, including:
-
simplified CPU pipeline
-
caches
-
DRAM timing
and can therefore be used to estimate system performance, see: Section 18.2, “gem5 run benchmark” for an example.
The downside of gem5 much slower than QEMU because of the greater simulation detail.
See gem5 vs QEMU for a more thorough comparison.
1.2.2. gem5 Buildroot setup getting started
For the most part, if you just add the --emulator gem5 option or *-gem5 suffix to all commands and everything should magically work.
If you haven’t built Buildroot yet for QEMU Buildroot setup, you can build from the beginning with:
./build --download-dependencies gem5-buildroot
./run --emulator gem5
If you have already built previously, don’t be afraid: gem5 and QEMU use almost the same root filesystem and kernel, so ./build will be fast.
Remember that the gem5 boot is considerably slower than QEMU since the simulation is more detailed.
To get a terminal, either open a new shell and run:
./gem5-shell
You can quit the shell without killing gem5 by typing tilde followed by a period:
~.
If you are inside tmux, which I highly recommend, you can both run gem5 stdout and open the guest terminal on a split window with:
./run --emulator gem5 --tmux
See also: Section 2.3.1, “tmux gem5”.
At the end of boot, it might not be very clear that you have the shell since some printk messages may appear in front of the prompt like this:
# <6>[    1.215329] clocksource: tsc: mask: 0xffffffffffffffff max_cycles: 0x1cd486fa865, max_idle_ns: 440795259574 ns
<6>[    1.215351] clocksource: Switched to clocksource tsc
but if you look closely, the PS1 prompt marker # is there already, just hit enter and a clear prompt line will appear.
If you forgot to open the shell and gem5 exit, you can inspect the terminal output post-mortem at:
less "$(./getvar --emulator gem5 m5out_dir)/system.pc.com_1.device"
More gem5 information is present at: Section 18, “gem5”
Good next steps are:
1.3. Docker host setup
This repository has been tested inside clean Docker containers.
This is a good option if you are on a Linux host, but the native setup failed due to your weird host distribution, and you have better things to do with your life than to debug it. See also: Section 29.1, “Supported hosts”.
For example, to do a QEMU Buildroot setup inside Docker, run:
sudo apt-get install docker
./run-docker create && \
./run-docker sh -- ./build --download-dependencies qemu-buildroot
./run-docker sh
You are now left inside a shell in the Docker! From there, just run as usual:
./run
The host git top level directory is mounted inside the guest with a Docker volume, which means for example that you can use your host’s GUI text editor directly on the files. Just don’t forget that if you nuke that directory on the guest, then it gets nuked on the host as well!
Command breakdown:
-
./run-docker create: create the image and container.Needed only the very first time you use Docker, or if you run
./run-docker DESTROYto restart for scratch, or save some disk space.The image and container name is
lkmc. The container shows under:docker ps -a
and the image shows under:
docker images
-
./run-docker sh: open a shell on the container.If it has not been started previously, start it. This can also be done explicitly with:
./run-docker start
Quit the shell as usual with
Ctrl-DThis can be called multiple times from different host terminals to open multiple shells.
-
./run-docker stop: stop the container.This might save a bit of CPU and RAM once you stop working on this project, but it should not be a lot.
-
./run-docker DESTROY: delete the container and image.This doesn’t really clean the build, since we mount the guest’s working directory on the host git top-level, so you basically just got rid of the
apt-getinstalls.To actually delete the Docker build, run on host:
# sudo rm -rf out.docker
To use GDB step debug from inside Docker, you need a second shell inside the container. You can either do that from another shell with:
./run-docker sh
or even better, by starting a tmux session inside the container. We install tmux by default in the container.
You can also start a second shell and run a command in it at the same time with:
./run-docker sh -- ./run-gdb start_kernel
To use QEMU graphic mode from Docker, run:
./run --graphic --vnc
and then on host:
sudo apt-get install vinagre
./vnc
TODO make files created inside Docker be owned by the current user in host instead of root:
1.4. Prebuilt setup
1.4.1. About the prebuilt setup
This setup uses prebuilt binaries that we upload to GitHub from time to time.
We don’t currently provide a full prebuilt because it would be too big to host freely, notably because of the cross toolchain.
Our prebuilts currently include:
-
QEMU Buildroot setup binaries
-
Linux kernel
-
root filesystem
-
-
Baremetal setup binaries for QEMU
For more details, see our our release procedure.
Advantage of this setup: saves time and disk space on the initial install, which is expensive in largely due to building the toolchain.
The limitations are severe however:
-
can’t GDB step debug the kernel, since the source and cross toolchain with GDB are not available. Buildroot cannot easily use a host toolchain: Section 28.2.2.1.1, “Buildroot use prebuilt host toolchain”.
Maybe we could work around this by just downloading the kernel source somehow, and using a host prebuilt GDB, but we felt that it would be too messy and unreliable.
-
you won’t get the latest version of this repository. Our Travis attempt to automate builds failed, and storing a release for every commit would likely make GitHub mad at us anyways.
-
gem5 is not currently supported. The major blocking point is how to avoid distributing the kernel images twice: once for gem5 which uses
vmlinux, and once for QEMU which usesarch/*images, see also:
This setup might be good enough for those developing simulators, as that requires less image modification. But once again, if you are serious about this, why not just let your computer build the full featured setup while you take a coffee or a nap? :-)
1.4.2. Prebuilt setup getting started
Checkout to the latest tag and use the Ubuntu packaged QEMU to boot Linux:
sudo apt-get install qemu-system-x86
git clone https://github.com/cirosantilli/linux-kernel-module-cheat
cd linux-kernel-module-cheat
git checkout "$(git rev-list --tags --max-count=1)"
./release-download-latest
unzip lkmc-*.zip
./run --qemu-which host
You have to checkout to the latest tag to ensure that the scripts match the release format: https://stackoverflow.com/questions/1404796/how-to-get-the-latest-tag-name-in-current-branch-in-git
This is known not to work for aarch64 on an Ubuntu 16.04 host with QEMU 2.5.0, presumably because QEMU is too old, the terminal does not show any output. I haven’t investigated why.
Or to run a baremetal example instead:
./run \
  --arch aarch64 \
  --baremetal userland/c/hello.c \
  --qemu-which host \
;
Be saner and use our custom built QEMU instead:
./build --download-dependencies qemu
./run
This also allows you to modify QEMU if you’re into that sort of thing.
To build the kernel modules as in Your first kernel module hack do:
git submodule update --depth 1 --init --recursive "$(./getvar linux_source_dir)"
./build-linux --no-modules-install -- modules_prepare
./build-modules --gcc-which host
./run
TODO: for now the only way to test those modules out without building Buildroot is with 9p, since we currently rely on Buildroot to manipulate the root filesystem.
Command explanation:
-
modules_preparedoes the minimal build procedure required on the kernel for us to be able to compile the kernel modules, and is way faster than doing a full kernel build. A full kernel build would also work however. -
--gcc-which hostselects your host Ubuntu packaged GCC, since you don’t have the Buildroot toolchain -
--no-modules-installis required otherwise themake modules_installtarget we run by default fails, since the kernel wasn’t built
To modify the Linux kernel, build and use it as usual:
git submodule update --depth 1 --init --recursive "$(./getvar linux_source_dir)"
./build-linux
./run
1.5. Host kernel module setup
THIS IS DANGEROUS (AND FUN), YOU HAVE BEEN WARNED
This method runs the kernel modules directly on your host computer without a VM, and saves you the compilation time and disk usage of the virtual machine method.
It has however severe limitations:
-
can’t control which kernel version and build options to use. So some of the modules will likely not compile because of kernel API changes, since the Linux kernel does not have a stable kernel module API.
-
bugs can easily break you system. E.g.:
-
segfaults can trivially lead to a kernel crash, and require a reboot
-
your disk could get erased. Yes, this can also happen with
sudofrom userland. But you should not usesudowhen developing newbie programs. And for the kernel you don’t have the choice not to usesudo. -
even more subtle system corruption such as not being able to rmmod
-
-
can’t control which hardware is used, notably the CPU architecture
-
can’t step debug it with GDB easily. The alternatives are JTAG or KGDB, but those are less reliable, and require extra hardware.
Still interested?
./build-modules --gcc-which host --host
Compilation will likely fail for some modules because of kernel or toolchain differences that we can’t control on the host.
The best workaround is to compile just your modules with:
./build-modules --gcc-which host --host -- hello hello2
which is equivalent to:
./build-modules \
  --gcc-which host \
  --host \
  -- \
  kernel_modules/hello.c \
  kernel_modules/hello2.c \
;
Or just remove the .c extension from the failing files and try again:
cd "$(./getvar kernel_modules_source_dir)"
mv broken.c broken.c~
Once you manage to compile, and have come to terms with the fact that this may blow up your host, try it out with:
cd "$(./getvar kernel_modules_build_host_subdir)"
sudo insmod hello.ko

# Our module is there.
sudo lsmod | grep hello

# Last message should be: hello init
dmesg -T

sudo rmmod hello

# Last message should be: hello exit
dmesg -T

# Not present anymore
sudo lsmod | grep hello
1.5.1. Hello host
Minimal host build system example:
cd hello_host_kernel_module
make
sudo insmod hello.ko
dmesg
sudo rmmod hello.ko
dmesg
1.6. Userland setup
1.6.1. About the userland setup
In order to test the kernel and emulators, userland content in the form of executables and scripts is of course required, and we store it mostly under:
When we started this repository, it only contained content that interacted very closely with the kernel, or that had required performance analysis.
However, we soon started to notice that this had an increasing overlap with other userland test repositories: we were duplicating build and test infrastructure and even some examples.
Therefore, we decided to consolidate other userland tutorials that we had scattered around into this repository.
Notable userland content included / moving into this repository includes:
-
https://github.com/cirosantilli/algorithm-cheat TODO will be good to move here for performance analysis with gem5
1.6.2. Userland setup getting started
There are several ways to run our Userland content, notably:
-
natively on the host as shown at: Section 1.6.2.1, “Userland setup getting started natively”
Can only run examples compatible with your host CPU architecture and OS, but has the fastest setup and runtimes.
-
from user mode simulation with:
-
the host prebuilt toolchain: Section 1.6.2.2, “Userland setup getting started with prebuilt toolchain and QEMU user mode”
-
the Buildroot toolchain you built yourself: Section 10.1, “QEMU user mode getting started”
This setup:
-
can run most examples, including those for other CPU architectures, with the notable exception of examples that rely on kernel modules
-
can run reproducible approximate performance experiments with gem5, see e.g. BST vs heap vs hashmap
-
-
from full system simulation as shown at: Section 1.1.1, “QEMU Buildroot setup getting started”.
This is the most reproducible and controlled environment, and all examples work there. But also the slower one to setup.
1.6.2.1. Userland setup getting started natively
With this setup, we will use the host toolchain and execute executables directly on the host.
No toolchain build is required, so you can just download your distro toolchain and jump straight into it.
Build, run and example, and clean it in-tree with:
sudo apt-get install gcc
cd userland
./build c/hello
./c/hello.out
./build --clean
Source: userland/c/hello.c.
Build an entire directory and test it:
cd userland
./build c
./test c
Build the current directory and test it:
cd userland/c
./build
./test
As mentioned at User mode tests, tests under userland/libs require certain optional libraries to be installed, and are not built or tested by default.
You can install those libraries with:
cd linux-kernel-module-cheat
./build --download-dependencies userland-host
and then build the examples and test with:
./build --package-all
./test --package-all
Pass custom compiler options:
./build --ccflags='-foptimize-sibling-calls -foptimize-strlen' --force-rebuild
Here we used --force-rebuild to force rebuild since the sources weren’t modified since the last build.
Some CLI options have more specialized flags, e.g. -O optimization level:
./build --optimization-level 3 --force-rebuild
See also User mode static executables for --static.
The build scripts inside userland/ are just symlinks to build-userland-in-tree which you can also use from toplevel as:
./build-userland-in-tree
./build-userland-in-tree userland/c
./build-userland-in-tree userland/c/hello.c
build-userland-in-tre is in turn just a thin wrapper around build-userland:
./build-userland --gcc-which host --in-tree userland/c
So you can use any option supported by build-userland script freely with build-userland-in-tree and build.
The situation is analogous for userland/test, test-executables-in-tree and test-executables, which are further documented at: Section 10.2, “User mode tests”.
Do a more clean out-of-tree build instead and run the program:
./build-userland --gcc-which host --userland-build-id host
./run --emulator native --userland userland/c/hello.c --userland-build-id host
Here we:
-
put the host executables in a separate build-variant to avoid conflict with Buildroot builds.
-
ran with the
--emulator nativeoption to run the program natively
In this case you can debub the program with:
./run --debug-vm --emulator native --userland userland/c/hello.c --userland-build-id host
as shown at: Section 17.7, “Debug the emulator”, although direct GDB host usage works as well of course.
1.6.2.2. Userland setup getting started with prebuilt toolchain and QEMU user mode
If you are lazy to built the Buildroot toolchain and QEMU, but want to run e.g. ARM Userland assembly in User mode simulation, you can get away on Ubuntu 18.04 with just:
sudo apt-get install gcc-aarch64-linux-gnu qemu-system-aarch64
./build-userland \
  --arch aarch64 \
  --gcc-which host \
  --userland-build-id host \
;
./run \
  --arch aarch64 \
  --qemu-which host \
  --userland-build-id host \
  --userland userland/c/print_argv.c \
  --userland-args 'asdf "qw er"' \
;
where:
-
--gcc-which host: use the host toolchain.We must pass this to
./runas well because QEMU must know which dynamic libraries to use. See also: Section 10.5, “User mode static executables”. -
--userland-build-id host: put the host built into a Build variants
This present the usual trade-offs of using prebuilts as mentioned at: Section 1.4, “Prebuilt setup”.
Other functionality are analogous, e.g. testing:
./test-executables \
  --arch aarch64 \
  --gcc-which host \
  --qemu-which host \
  --userland-build-id host \
;
and User mode GDB:
./run \
  --arch aarch64 \
  --gdb \
  --gcc-which host \
  --qemu-which host \
  --userland-build-id host \
  --userland userland/c/print_argv.c \
  --userland-args 'asdf "qw er"' \
;
1.6.2.3. Userland setup getting started full system
First ensure that QEMU Buildroot setup is working.
After doing that setup, you can already execute your userland programs from inside QEMU: the only missing step is how to rebuild executables and run them.
And the answer is exactly analogous to what is shown at: Section 1.1.2.2, “Your first kernel module hack”
For example, if we modify userland/c/hello.c to print out something different, we can just rebuild it with:
./build-userland
Source: build-userland. ./build calls that script automatically for us when doing the initial full build.
Now, run the program either without rebooting use the 9P mount:
/mnt/9p/out_rootfs_overlay/c/hello.out
or shutdown QEMU, add the executable to the root filesystem:
./build-buildroot
reboot and use the root filesystem as usual:
./hello.out
1.7. Baremetal setup
1.7.1. About the baremetal setup
This setup does not use the Linux kernel nor Buildroot at all: it just runs your very own minimal OS.
x86_64 is not currently supported, only arm and aarch64: I had made some x86 bare metal examples at: https://github.com/cirosantilli/x86-bare-metal-examples but I’m lazy to port them here now. Pull requests are welcome.
The main reason this setup is included in this project, despite the word "Linux" being on the project name, is that a lot of the emulator boilerplate can be reused for both use cases.
This setup allows you to make a tiny OS and that runs just a few instructions, use it to fully control the CPU to better understand the simulators for example, or develop your own OS if you are into that.
You can also use C and a subset of the C standard library because we enable Newlib by default. See also: https://electronics.stackexchange.com/questions/223929/c-standard-libraries-on-bare-metal/400077#400077
Our C bare-metal compiler is built with crosstool-NG. If you have already built Buildroot previously, you will end up with two GCCs installed. Unfortunately I don’t see a solution for this, since we need separate toolchains for Newlib on baremetal and glibc on Linux: https://stackoverflow.com/questions/38956680/difference-between-arm-none-eabi-and-arm-linux-gnueabi/38989869#38989869
1.7.2. Baremetal setup getting started
Every .c file inside baremetal/ and .S file inside baremetal/arch/<arch>/ generates a separate baremetal image.
For example, to run baremetal/arch/aarch64/dump_regs.c in QEMU do:
./build --arch aarch64 --download-dependencies qemu-baremetal
./run --arch aarch64 --baremetal baremetal/arch/aarch64/dump_regs.c
And the terminal prints the values of certain system registers. This example prints registers that are only accessible from EL1 or higher, and thus could not be run in userland.
In addition to the examples under baremetal/, several of the userland examples can also be run in baremetal! This is largely due to the awesomeness of Newlib.
The examples that work include most C examples that don’t rely on complicated syscalls such as threads, and almost all the Userland assembly examples.
The exact list of userland programs that work in baremetal is specified in path_properties with the baremetal property, but you can also easily find it out with a baremetal test dry run:
./test-executables --arch aarch64 --dry-run --mode baremetal
For example, we can run the C hello world userland/c/hello.c simply as:
./run --arch aarch64 --baremetal userland/c/hello.c
and that outputs to the serial port the string:
hello
which QEMU shows on the host terminal.
To modify a baremetal program, simply edit the file, e.g.
vim userland/c/hello.c
and rebuild:
./build-baremetal --arch aarch64
./run --arch aarch64 --baremetal userland/c/hello.c
./build qemu-baremetal that we run previously is only needed for the initial build. That script calls build-baremetal for us, in addition to building prerequisites such as QEMU and crosstool-NG.
./build-baremetal uses crosstool-NG, and so it must be preceded by build-crosstool-ng, which ./build qemu-baremetal also calls.
Now let’s run userland/arch/aarch64/add.S:
./run --arch aarch64 --baremetal userland/arch/aarch64/add.S
This time, the terminal does not print anything, which indicates success: if you look into the source, you will see that we just have an assertion there.
You can see a sample assertion fail in userland/c/assert_fail.c:
./run --arch aarch64 --baremetal userland/c/assert_fail.c
and the terminal contains:
lkmc_exit_status_134
error: simulation error detected by parsing logs
and the exit status of our script is 1:
echo $?
You can run all the baremetal examples in one go and check that all assertions passed with:
./test-executables --arch aarch64 --mode baremetal
To use gem5 instead of QEMU do:
./build --download-dependencies gem5-baremetal
./run --arch aarch64 --baremetal userland/c/hello.c --emulator gem5
and then as usual open a shell with:
./gem5-shell
Or as usual, tmux users can do both in one go with:
./run --arch aarch64 --baremetal userland/c/hello.c --emulator gem5 --tmux
TODO: the carriage returns are a bit different than in QEMU, see: Section 26.4, “gem5 baremetal carriage return”.
Note that ./build-baremetal requires the --emulator gem5 option, and generates separate executable images for both, as can be seen from:
echo "$(./getvar --arch aarch64 --baremetal userland/c/hello.c --emulator qemu image)"
echo "$(./getvar --arch aarch64 --baremetal userland/c/hello.c --emulator gem5 image)"
This is unlike the Linux kernel that has a single image for both QEMU and gem5:
echo "$(./getvar --arch aarch64 --emulator qemu image)"
echo "$(./getvar --arch aarch64 --emulator gem5 image)"
The reason for that is that on baremetal we don’t parse the device tress from memory like the Linux kernel does, which tells the kernel for example the UART address, and many other system parameters.
gem5 also supports the RealViewPBX machine, which represents an older hardware compared to the default VExpress_GEM5_V1:
./build-baremetal --arch aarch64 --emulator gem5 --machine RealViewPBX
./run --arch aarch64 --baremetal userland/c/hello.c --emulator gem5 --machine RealViewPBX
This generates yet new separate images with new magic constants:
echo "$(./getvar --arch aarch64 --baremetal userland/c/hello.c --emulator gem5 --machine VExpress_GEM5_V1 image)"
echo "$(./getvar --arch aarch64 --baremetal userland/c/hello.c --emulator gem5 --machine RealViewPBX      image)"
But just stick to newer and better VExpress_GEM5_V1 unless you have a good reason to use RealViewPBX.
When doing baremetal programming, it is likely that you will want to learn userland assembly first, see: Section 21, “Userland assembly”.
For more information on baremetal, see the section: Section 26, “Baremetal”.
The following subjects are particularly important:
1.8. Build the documentation
You don’t need to depend on GitHub.
For a quick and dirty build, install Asciidoctor however you like and build:
asciidotor README.adoc
xdg-open README.html
For development, you will want to do a more controlled build with extra error checking as follows.
For the initial build do:
./build --download-dependencies docs
which also downloads build dependencies.
Then the following times just to the faster:
./build-doc
Source: build-doc
The HTML output is located at:
xdg-open out/README.html
More information about our documentation internals can be found at: Section 29.5, “Documentation”
2. GDB step debug
2.1. GDB step debug kernel boot
--gdb-wait makes QEMU and gem5 wait for a GDB connection, otherwise we could accidentally go past the point we want to break at:
./run --gdb-wait
Say you want to break at start_kernel. So on another shell:
./run-gdb start_kernel
or at a given line:
./run-gdb init/main.c:1088
Now QEMU will stop there, and you can use the normal GDB commands:
list
next
continue
See also:
2.1.1. GDB step debug kernel boot other archs
Just don’t forget to pass --arch to ./run-gdb, e.g.:
./run --arch aarch64 --gdb-wait
and:
./run-gdb --arch aarch64 start_kernel
2.1.2. Disable kernel compiler optimizations
O=0 is an impossible dream, O=2 being the default.
So get ready for some weird jumps, and <value optimized out> fun. Why, Linux, why.
2.2. GDB step debug kernel post-boot
Let’s observe the kernel write system call as it reacts to some userland actions.
Start QEMU with just:
./run
and after boot inside a shell run:
./count.sh
which counts to infinity to stdout. Source: rootfs_overlay/lkmc/count.sh.
Then in another shell, run:
./run-gdb
and then hit:
Ctrl-C
break __x64_sys_write
continue
continue
continue
And you now control the counting on the first shell from GDB!
Before v4.17, the symbol name was just sys_write, the change happened at d5a00528b58cdb2c71206e18bd021e34c4eab878. As of Linux v 4.19, the function is called sys_write in arm, and __arm64_sys_write in aarch64. One good way to find it if the name changes again is to try:
rbreak .*sys_write
or just have a quick look at the sources!
When you hit Ctrl-C, if we happen to be inside kernel code at that point, which is very likely if there are no heavy background tasks waiting, and we are just waiting on a sleep type system call of the command prompt, we can already see the source for the random place inside the kernel where we stopped.
2.3. tmux
tmux just makes things even more fun by allowing us to see both the terminal for:
-
emulator stdout
at once without dragging windows around!
First start tmux with:
tmux
Now that you are inside a shell inside tmux, you can start GDB simply with:
./run --gdb
which is just a convenient shortcut for:
./run --gdb-wait --tmux --tmux-args start_kernel
This splits the terminal into two panes:
-
left: usual QEMU with terminal
-
right: GDB
and focuses on the GDB pane.
Now you can navigate with the usual tmux shortcuts:
-
switch between the two panes with:
Ctrl-B O -
close either pane by killing its terminal with
Ctrl-Das usual
See the tmux manual for further details:
man tmux
To start again, switch back to the QEMU pane with Ctrl-O, kill the emulator, and re-run:
./run --gdb
This automatically clears the GDB pane, and starts a new one.
The option --tmux-args determines which options will be passed to the program running on the second tmux pane, and is equivalent to:
This is equivalent to:
./run --gdb-wait
./run-gdb start_kernel
Due to Python’s CLI parsing quicks, if the run-gdb arguments start with a dash -, you have to use the = sign, e.g. to GDB step debug early boot:
./run --gdb --tmux-args=--no-continue
2.3.1. tmux gem5
If you are using gem5 instead of QEMU, --tmux has a different effect by default: it opens the gem5 terminal instead of the debugger:
./run --emulator gem5 --tmux
To open a new pane with GDB instead of the terminal, use:
./run --gdb
which is equivalent to:
./run --emulator gem5 --gdb-wait --tmux --tmux-args start_kernel --tmux-program gdb
--tmux-program implies --tmux, so we can just write:
./run --emulator gem5 --gdb-wait --tmux-program gdb
If you also want to see both GDB and the terminal with gem5, then you will need to open a separate shell manually as usual with ./gem5-shell.
From inside tmux, you can create new terminals on a new window with Ctrl-B C split a pane yet again vertically with Ctrl-B % or horizontally with Ctrl-B ".
2.4. GDB step debug kernel module
Loadable kernel modules are a bit trickier since the kernel can place them at different memory locations depending on load order.
So we cannot set the breakpoints before insmod.
However, the Linux kernel GDB scripts offer the lx-symbols command, which takes care of that beautifully for us.
Shell 1:
./run
Wait for the boot to end and run:
insmod timer.ko
Source: kernel_modules/timer.c.
This prints a message to dmesg every second.
Shell 2:
./run-gdb
In GDB, hit Ctrl-C, and note how it says:
scanning for modules in /root/linux-kernel-module-cheat/out/kernel_modules/x86_64/kernel_modules
loading @0xffffffffc0000000: /root/linux-kernel-module-cheat/out/kernel_modules/x86_64/kernel_modules/timer.ko
That’s lx-symbols working! Now simply:
break lkmc_timer_callback
continue
continue
continue
and we now control the callback from GDB!
Just don’t forget to remove your breakpoints after rmmod, or they will point to stale memory locations.
TODO: why does break work_func for insmod kthread.ko not very well? Sometimes it breaks but not others.
2.4.1. GDB step debug kernel module insmodded by init on ARM
TODO on arm 51e31cdc2933a774c2a0dc62664ad8acec1d2dbe it does not always work, and lx-symbols fails with the message:
loading vmlinux
Traceback (most recent call last):
  File "/linux-kernel-module-cheat//out/arm/buildroot/build/linux-custom/scripts/gdb/linux/symbols.py", line 163, in invoke
    self.load_all_symbols()
  File "/linux-kernel-module-cheat//out/arm/buildroot/build/linux-custom/scripts/gdb/linux/symbols.py", line 150, in load_all_symbols
    [self.load_module_symbols(module) for module in module_list]
  File "/linux-kernel-module-cheat//out/arm/buildroot/build/linux-custom/scripts/gdb/linux/symbols.py", line 110, in load_module_symbols
    module_name = module['name'].string()
gdb.MemoryError: Cannot access memory at address 0xbf0000cc
Error occurred in Python command: Cannot access memory at address 0xbf0000cc
Can’t reproduce on x86_64 and aarch64 are fine.
It is kind of random: if you just insmod manually and then immediately ./run-gdb --arch arm, then it usually works.
But this fails most of the time: shell 1:
./run --arch arm --eval-after 'insmod hello.ko'
shell 2:
./run-gdb --arch arm
then hit Ctrl-C on shell 2, and voila.
Then:
cat /proc/modules
says that the load address is:
0xbf000000
so it is close to the failing 0xbf0000cc.
readelf:
./run-toolchain readelf -- -s "$(./getvar kernel_modules_build_subdir)/hello.ko"
does not give any interesting hits at cc, no symbol was placed that far.
2.4.2. GDB module_init
TODO find a more convenient method. We have working methods, but they are not ideal.
This is not very easy, since by the time the module finishes loading, and lx-symbols can work properly, module_init has already finished running!
Possibly asked at:
2.4.2.1. GDB module_init step into it
This is the best method we’ve found so far.
The kernel calls module_init synchronously, therefore it is not hard to step into that call.
As of 4.16, the call happens in do_one_initcall, so we can do in shell 1:
./run
shell 2 after boot finishes (because there are other calls to do_init_module at boot, presumably for the built-in modules):
./run-gdb do_one_initcall
then step until the line:
833 ret = fn();
which does the actual call, and then step into it.
For the next time, you can also put a breakpoint there directly:
./run-gdb init/main.c:833
How we found this out: first we got GDB module_init calculate entry address working, and then we did a bt. AKA cheating :-)
2.4.2.2. GDB module_init calculate entry address
This works, but is a bit annoying.
The key observation is that the load address of kernel modules is deterministic: there is a pre allocated memory region https://www.kernel.org/doc/Documentation/x86/x86_64/mm.txt "module mapping space" filled from bottom up.
So once we find the address the first time, we can just reuse it afterwards, as long as we don’t modify the module.
Do a fresh boot and get the module:
./run --eval-after './pr_debug.sh;insmod fops.ko;./linux/poweroff.out'
The boot must be fresh, because the load address changes every time we insert, even after removing previous modules.
The base address shows on terminal:
0xffffffffc0000000 .text
Now let’s find the offset of myinit:
./run-toolchain readelf -- \
  -s "$(./getvar kernel_modules_build_subdir)/fops.ko" | \
  grep myinit
which gives:
30: 0000000000000240 43 FUNC LOCAL DEFAULT 2 myinit
so the offset address is 0x240 and we deduce that the function will be placed at:
0xffffffffc0000000 + 0x240 = 0xffffffffc0000240
Now we can just do a fresh boot on shell 1:
./run --eval 'insmod fops.ko;./linux/poweroff.out' --gdb-wait
and on shell 2:
./run-gdb '*0xffffffffc0000240'
GDB then breaks, and lx-symbols works.
2.4.2.3. GDB module_init break at the end of sys_init_module
TODO not working. This could be potentially very convenient.
The idea here is to break at a point late enough inside sys_init_module, at which point lx-symbols can be called and do its magic.
Beware that there are both sys_init_module and sys_finit_module syscalls, and insmod uses fmodule_init by default.
Both call do_module_init however, which is what lx-symbols hooks to.
If we try:
b sys_finit_module
then hitting:
n
does not break, and insertion happens, likely because of optimizations? Disable kernel compiler optimizations
Then we try:
b do_init_module
A naive:
fin
also fails to break!
Finally, in despair we notice that pr_debug prints the kernel load address as explained at Bypass lx-symbols.
So, if we set a breakpoint just after that message is printed by searching where that happens on the Linux source code, we must be able to get the correct load address before init_module happens.
2.4.2.4. GDB module_init add trap instruction
This is another possibility: we could modify the module source by adding a trap instruction of some kind.
This appears to be described at: https://www.linuxjournal.com/article/4525
But it refers to a gdbstart script which is not in the tree anymore and beyond my git log capabilities.
And just adding:
asm( " int $3");
directly gives an oops as I’d expect.
2.4.3. Bypass lx-symbols
Useless, but a good way to show how hardcore you are. Disable lx-symbols with:
./run-gdb --no-lxsymbols
From inside guest:
insmod timer.ko
cat /proc/modules
as mentioned at:
This will give a line of form:
fops 2327 0 - Live 0xfffffffa00000000
And then tell GDB where the module was loaded with:
Ctrl-C
add-symbol-file ../../../rootfs_overlay/x86_64/timer.ko 0xffffffffc0000000
0xffffffffc0000000
Alternatively, if the module panics before you can read /proc/modules, there is a pr_debug which shows the load address:
echo 8 > /proc/sys/kernel/printk
echo 'file kernel/module.c +p' > /sys/kernel/debug/dynamic_debug/control
./linux/myinsmod.out hello.ko
And then search for a line of type:
[ 84.877482] 0xfffffffa00000000 .text
Tested on 4f4749148273c282e80b58c59db1b47049e190bf + 1.
2.5. GDB step debug early boot
TODO successfully debug the very first instruction that the Linux kernel runs, before start_kernel!
Break at the very first instruction executed by QEMU:
./run-gdb --no-continue
TODO why can’t we break at early startup stuff such as:
./run-gdb extract_kernel
./run-gdb main
Maybe it is because they are being copied around at specific locations instead of being run directly from inside the main image, which is where the debug information points to?
gem5 tracing with --debug-flags=Exec does show the right symbols however! So in the worst case, we can just read their source. Amazing.
v4.19 also added a CONFIG_HAVE_KERNEL_UNCOMPRESSED=y option for having the kernel uncompressed which could make following the startup easier, but it is only available on s390. aarch64 however is already uncompressed by default, so might be the easiest one. See also: Section 15.21.1, “vmlinux vs bzImage vs zImage vs Image”.
2.5.1. GDB step debug early boot by address
One possibility is to run:
./trace-boot --arch arm
and then find the second address (the first one does not work, already too late maybe):
less "$(./getvar --arch arm trace_txt_file)"
and break there:
./run --arch arm --gdb-wait
./run-gdb --arch arm '*0x1000'
but TODO: it does not show the source assembly under arch/arm: https://stackoverflow.com/questions/11423784/qemu-arm-linux-kernel-boot-debug-no-source-code
I also tried to hack run-gdb with:
@@ -81,7 +81,7 @@ else
 ${gdb} \
 -q \\
 -ex 'add-auto-load-safe-path $(pwd)' \\
--ex 'file vmlinux' \\
+-ex 'file arch/arm/boot/compressed/vmlinux' \\
 -ex 'target remote localhost:${port}' \\
 ${brk} \
 -ex 'continue' \\
and no I do have the symbols from arch/arm/boot/compressed/vmlinux', but the breaks still don’t work.
2.6. GDB step debug userland processes
QEMU’s -gdb GDB breakpoints are set on virtual addresses, so you can in theory debug userland processes as well.
You will generally want to use gdbserver for this as it is more reliable, but this method can overcome the following limitations of gdbserver:
-
the emulator does not support host to guest networking. This seems to be the case for gem5 as explained at: Section 14.3.1.3, “gem5 host to guest networking”
-
cannot see the start of the
initprocess easily -
gdbserveralters the working of the kernel, and makes your run less representative
Known limitations of direct userland debugging:
-
the kernel might switch context to another process or to the kernel itself e.g. on a system call, and then TODO confirm the PIC would go to weird places and source code would be missing.
Solutions to this are being researched at: Section 2.10.1, “lx-ps”.
-
TODO step into shared libraries. If I attempt to load them explicitly:
(gdb) sharedlibrary ../../staging/lib/libc.so.0
No loaded shared libraries match the pattern `../../staging/lib/libc.so.0'.
since GDB does not know that libc is loaded.
2.6.1. GDB step debug userland custom init
This is the userland debug setup most likely to work, since at init time there is only one userland executable running.
For executables from the userland/ directory such as userland/posix/count.c:
-
Shell 1:
./run --gdb-wait --kernel-cli 'init=/lkmc/posix/count.out'
-
Shell 2:
./run-gdb --userland userland/posix/count.c main
Alternatively, we could also pass the full path to the executable:
./run-gdb --userland "$(./getvar userland_build_dir)/posix/count.out" main
Path resolution is analogous to that of
./run --baremetal.
Then, as soon as boot ends, we are left inside a debug session that looks just like what gdbserver would produce.
2.6.2. GDB step debug userland BusyBox init
BusyBox custom init process:
-
Shell 1:
./run --gdb-wait --kernel-cli 'init=/bin/ls'
-
Shell 2:
./run-gdb --userland "$(./getvar buildroot_build_build_dir)"/busybox-*/busybox ls_main
This follows BusyBox' convention of calling the main for each executable as <exec>_main since the busybox executable has many "mains".
BusyBox default init process:
-
Shell 1:
./run --gdb-wait
-
Shell 2:
./run-gdb --userland "$(./getvar buildroot_build_build_dir)"/busybox-*/busybox init_main
init cannot be debugged with gdbserver without modifying the source, or else /sbin/init exits early with:
"must be run as PID 1"
2.6.3. GDB step debug userland non-init
Non-init process:
-
Shell 1:
./run --gdb-wait
-
Shell 2:
./run-gdb --userland userland/linux/rand_check.c main
-
Shell 1 after the boot finishes:
./linux/rand_check.out
This is the least reliable setup as there might be other processes that use the given virtual address.
2.6.3.1. GDB step debug userland non-init without --gdb-wait
TODO: if I try GDB step debug userland non-init without --gdb-wait and the break main that we do inside ./run-gdb says:
Cannot access memory at address 0x10604
and then GDB never breaks. Tested at ac8663a44a450c3eadafe14031186813f90c21e4 + 1.
The exact behaviour seems to depend on the architecture:
-
arm: happens always -
x86_64: appears to happen only if you try to connect GDB as fast as possible, before init has been reached. -
aarch64: could not observe the problem
We have also double checked the address with:
./run-toolchain --arch arm readelf -- \
  -s "$(./getvar --arch arm userland_build_dir)/linux/myinsmod.out" | \
  grep main
and from GDB:
info line main
and both give:
000105fc
which is just 8 bytes before 0x10604.
gdbserver also says 0x10604.
However, if do a Ctrl-C in GDB, and then a direct:
b *0x000105fc
it works. Why?!
On GEM5, x86 can also give the Cannot access memory at address, so maybe it is also unreliable on QEMU, and works just by coincidence.
2.7. GDB call
GDB can call functions as explained at: https://stackoverflow.com/questions/1354731/how-to-evaluate-functions-in-gdb
However this is failing for us:
-
some symbols are not visible to
calleven thoughbsees them -
for those that are,
callfails with an E14 error
E.g.: if we break on __x64_sys_write on count.sh:
>>> call printk(0, "asdf")
Could not fetch register "orig_rax"; remote failure reply 'E14'
>>> b printk
Breakpoint 2 at 0xffffffff81091bca: file kernel/printk/printk.c, line 1824.
>>> call fdget_pos(fd)
No symbol "fdget_pos" in current context.
>>> b fdget_pos
Breakpoint 3 at 0xffffffff811615e3: fdget_pos. (9 locations)
>>>
even though fdget_pos is the first thing __x64_sys_write does:
581 SYSCALL_DEFINE3(write, unsigned int, fd, const char __user *, buf,
582         size_t, count)
583 {
584     struct fd f = fdget_pos(fd);
I also noticed that I get the same error:
Could not fetch register "orig_rax"; remote failure reply 'E14'
when trying to use:
fin
on many (all?) functions.
2.8. GDB view ARM system registers
info all-registers shows some of them.
The implementation is described at: https://stackoverflow.com/questions/46415059/how-to-observe-aarch64-system-registers-in-qemu/53043044#53043044
2.9. GDB step debug multicore userland
For a more minimal baremetal multicore setup, see: Section 26.8.3, “ARM multicore”.
We can set and get which cores the Linux kernel allows a program to run on with sched_getaffinity and sched_setaffinity:
./run --cpus 2 --eval-after './linux/sched_getaffinity.out'
Sample output:
sched_getaffinity = 1 1
sched_getcpu = 1
sched_getaffinity = 1 0
sched_getcpu = 0
Which shows us that:
-
initially:
-
all 2 cores were enabled as shown by
sched_getaffinity = 1 1 -
the process was randomly assigned to run on core 1 (the second one) as shown by
sched_getcpu = 1. If we run this several times, it will also run on core 0 sometimes.
-
-
then we restrict the affinity to just core 0, and we see that the program was actually moved to core 0
The number of cores is modified as explained at: Section 18.2.2.1, “Number of cores”
taskset from the util-linux package sets the initial core affinity of a program:
./build-buildroot \
  --config 'BR2_PACKAGE_UTIL_LINUX=y' \
  --config 'BR2_PACKAGE_UTIL_LINUX_SCHEDUTILS=y' \
;
./run --eval-after 'taskset -c 1,1 ./linux/sched_getaffinity.out'
output:
sched_getaffinity = 0 1
sched_getcpu = 1
sched_getaffinity = 1 0
sched_getcpu = 0
so we see that the affinity was restricted to the second core from the start.
Let’s do a QEMU observation to justify this example being in the repository with userland breakpoints.
We will run our ./linux/sched_getaffinity.out infinitely many times, on core 0 and core 1 alternatively:
./run \
  --cpus 2 \
  --eval-after 'i=0; while true; do taskset -c $i,$i ./linux/sched_getaffinity.out; i=$((! $i)); done' \
  --gdb-wait \
;
on another shell:
./run-gdb --userland "$(./getvar userland_build_dir)/linux/sched_getaffinity.out" main
Then, inside GDB:
(gdb) info threads
  Id   Target Id         Frame
* 1    Thread 1 (CPU#0 [running]) main () at sched_getaffinity.c:30
  2    Thread 2 (CPU#1 [halted ]) native_safe_halt () at ./arch/x86/include/asm/irqflags.h:55
(gdb) c
(gdb) info threads
  Id   Target Id         Frame
  1    Thread 1 (CPU#0 [halted ]) native_safe_halt () at ./arch/x86/include/asm/irqflags.h:55
* 2    Thread 2 (CPU#1 [running]) main () at sched_getaffinity.c:30
(gdb) c
and we observe that info threads shows the actual correct core on which the process was restricted to run by taskset!
We should also try it out with kernel modules: https://stackoverflow.com/questions/28347876/set-cpu-affinity-on-a-loadable-linux-kernel-module
TODO we then tried:
./run --cpus 2 --eval-after './linux/sched_getaffinity_threads.out'
and:
./run-gdb --userland "$(./getvar userland_build_dir)/linux/sched_getaffinity_threads.out"
to switch between two simultaneous live threads with different affinities, it just didn’t break on our threads:
b main_thread_0
Bibliography:
2.10. Linux kernel GDB scripts
We source the Linux kernel GDB scripts by default for lx-symbols, but they also contains some other goodies worth looking into.
Those scripts basically parse some in-kernel data structures to offer greater visibility with GDB.
All defined commands are prefixed by lx-, so to get a full list just try to tab complete that.
There aren’t as many as I’d like, and the ones that do exist are pretty self explanatory, but let’s give a few examples.
Show dmesg:
lx-dmesg
Show the Kernel command line parameters:
lx-cmdline
Dump the device tree to a fdtdump.dtb file in the current directory:
lx-fdtdump
pwd
List inserted kernel modules:
lx-lsmod
Sample output:
Address            Module                  Size  Used by
0xffffff80006d0000 hello                  16384  0
Bibliography:
2.10.1. lx-ps
List all processes:
lx-ps
Sample output:
0xffff88000ed08000 1 init
0xffff88000ed08ac0 2 kthreadd
The second and third fields are obviously PID and process name.
The first one is more interesting, and contains the address of the task_struct in memory.
This can be confirmed with:
p ((struct task_struct)*0xffff88000ed08000
which contains the correct PID for all threads I’ve tried:
pid = 1,
TODO get the PC of the kthreads: https://stackoverflow.com/questions/26030910/find-program-counter-of-process-in-kernel Then we would be able to see where the threads are stopped in the code!
On ARM, I tried:
task_pt_regs((struct thread_info *)((struct task_struct)*0xffffffc00e8f8000))->uregs[ARM_pc]
but task_pt_regs is a #define and GDB cannot see defines without -ggdb3: https://stackoverflow.com/questions/2934006/how-do-i-print-a-defined-constant-in-gdb which are apparently not set?
Bibliography:
2.11. Debug the GDB remote protocol
For when it breaks again, or you want to add a new feature!
./run --debug
./run-gdb --before '-ex "set remotetimeout 99999" -ex "set debug remote 1"' start_kernel
2.11.1. Remote 'g' packet reply is too long
This error means that the GDB server, e.g. in QEMU, sent more registers than the GDB client expected.
This can happen for the following reasons:
-
you set the architecture of the client wrong, often 32 vs 64 bit as mentioned at: https://stackoverflow.com/questions/4896316/gdb-remote-cross-debugging-fails-with-remote-g-packet-reply-is-too-long
-
there is a bug in the GDB server and the XML description does not match the number of registers actually sent
-
the GDB server does not send XML target descriptions and your GDB expects a different number of registers by default. E.g., gem5 d4b3e064adeeace3c3e7d106801f95c14637c12f does not send the XML files
The XML target description format is described a bit further at: https://stackoverflow.com/questions/46415059/how-to-observe-aarch64-system-registers-in-qemu/53043044#53043044
3. KGDB
KGDB is kernel dark magic that allows you to GDB the kernel on real hardware without any extra hardware support.
It is useless with QEMU since we already have full system visibility with -gdb. So the goal of this setup is just to prepare you for what to expect when you will be in the treches of real hardware.
KGDB is cheaper than JTAG (free) and easier to setup (all you need is serial), but with less visibility as it depends on the kernel working, so e.g.: dies on panic, does not see boot sequence.
First run the kernel with:
./run --kgdb
this passes the following options on the kernel CLI:
kgdbwait kgdboc=ttyS1,115200
kgdbwait tells the kernel to wait for KGDB to connect.
So the kernel sets things up enough for KGDB to start working, and then boot pauses waiting for connection:
<6>[    4.866050] Serial: 8250/16550 driver, 4 ports, IRQ sharing disabled
<6>[    4.893205] 00:05: ttyS0 at I/O 0x3f8 (irq = 4, base_baud = 115200) is a 16550A
<6>[    4.916271] 00:06: ttyS1 at I/O 0x2f8 (irq = 3, base_baud = 115200) is a 16550A
<6>[    4.987771] KGDB: Registered I/O driver kgdboc
<2>[    4.996053] KGDB: Waiting for connection from remote gdb...

Entering kdb (current=0x(____ptrval____), pid 1) on processor 0 due to Keyboard Entry
[0]kdb>
KGDB expects the connection at ttyS1, our second serial port after ttyS0 which contains the terminal.
The last line is the KDB prompt, and is covered at: Section 3.3, “KDB”. Typing now shows nothing because that prompt is expecting input from ttyS1.
Instead, we connect to the serial port ttyS1 with GDB:
./run-gdb --kgdb --no-continue
Once GDB connects, it is left inside the function kgdb_breakpoint.
So now we can set breakpoints and continue as usual.
For example, in GDB:
continue
Then in QEMU:
./count.sh &
./kgdb.sh
rootfs_overlay/lkmc/kgdb.sh pauses the kernel for KGDB, and gives control back to GDB.
And now in GDB we do the usual:
break __x64_sys_write
continue
continue
continue
continue
And now you can count from KGDB!
If you do: break __x64_sys_write immediately after ./run-gdb --kgdb, it fails with KGDB: BP remove failed: <address>. I think this is because it would break too early on the boot sequence, and KGDB is not yet ready.
See also:
3.1. KGDB ARM
TODO: we would need a second serial for KGDB to work, but it is not currently supported on arm and aarch64 with -M virt that we use: https://unix.stackexchange.com/questions/479085/can-qemu-m-virt-on-arm-aarch64-have-multiple-serial-ttys-like-such-as-pl011-t/479340#479340
One possible workaround for this would be to use KDB ARM.
Main more generic question: https://stackoverflow.com/questions/14155577/how-to-use-kgdb-on-arm
3.2. KGDB kernel modules
Just works as you would expect:
insmod timer.ko
./kgdb.sh
In GDB:
break lkmc_timer_callback
continue
continue
continue
and you now control the count.
3.3. KDB
KDB is a way to use KDB directly in your main console, without GDB.
Advantage over KGDB: you can do everything in one serial. This can actually be important if you only have one serial for both shell and .
Disadvantage: not as much functionality as GDB, especially when you use Python scripts. Notably, TODO confirm you can’t see the the kernel source code and line step as from GDB, since the kernel source is not available on guest (ah, if only debugging information supported full source, or if the kernel had a crazy mechanism to embed it).
Run QEMU as:
./run --kdb
This passes kgdboc=ttyS0 to the Linux CLI, therefore using our main console. Then QEMU:
[0]kdb> go
And now the kdb> prompt is responsive because it is listening to the main console.
After boot finishes, run the usual:
./count.sh &
./kgdb.sh
And you are back in KDB. Now you can count with:
[0]kdb> bp __x64_sys_write
[0]kdb> go
[0]kdb> go
[0]kdb> go
[0]kdb> go
And you will break whenever __x64_sys_write is hit.
You can get see further commands with:
[0]kdb> help
The other KDB commands allow you to step instructions, view memory, registers and some higher level kernel runtime data similar to the superior GDB Python scripts.
3.3.1. KDB graphic
You can also use KDB directly from the graphic window with:
./run --graphic --kdb
This setup could be used to debug the kernel on machines without serial, such as modern desktops.
This works because --graphics adds kbd (which stands for KeyBoarD!) to kgdboc.
3.3.2. KDB ARM
TODO neither arm and aarch64 are working as of 1cd1e58b023791606498ca509256cc48e95e4f5b + 1.
arm seems to place and hit the breakpoint correctly, but no matter how many go commands I do, the count.sh stdout simply does not show.
aarch64 seems to place the breakpoint correctly, but after the first go the kernel oopses with warning:
WARNING: CPU: 0 PID: 46 at /root/linux-kernel-module-cheat/submodules/linux/kernel/smp.c:416 smp_call_function_many+0xdc/0x358
and stack trace:
smp_call_function_many+0xdc/0x358
kick_all_cpus_sync+0x30/0x38
kgdb_flush_swbreak_addr+0x3c/0x48
dbg_deactivate_sw_breakpoints+0x7c/0xb8
kgdb_cpu_enter+0x284/0x6a8
kgdb_handle_exception+0x138/0x240
kgdb_brk_fn+0x2c/0x40
brk_handler+0x7c/0xc8
do_debug_exception+0xa4/0x1c0
el1_dbg+0x18/0x78
__arm64_sys_write+0x0/0x30
el0_svc_handler+0x74/0x90
el0_svc+0x8/0xc
My theory is that every serious ARM developer has JTAG, and no one ever tests this, and the kernel code is just broken.
4. gdbserver
Step debug userland processes to understand how they are talking to the kernel.
First build gdbserver into the root filesystem:
./build-buildroot --config 'BR2_PACKAGE_GDB=y'
Then on guest, to debug userland/linux/rand_check.c:
./gdbserver.sh ./c/print_argv.out asdf qwer
Source: rootfs_overlay/lkmc/gdbserver.sh.
And on host:
./run-gdb --gdbserver --userland userland/c/print_argv.c main
or alternatively with the path to the executable itself:
./run --gdbserver --userland "$(./getvar userland_build_dir)/c/print_argv.out"
Bibliography: https://reverseengineering.stackexchange.com/questions/8829/cross-debugging-for-arm-mips-elf-with-qemu-toolchain/16214#16214
4.1. gdbserver BusyBox
Analogous to GDB step debug userland processes:
./gdbserver.sh ls
on host you need:
./run-gdb --gdbserver --userland "$(./getvar buildroot_build_build_dir)"/busybox-*/busybox ls_main
4.2. gdbserver libc
Our setup gives you the rare opportunity to step debug libc and other system libraries.
For example in the guest:
./gdbserver.sh ./posix/count.out
Then on host:
./run-gdb --gdbserver --userland userland/posix/count.c main
and inside GDB:
break sleep
continue
And you are now left inside the sleep function of our default libc implementation uclibc libc/unistd/sleep.c!
You can also step into the sleep call:
step
This is made possible by the GDB command that we use by default:
set sysroot ${common_buildroot_build_dir}/staging
which automatically finds unstripped shared libraries on the host for us.
4.3. gdbserver dynamic loader
TODO: try to step debug the dynamic loader. Would be even easier if starti is available: https://stackoverflow.com/questions/10483544/stopping-at-the-first-machine-code-instruction-in-gdb
5. CPU architecture
The portability of the kernel and toolchains is amazing: change an option and most things magically work on completely different hardware.
To use arm instead of x86 for example:
./build-buildroot --arch arm
./run --arch arm
Debug:
./run --arch arm --gdb-wait
# On another terminal.
./run-gdb --arch arm
We also have one letter shorthand names for the architectures and --arch option:
# aarch64
./run -a A
# arm
./run -a a
# x86_64
./run -a x
Known quirks of the supported architectures are documented in this section.
5.1. x86_64
5.1.1. ring0
This example illustrates how reading from the x86 control registers with mov crX, rax can only be done from kernel land on ring0.
From kernel land:
insmod ring0.ko
works and output the registers, for example:
cr0 = 0xFFFF880080050033
cr2 = 0xFFFFFFFF006A0008
cr3 = 0xFFFFF0DCDC000
However if we try to do it from userland:
./ring0.out
stdout gives:
Segmentation fault
and dmesg outputs:
traps: ring0.out[55] general protection ip:40054c sp:7fffffffec20 error:0 in ring0.out[400000+1000]
Sources:
In both cases, we attempt to run the exact same code which is shared on the ring0.h header file.
Bibliography:
5.2. arm
5.2.1. Run arm executable in aarch64
TODO Can you run arm executables in the aarch64 guest? https://stackoverflow.com/questions/22460589/armv8-running-legacy-32-bit-applications-on-64-bit-os/51466709#51466709
I’ve tried:
./run-toolchain --arch aarch64 gcc -- -static ~/test/hello_world.c -o "$(./getvar p9_dir)/a.out"
./run --arch aarch64 --eval-after '/mnt/9p/data/a.out'
but it fails with:
a.out: line 1: syntax error: unexpected word (expecting ")")
5.3. MIPS
We used to "support" it until f8c0502bb2680f2dbe7c1f3d7958f60265347005 (it booted) but dropped since one was testing it often.
If you want to revive and maintain it, send a pull request.
5.4. Other architectures
It should not be too hard to port this repository to any architecture that Buildroot supports. Pull requests are welcome.
6. init
When the Linux kernel finishes booting, it runs an executable as the first and only userland process. This executable is called the init program.
The init process is then responsible for setting up the entire userland (or destroying everything when you want to have fun).
This typically means reading some configuration files (e.g. /etc/initrc) and forking a bunch of userland executables based on those files, including the very interactive shell that we end up on.
systemd provides a "popular" init implementation for desktop distros as of 2017.
BusyBox provides its own minimalistic init implementation which Buildroot, and therefore this repo, uses by default.
The init program can be either an executable shell text file, or a compiled ELF file. It becomes easy to accept this once you see that the exec system call handles both cases equally: https://unix.stackexchange.com/questions/174062/can-the-init-process-be-a-shell-script-in-linux/395375#395375
The init executable is searched for in a list of paths in the root filesystem, including /init, /sbin/init and a few others. For more details see: Section 6.3, “Path to init”
6.1. Replace init
To have more control over the system, you can replace BusyBox’s init with your own.
The most direct way to replace init with our own is to just use the init= command line parameter directly:
./run --kernel-cli 'init=/lkmc/count.sh'
This just counts every second forever and does not give you a shell.
This method is not very flexible however, as it is hard to reliably pass multiple commands and command line arguments to the init with it, as explained at: Section 6.4, “Init environment”.
For this reason, we have created a more robust helper method with the --eval option:
./run --eval 'echo "asdf qwer";insmod hello.ko;./linux/poweroff.out'
It is basically a shortcut for:
./run --kernel-cli 'init=/lkmc/eval_base64.sh - lkmc_eval="insmod hello.ko;./linux/poweroff.out"'
Source: rootfs_overlay/lkmc/eval_base64.sh.
This allows quoting and newlines by base64 encoding on host, and decoding on guest, see: Section 15.3.1, “Kernel command line parameters escaping”.
It also automatically chooses between init= and rcinit= for you, see: Section 6.3, “Path to init”
--eval replaces BusyBox' init completely, which makes things more minimal, but also has has the following consequences:
-
/etc/fstabmounts are not done, notably/procand/sys, test it out with:./run --eval 'echo asdf;ls /proc;ls /sys;echo qwer'
-
no shell is launched at the end of boot for you to interact with the system. You could explicitly add a
shat the end of your commands however:./run --eval 'echo hello;sh'
The best way to overcome those limitations is to use: Section 6.2, “Run command at the end of BusyBox init”
If the script is large, you can add it to a gitignored file and pass that to --eval as in:
echo '
cd /lkmc
insmod hello.ko
./linux/poweroff.out
' > data/gitignore.sh
./run --eval "$(cat data/gitignore.sh)"
or add it to a file to the root filesystem guest and rebuild:
echo '#!/bin/sh
cd /lkmc
insmod hello.ko
./linux/poweroff.out
' > rootfs_overlay/lkmc/gitignore.sh
chmod +x rootfs_overlay/lkmc/gitignore.sh
./build-buildroot
./run --kernel-cli 'init=/lkmc/gitignore.sh'
Remember that if your init returns, the kernel will panic, there are just two non-panic possibilities:
-
run forever in a loop or long sleep
-
poweroffthe machine
6.1.1. poweroff.out
Just using BusyBox' poweroff at the end of the init does not work and the kernel panics:
./run --eval poweroff
because BusyBox' poweroff tries to do some fancy stuff like killing init, likely to allow userland to shutdown nicely.
But this fails when we are init itself!
BusyBox' poweroff works more brutally and effectively if you add -f:
./run --eval 'poweroff -f'
but why not just use our minimal ./linux/poweroff.out and be done with it?
./run --eval './linux/poweroff.out'
Source: userland/linux/poweroff.c
This also illustrates how to shutdown the computer from C: https://stackoverflow.com/questions/28812514/how-to-shutdown-linux-using-c-or-qt-without-call-to-system
6.1.2. sleep_forever.out
I dare you to guess what this does:
./run --eval './posix/sleep_forever.out'
Source: userland/posix/sleep_forever.c
This executable is a convenient simple init that does not panic and sleeps instead.
6.1.3. time_boot.out
Get a reasonable answer to "how long does boot take in guest time?":
./run --eval-after './linux/time_boot.c'
Source: userland/linux/time_boot.c
That executable writes to dmesg directly through /dev/kmsg a message of type:
[ 2.188242] /path/to/linux-kernel-module-cheat/userland/linux/time_boot.c
which tells us that boot took 2.188242 seconds based on the dmesg timestamp.
6.2. Run command at the end of BusyBox init
Use the --eval-after option is for you rely on something that BusyBox' init set up for you like /etc/fstab:
./run --eval-after 'echo asdf;ls /proc;ls /sys;echo qwer'
After the commands run, you are left on an interactive shell.
The above command is basically equivalent to:
./run --kernel-cli-after-dash 'lkmc_eval="insmod hello.ko;./linux/poweroff.out;"'
where the lkmc_eval option gets evaled by our default rootfs_overlay/etc/init.d/S98 startup script.
Except that --eval-after is smarter and uses base64 encoding.
Alternatively, you can also add the comamdns to run to a new init.d entry to run at the end o the BusyBox init:
cp rootfs_overlay/etc/init.d/S98 rootfs_overlay/etc/init.d/S99.gitignore
vim rootfs_overlay/etc/init.d/S99.gitignore
./build-buildroot
./run
and they will be run automatically before the login prompt.
Scripts under /etc/init.d are run by /etc/init.d/rcS, which gets called by the line ::sysinit:/etc/init.d/rcS in /etc/inittab.
6.3. Path to init
The init is selected at:
-
initrd or initramfs system:
/init, a custom one can be set with therdinit=kernel command line parameter -
otherwise: default is
/sbin/init, followed by some other paths, a custom one can be set withinit=
6.4. Init environment
The kernel parses parameters from the kernel command line up to "-"; if it doesn’t recognize a parameter and it doesn’t contain a '.', the parameter gets passed to init: parameters with '=' go into init’s environment, others are passed as command line arguments to init. Everything after "-" is passed as an argument to init.
And you can try it out with:
./run --kernel-cli 'init=/lkmc/linux/init_env_poweroff.out - asdf=qwer zxcv'
Output:
args:
/lkmc/linux/init_env_poweroff.out
-
zxcv

env:
HOME=/
TERM=linux
asdf=qwer
Source: userland/linux/init_env_poweroff.c.
6.4.1. init arguments
The annoying dash - gets passed as a parameter to init, which makes it impossible to use this method for most non custom executables.
Arguments with dots that come after - are still treated specially (of the form subsystem.somevalue) and disappear, from args, e.g.:
./run --kernel-cli 'init=/lkmc/linux/init_env_poweroff.out - /lkmc/linux/poweroff.out'
outputs:
args
/lkmc/linux/init_env_poweroff.out
-
ab
so see how a.b is gone.
The simple workaround is to just create a shell script that does it, e.g. as we’ve done at: rootfs_overlay/lkmc/gem5_exit.sh.
6.4.2. init environment env
Wait, where do HOME and TERM come from? (greps the kernel). Ah, OK, the kernel sets those by default: https://github.com/torvalds/linux/blob/94710cac0ef4ee177a63b5227664b38c95bbf703/init/main.c#L173
const char *envp_init[MAX_INIT_ENVS+2] = { "HOME=/", "TERM=linux", NULL, };
6.4.3. BusyBox shell init environment
On top of the Linux kernel, the BusyBox /bin/sh shell will also define other variables.
We can explore the shenanigans that the shell adds on top of the Linux kernel with:
./run --kernel-cli 'init=/bin/sh'
From there we observe that:
env
gives:
SHLVL=1
HOME=/
TERM=linux
PWD=/
therefore adding SHLVL and PWD to the default kernel exported variables.
Furthermore, to increase confusion, if you list all non-exported shell variables https://askubuntu.com/questions/275965/how-to-list-all-variables-names-and-their-current-values with:
set
then it shows more variables, notably:
PATH='/sbin:/usr/sbin:/bin:/usr/bin'
6.4.3.1. BusyBox shell initrc files
Login shells source some default files, notably:
/etc/profile
$HOME/.profile
In our case, HOME is set to / presumably by init at: https://git.busybox.net/busybox/tree/init/init.c?id=5059653882dbd86e3bbf48389f9f81b0fac8cd0a#n1114
We provide /.profile from rootfs_overlay/.profile, and use the default BusyBox /etc/profile.
The shell knows that it is a login shell if the first character of argv[0] is -, see also: https://stackoverflow.com/questions/2050961/is-argv0-name-of-executable-an-accepted-standard-or-just-a-common-conventi/42291142#42291142
When we use just init=/bin/sh, the Linux kernel sets argv[0] to /bin/sh, which does not start with -.
However, if you use ::respawn:-/bin/sh on inttab described at TTY, BusyBox' init sets argv[0][0] to -, and so does getty. This can be observed with:
cat /proc/$$/cmdline
where $$ is the PID of the shell itself: https://stackoverflow.com/questions/21063765/get-pid-in-shell-bash
7. initrd
The kernel can boot from an CPIO file, which is a directory serialization format much like tar: https://superuser.com/questions/343915/tar-vs-cpio-what-is-the-difference
The bootloader, which for us is provided by QEMU itself, is then configured to put that CPIO into memory, and tell the kernel that it is there.
This is very similar to the kernel image itself, which already gets put into memory by the QEMU -kernel option.
With this setup, you don’t even need to give a root filesystem to the kernel: it just does everything in memory in a ramfs.
To enable initrd instead of the default ext2 disk image, do:
./build-buildroot --initrd
./run --initrd
By looking at the QEMU run command generated, you can see that we didn’t give the -drive option at all:
cat "$(./getvar run_dir)/run.sh"
Instead, we used the QEMU -initrd option to point to the .cpio filesystem that Buildroot generated for us.
Try removing that -initrd option to watch the kernel panic without rootfs at the end of boot.
When using .cpio, there can be no filesystem persistency across boots, since all file operations happen in memory in a tmpfs:
date >f
poweroff
cat f
# can't open 'f': No such file or directory
which can be good for automated tests, as it ensures that you are using a pristine unmodified system image every time.
Not however that we already disable disk persistency by default on ext2 filesystems even without --initrd: Section 17.2, “Disk persistency”.
One downside of this method is that it has to put the entire filesystem into memory, and could lead to a panic:
end Kernel panic - not syncing: Out of memory and no killable processes...
This can be solved by increasing the memory with:
./run --initrd --memory 256M
The main ingredients to get initrd working are:
-
BR2_TARGET_ROOTFS_CPIO=y: make Buildroot generateimages/rootfs.cpioin addition to the other images.It is also possible to compress that image with other options.
-
qemu -initrd: make QEMU put the image into memory and tell the kernel about it. -
CONFIG_BLK_DEV_INITRD=y: Compile the kernel with initrd support, see also: https://unix.stackexchange.com/questions/67462/linux-kernel-is-not-finding-the-initrd-correctly/424496#424496Buildroot forces that option when
BR2_TARGET_ROOTFS_CPIO=yis given
TODO: how does the bootloader inform the kernel where to find initrd? https://unix.stackexchange.com/questions/89923/how-does-linux-load-the-initrd-image
7.1. initrd in desktop distros
Most modern desktop distributions have an initrd in their root disk to do early setup.
The rationale for this is described at: https://en.wikipedia.org/wiki/Initial_ramdisk
One obvious use case is having an encrypted root filesystem: you keep the initrd in an unencrypted partition, and then setup decryption from there.
I think GRUB then knows read common disk formats, and then loads that initrd to memory with a /boot/grub/grub.cfg directive of type:
initrd /initrd.img-4.4.0-108-generic
7.2. initramfs
initramfs is just like initrd, but you also glue the image directly to the kernel image itself using the kernel’s build system.
Try it out with:
./build-buildroot --initramfs
./build-linux --initramfs
./run --initramfs
Notice how we had to rebuild the Linux kernel this time around as well after Buildroot, since in that build we will be gluing the CPIO to the kernel image.
Now, once again, if we look at the QEMU run command generated, we see all that QEMU needs is the -kernel option, no -drive not even -initrd! Pretty cool:
cat "$(./getvar run_dir)/run.sh"
It is also interesting to observe how this increases the size of the kernel image if you do a:
ls -lh "$(./getvar linux_image)"
before and after using initramfs, since the .cpio is now glued to the kernel image.
Don’t forget that to stop using initramfs, you must rebuild the kernel without --initramfs to get rid of the attached CPIO image:
./build-linux
./run
Alternatively, consider using Linux kernel build variants if you need to switch between initramfs and non initramfs often:
./build-buildroot --initramfs
./build-linux --initramfs --linux-build-id initramfs
./run --initramfs --linux-build-id
Setting up initramfs is very easy: our scripts just set CONFIG_INITRAMFS_SOURCE to point to the CPIO path.
http://nairobi-embedded.org/initramfs_tutorial.html shows a full manual setup.
7.3. rootfs
This is how /proc/mounts shows the root filesystem:
-
hard disk:
/dev/root on / type ext2 (rw,relatime,block_validity,barrier,user_xattr). That file does not exist however. -
initrd:
rootfs on / type rootfs (rw) -
initramfs:
rootfs on / type rootfs (rw)
TODO: understand /dev/root better:
7.4. gem5 initrd
TODO we were not able to get it working yet: https://stackoverflow.com/questions/49261801/how-to-boot-the-linux-kernel-with-initrd-or-initramfs-with-gem5
This would require gem5 to load the CPIO into memory, just like QEMU. Grepping initrd shows some ARM hits under:
src/arch/arm/linux/atag.hh
but they are commented out.
7.5. gem5 initramfs
This could in theory be easier to make work than initrd since the emulator does not have to do anything special.
However, it didn’t: boot fails at the end because it does not see the initramfs, but rather tries to open our dummy root filesystem, which unsurprisingly does not have a format in a way that the kernel understands:
VFS: Cannot open root device "sda" or unknown-block(8,0): error -5
We think that this might be because gem5 boots directly vmlinux, and not from the final compressed images that contain the attached rootfs such as bzImage, which is what QEMU does, see also: Section 15.21.1, “vmlinux vs bzImage vs zImage vs Image”.
To do this failed test, we automatically pass a dummy disk image as of gem5 7fa4c946386e7207ad5859e8ade0bbfc14000d91 since the scripts don’t handle a missing --disk-image well, much like is currently done for Baremetal.
Interestingly, using initramfs significantly slows down the gem5 boot, even though it did not work. For example, we’ve observed a 4x slowdown of as 17062a2e8b6e7888a14c3506e9415989362c58bf for aarch64. This must be because expanding the large attached CPIO must be expensive. We can clearly see from the kernel logs that the kernel just hangs at a point after the message PCI: CLS 0 bytes, default 64 for a long time before proceeding further.
8. Device tree
The device tree is a Linux kernel defined data structure that serves to inform the kernel how the hardware is setup.
platform_device contains a minimal runnable example of device tree manipulation.
Device trees serve to reduce the need for hardware vendors to patch the kernel: they just provide a device tree file instead, which is much simpler.
x86 does not use it device trees, but many other archs to, notably ARM.
This is notably because ARM boards:
-
typically don’t have discoverable hardware extensions like PCI, but rather just put everything on an SoC with magic register addresses
-
are made by a wide variety of vendors due to ARM’s licensing business model, which increases variability
The Linux kernel itself has several device trees under ./arch/<arch>/boot/dts, see also: https://stackoverflow.com/questions/21670967/how-to-compile-dts-linux-device-tree-source-files-to-dtb/42839737#42839737
8.1. DTB files
Files that contain device trees have the .dtb extension when compiled, and .dts when in text form.
You can convert between those formats with:
"$(./getvar buildroot_host_dir)"/bin/dtc -I dtb -O dts -o a.dts a.dtb
"$(./getvar buildroot_host_dir)"/bin/dtc -I dts -O dtb -o a.dtb a.dts
Buildroot builds the tool due to BR2_PACKAGE_HOST_DTC=y.
On Ubuntu 18.04, the package is named:
sudo apt-get install device-tree-compiler
Device tree files are provided to the emulator just like the root filesystem and the Linux kernel image.
In real hardware, those components are also often provided separately. For example, on the Raspberry Pi 2, the SD card must contain two partitions:
-
the first contains all magic files, including the Linux kernel and the device tree
-
the second contains the root filesystem
8.2. Device tree syntax
Good format descriptions:
Minimal example
/dts-v1/;

/ {
    a;
};
Check correctness with:
dtc a.dts
Separate nodes are simply merged by node path, e.g.:
/dts-v1/;

/ {
    a;
};

/ {
    b;
};
then dtc a.dts gives:
/dts-v1/;

/ {
        a;
        b;
};
8.3. Get device tree from a running kernel
This is specially interesting because QEMU and gem5 are capable of generating DTBs that match the selected machine depending on dynamic command line parameters for some types of machines.
So observing the device tree from the guest allows to easily see what the emulator has generated.
Compile the dtc tool into the root filesystem:
./build-buildroot \
  --arch aarch64 \
  --config 'BR2_PACKAGE_DTC=y' \
  --config 'BR2_PACKAGE_DTC_PROGRAMS=y' \
;
-M virt for example, which we use by default for aarch64, boots just fine without the -dtb option:
./run --arch aarch64
Then, from inside the guest:
dtc -I fs -O dts /sys/firmware/devicetree/base
contains:
        cpus {
                #address-cells = <0x1>;
                #size-cells = <0x0>;

                cpu@0 {
                        compatible = "arm,cortex-a57";
                        device_type = "cpu";
                        reg = <0x0>;
                };
        };
8.4. Device tree emulator generation
Since emulators know everything about the hardware, they can automatically generate device trees for us, which is very convenient.
This is the case for both QEMU and gem5.
For example, if we increase the number of cores to 2:
./run --arch aarch64 --cpus 2
QEMU automatically adds a second CPU to the DTB!
                cpu@0 {
                cpu@1 {
The action seems to be happening at: hw/arm/virt.c.
You can dump the DTB QEMU generated with:
./run --arch aarch64 -- -machine dumpdtb=dtb.dtb
gem5 fs_bigLITTLE 2a9573f5942b5416fb0570cf5cb6cdecba733392 can also generate its own DTB.
gem5 can generate DTBs on ARM with --generate-dtb. The generated DTB is placed in the m5out directory named as system.dtb.
9. KVM
KVM is Linux kernel interface that greatly speeds up execution of virtual machines.
You can make QEMU or gem5 by passing enabling KVM with:
./run --kvm
but it was broken in gem5 with pending patches: https://www.mail-archive.com/gem5-users@gem5.org/msg15046.html It fails immediately on:
panic: KVM: Failed to enter virtualized mode (hw reason: 0x80000021)
KVM works by running userland instructions natively directly on the real hardware instead of running a software simulation of those instructions.
Therefore, KVM only works if you the host architecture is the same as the guest architecture. This means that this will likely only work for x86 guests since almost all development machines are x86 nowadays. Unless you are running an ARM desktop for some weird reason :-)
We don’t enable KVM by default because:
-
it limits visibility, since more things are running natively:
-
can’t use GDB
-
can’t do instruction tracing
-
on gem5, you lose cycle counts and therefor any notion of performance
-
-
QEMU kernel boots are already fast enough for most purposes without it
One important use case for KVM is to fast forward gem5 execution, often to skip boot, take a gem5 checkpoint, and then move on to a more detailed and slow simulation
9.1. KVM arm
TODO: we haven’t gotten it to work yet, but it should be doable, and this is an outline of how to do it. Just don’t expect this to tested very often for now.
We can test KVM on arm by running this repository inside an Ubuntu arm QEMU VM.
This produces no speedup of course, since the VM is already slow since it cannot use KVM on the x86 host.
First, obtain an Ubuntu arm64 virtual machine as explained at: https://askubuntu.com/questions/281763/is-there-any-prebuilt-qemu-ubuntu-image32bit-online/1081171#1081171
Then, from inside that image:
sudo apt-get install git
git clone https://github.com/cirosantilli/linux-kernel-module-cheat
cd linux-kernel-module-cheat
sudo ./setup -y
and then proceed exactly as in Prebuilt setup.
We don’t want to build the full Buildroot image inside the VM as that would be way too slow, thus the recommendation for the prebuilt setup.
TODO: do the right thing and cross compile QEMU and gem5. gem5’s Python parts might be a pain. QEMU should be easy: https://stackoverflow.com/questions/26514252/cross-compile-qemu-for-arm
10. User mode simulation
Both QEMU and gem5 have an user mode simulation mode in addition to full system simulation that we consider elsewhere in this project.
In QEMU, it is called just "user mode", and in gem5 it is called syscall emulation mode.
In both, the basic idea is the same.
User mode simulation takes regular userland executables of any arch as input and executes them directly, without booting a kernel.
Instead of simulating the full system, it translates normal instructions like in full system mode, but magically forwards system calls to the host OS.
Advantages over full system simulation:
-
the simulation may run faster since you don’t have to simulate the Linux kernel and several device models
-
you don’t need to build your own kernel or root filesystem, which saves time. You still need a toolchain however, but the pre-packaged ones may work fine.
Disadvantages:
-
lower guest to host portability:
-
TODO confirm: host OS == guest OS?
-
TODO confirm: the host Linux kernel should be newer than the kernel the executable was built for.
It may still work even if that is not the case, but could fail is a missing system call is reached.
The target Linux kernel of the executable is a GCC toolchain build-time configuration.
-
emulator implementers have to keep up with libc changes, some of which break even a C hello world due setup code executed before main.
-
-
cannot be used to test the Linux kernel or any devices, and results are less representative of a real system since we are faking more
10.1. QEMU user mode getting started
Let’s run userland/c/print_argv.c built with the Buildroot toolchain on QEMU user mode:
./build user-mode-qemu
./run \
  --userland userland/c/print_argv.c \
  --userland-args='asdf "qw er"' \
;
Output:
/path/to/linux-kernel-module-cheat/out/userland/default/x86_64/c/print_argv.out
asdf
qw er
./run --userland path resolution is analogous to that of ./run --baremetal.
./build user-mode-qemu first builds Buildroot, and then runs ./build-userland, which is further documented at: Section 1.6, “Userland setup”. It also builds QEMU. If you ahve already done a QEMU Buildroot setup previously, this will be very fast.
If you modify the userland programs, rebuild simply with:
./build-userland
10.1.1. User mode GDB
It’s nice when the obvious just works, right?
./run \
  --arch aarch64 \
  --gdb-wait \
  --userland userland/c/print_argv.c \
  --userland-args 'asdf "qw er"' \
;
and on another shell:
./run-gdb \
  --arch aarch64 \
  --userland userland/c/print_argv.c \
  main \
;
Or alternatively, if you are using tmux, do everything in one go with:
./run \
  --arch aarch64 \
  --gdb \
  --userland userland/c/print_argv.c \
  --userland-args 'asdf "qw er"' \
;
To stop at the very first instruction of a freestanding program, just use --no-continue. A good example of this is shown at: Section 21.5.1, “Freestanding programs”.
10.2. User mode tests
Automatically run all userland tests that can be run in user mode simulation, and check that they exit with status 0:
./build --all-archs test-executables-userland
./test-executables --all-archs --all-emulators
Or just for QEMU:
./build --all-archs test-executables-userland-qemu
./test-executables --all-archs --emulator qemu
Source: test-executables
This script skips a manually configured list of tests, notably:
-
tests that depend on a full running kernel and cannot be run in user mode simulation, e.g. those that rely on kernel modules
-
tests that require user interaction
-
tests that take perceptible ammounts of time
-
known bugs we didn’t have time to fix ;-)
Tests under userland/libs/ depend on certain libraries being available on the target, e.g. BLAS for userland/libs/openblas. They are not run by default, but can be enabled with --package and --package-all.
The gem5 tests require building statically with build id static, see also: Section 10.6, “gem5 syscall emulation mode”. TODO automate this better.
See: Section 29.13, “Test this repo” for more useful testing tips.
10.3. User mode Buildroot executables
If you followed QEMU Buildroot setup, you can now run the executables created by Buildroot directly as:
./run \
  --userland "$(./getvar buildroot_target_dir)/bin/echo" \
  --userland-args='asdf' \
;
To easily explore the userland executable environment interactively, you can do:
./run \
  --arch aarch64 \
  --userland "$(./getvar --arch aarch64 buildroot_target_dir)/bin/sh" \
  --terminal \
;
or:
./run \
  --arch aarch64 \
  --userland "$(./getvar --arch aarch64 buildroot_target_dir)/bin/sh"  \
  --userland-args='-c "uname -a && pwd"' \
;
Here is an interesting examples of this: Section 15.20.1, “Linux Test Project”
10.4. User mode simulation with glibc
At 125d14805f769104f93c510bedaa685a52ec025d we moved Buildroot from uClibc to glibc, and caused some user mode pain, which we document here.
10.4.1. FATAL: kernel too old
glibc has a check for kernel version, likely obtained from the uname syscall, and if the kernel is not new enough, it quits.
Both gem5 and QEMU however allow setting the reported uname version from the command line, which we do to always match our toolchain.
QEMU by default copies the host uname value, but we always override it in our scripts.
Determining the right number to use for the kernel version is of course highly non-trivial and would require an extensive userland test suite, which most emulator don’t have.
./run --arch aarch64 --kernel-version 4.18 --userland userland/posix/uname.c
Source: userland/posix/uname.c.
The QEMU source that does this is at: https://github.com/qemu/qemu/blob/v3.1.0/linux-user/syscall.c#L8931
Bibliography:
The ID is just hardcoded on the source:
10.4.2. stack smashing detected
For some reason QEMU / glibc x86_64 picks up the host libc, which breaks things.
Other archs work as they different host libc is skipped. User mode static executables also work.
We have worked around this with with https://bugs.launchpad.net/qemu/+bug/1701798/comments/12 from the thread: https://bugs.launchpad.net/qemu/+bug/1701798 by creating the file: rootfs_overlay/etc/ld.so.cache which is a symlink to a file that cannot exist: /dev/null/nonexistent.
Reproduction:
rm -f "$(./getvar buildroot_target_dir)/etc/ld.so.cache"
./run --userland userland/c/hello.c
./run --userland userland/c/hello.c --qemu-which host
Outcome:
*** stack smashing detected ***: <unknown> terminated
qemu: uncaught target signal 6 (Aborted) - core dumped
To get things working again, restore ld.so.cache with:
./build-buildroot
I’ve also tested on an Ubuntu 16.04 guest and the failure is different one:
qemu: uncaught target signal 4 (Illegal instruction) - core dumped
A non-QEMU-specific example of stack smashing is shown at: https://stackoverflow.com/questions/1345670/stack-smashing-detected/51897264#51897264
Tested at: 2e32389ebf1bedd89c682aa7b8fe42c3c0cf96e5 + 1.
10.5. User mode static executables
Example:
./build-userland \
  --arch aarch64 \
  --static \
;
./run \
  --arch aarch64 \
  --static \
  --userland userland/c/print_argv.c \
  --userland-args 'asdf "qw er"' \
;
Running dynamically linked executables in QEMU requires pointing it to the root filesystem with the -L option so that it can find the dynamic linker and shared libraries.
We pass -L by default, so everything just works.
However, in case something goes wrong, you can also try statically linked executables, since this mechanism tends to be a bit more stable, for example:
-
gem5 user mode currently only supports static executables as mentioned at: Section 10.6, “gem5 syscall emulation mode”
-
QEMU x86_64 guest on x86_64 host was failing with stack smashing detected, but we found a workaround
10.5.1. User mode static executables with dynamic libraries
One limitation of static executables is that Buildroot mostly only builds dynamic versions of libraries (the libc is an exception).
So programs that rely on those libraries might not compile as GCC can’t find the .a version of the library.
For example, if we try to build BLAS statically:
./build-userland --package openblas --static -- userland/libs/openblas/hello.c
it fails with:
ld: cannot find -lopenblas
g++ and pthreads also causes issues: https://stackoverflow.com/questions/35116327/when-g-static-link-pthread-cause-segmentation-fault-why
As a consequence, the following fails:
./run --userland userland/cpp/atomic.cpp --static
with error:
qemu-x86_64: /path/to/linux-kernel-module-cheat/submodules/qemu/accel/tcg/cpu-exec.c:700: cpu_exec: Assertion `!have_mmap_lock()' failed.
qemu-x86_64: /path/to/linux-kernel-module-cheat/submodules/qemu/accel/tcg/cpu-exec.c:700: cpu_exec: Assertion `!have_mmap_lock()' failed.
and if we manually build and run natively on host it segfaults.
If we hack the compilation command to do instead:
-pthread -Wl,--whole-archive -lpthread -Wl,--no-whole-archive
then it works. We should automate that at some point.
10.6. gem5 syscall emulation mode
Less robust than QEMU’s, but still usable:
There are much more unimplemented syscalls in gem5 than in QEMU. Many of those are trivial to implement however.
As of 185c2730cc78d5adda683d76c0e3b35e7cb534f0, dynamically linked executables only work on x86, and they can only use the host libraries, which is ugly:
If you try dynamically linked executables on ARM, they fail with:
fatal: Unable to open dynamic executable's interpreter.
So let’s just play with some static ones:
./build-userland \
  --arch aarch64 \
  --static \
;
./run \
  --arch aarch64 \
  --emulator gem5 \
  --userland userland/c/print_argv.c \
  --userland-args 'asdf "qw er"' \
;
TODO: how to escape spaces on the command line arguments?
GDB step debug also works normally on gem5:
./run \
  --arch aarch64 \
  --emulator gem5 \
  --gdb-wait \
  --static \
  --userland userland/c/print_argv.c \
  --userland-args 'asdf "qw er"' \
;
./run-gdb \
  --arch aarch64 \
  --emulator gem5 \
  --static \
  --userland userland/c/print_argv.c \
  main \
;
10.6.1. gem5 syscall emulation exit status
As of gem5 7fa4c946386e7207ad5859e8ade0bbfc14000d91, the crappy se.py script does not forward the exit status of syscall emulation mode, you can test it with:
./run --dry-run --emulator gem5 --static --userland userland/c/false.c
Source: userland/c/false.c.
Then manually run the generated gem5 CLI, and do:
echo $?
and the output is always 0.
Instead, it just outputs a message to stdout just like for m5 fail:
Simulated exit code not 0! Exit code is 1
which we parse in run and then exit with the correct result ourselves…
10.6.2. gem5 syscall emulation mode program stdin
gem5 shows its own stdout to terminal, and does not allow you to type stdin to programs.
Instead, you must pass stdin non-interactively with the through a file with the --se.py --input option, e.g.:
printf a > f
./run --emulator gem5 --userland userland/c/getchar.c --static -- --input f
leads to gem5 output:
enter a character: you entered: a
Source: userland/c/getchar.c
10.6.3. User mode vs full system benchmark
Let’s see if user mode runs considerably faster than full system or not.
First we build Dhrystone manually statically since dynamic linking is broken in gem5 as explained at: Section 10.6, “gem5 syscall emulation mode”.
gem5 user mode:
./build-buildroot --arch arm --config 'BR2_PACKAGE_DHRYSTONE=y'
make \
  -B \
  -C "$(./getvar --arch arm buildroot_build_build_dir)/dhrystone-2" \
  CC="$(./run-toolchain --arch arm --print-tool gcc)" \
  CFLAGS=-static \
;
time \
  ./run \
  --arch arm \
  --emulator gem5 \
  --userland "$(./getvar --arch arm buildroot_build_build_dir)/dhrystone-2/dhrystone" \
  --userland-args 'asdf qwer' \
;
gem5 full system:
time \
  ./run \
  --arch arm \
  --eval-after './gem5.sh' \
  --emulator gem5
  --gem5-readfile 'dhrystone 100000' \
;
QEMU user mode:
time qemu-arm "$(./getvar --arch arm buildroot_build_build_dir)/dhrystone-2/dhrystone" 100000000
QEMU full system:
time \
  ./run \
  --arch arm \
  --eval-after 'time dhrystone 100000000;./linux/poweroff.out' \
;
Result on P51 at bad30f513c46c1b0995d3a10c0d9bc2a33dc4fa0:
-
gem5 user: 33 seconds
-
gem5 full system: 51 seconds
-
QEMU user: 45 seconds
-
QEMU full system: 223 seconds
10.7. QEMU user mode quirks
10.7.1. QEMU user mode does not show stdout immediately
At 8d8307ac0710164701f6e14c99a69ee172ccbb70 + 1, I noticed that if you run userland/posix/count.c:
./run --userland userland/posix/count_to.c --userland-args 3
it first waits for 3 seconds, then the program exits, and then it dumps all the stdout at once, instead of counting once every second as expected.
The same can be reproduced by copying the raw QEMU command and piping it through tee, so I don’t think it is a bug in our setup:
/path/to/linux-kernel-module-cheat/out/qemu/default/x86_64-linux-user/qemu-x86_64 \
  -L /path/to/linux-kernel-module-cheat/out/buildroot/build/default/x86_64/target \
  /path/to/linux-kernel-module-cheat/out/userland/default/x86_64/posix/count.out \
  3 \
| tee
TODO: investigate further and then possibly post on QEMU mailing list.
10.7.1.1. QEMU user mode does not show errors
Similarly to QEMU user mode does not show stdout immediately, QEMU error messages do not show at all through pipes.
In particular, it does not say anything if you pass it a non-existing executable:
qemu-x86_64 asdf | cat
So we just check ourselves manually
11. Kernel module utilities
11.2. myinsmod
If you are feeling raw, you can insert and remove modules with our own minimal module inserter and remover!
# init_module
./linux/myinsmod.out hello.ko
# finit_module
./linux/myinsmod.out hello.ko "" 1
./linux/myrmmod.out hello
which teaches you how it is done from C code.
Source:
The Linux kernel offers two system calls for module insertion:
-
init_module -
finit_module
and:
man init_module
documents that:
The finit_module() system call is like init_module(), but reads the module to be loaded from the file descriptor fd. It is useful when the authenticity of a kernel module can be determined from its location in the filesystem; in cases where that is possible, the overhead of using cryptographically signed modules to determine the authenticity of a module can be avoided. The param_values argument is as for init_module().
finit is newer and was added only in v3.8. More rationale: https://lwn.net/Articles/519010/
11.3. modprobe
Implemented as a BusyBox applet by default: https://git.busybox.net/busybox/tree/modutils/modprobe.c?h=1_29_stable
modprobe searches for modules installed under:
ls /lib/modules/<kernel_version>
and specified in the modules.order file.
This is the default install path for CONFIG_SOME_MOD=m modules built with make modules_install in the Linux kernel tree, with root path given by INSTALL_MOD_PATH, and therefore canonical in that sense.
Currently, there are only two kinds of kernel modules that you can try out with modprobe:
-
modules built with Buildroot, see: Section 29.12.2.1, “kernel_modules buildroot package”
-
modules built from the kernel tree itself, see: Section 15.12.2, “dummy-irq”
We are not installing out custom ./build-modules modules there, because:
-
we don’t know the right way. Why is there no
installorinstall_modulestarget for kernel modules?This can of course be solved by running Buildroot in verbose mode, and copying whatever it is doing, initial exploration at: https://stackoverflow.com/questions/22783793/how-to-install-kernel-modules-from-source-code-error-while-make-process/53169078#53169078
-
we would have to think how to not have to include the kernel modules twice in the root filesystem, but still have 9P working for fast development as described at: Section 1.1.2.2, “Your first kernel module hack”
11.4. kmod
The more "reference" kernel.org implementation of lsmod, insmod, rmmod, etc.: https://git.kernel.org/pub/scm/utils/kernel/kmod/kmod.git
Default implementation on desktop distros such as Ubuntu 16.04, where e.g.:
ls -l /bin/lsmod
gives:
lrwxrwxrwx 1 root root 4 Jul 25 15:35 /bin/lsmod -> kmod
and:
dpkg -l | grep -Ei
contains:
ii kmod 22-1ubuntu5 amd64 tools for managing Linux kernel modules
BusyBox also implements its own version of those executables, see e.g. modprobe. Here we will only describe features that differ from kmod to the BusyBox implementation.
11.4.1. module-init-tools
Name of a predecessor set of tools.
11.4.2. kmod modprobe
kmod’s modprobe can also load modules under different names to avoid conflicts, e.g.:
sudo modprobe vmhgfs -o vm_hgfs
12. Filesystems
12.1. OverlayFS
OverlayFS is a filesystem merged in the Linux kernel in 3.18.
As the name suggests, OverlayFS allows you to merge multiple directories into one. The following minimal runnable examples should give you an intuition on how it works:
We are very interested in this filesystem because we are looking for a way to make host cross compiled executables appear on the guest root / without reboot.
This would have several advantages:
-
makes it faster to test modified guest programs
-
not rebooting is fundamental for gem5, where the reboot is very costly.
-
no need to regenerate the root filesystem at all and reboot
-
overcomes the
check_bin_archproblem as shown at: Section 19.8, “Buildroot rebuild is slow when the root filesystem is large”
-
-
we could keep the base root filesystem very small, which implies:
-
less host disk usage, no need to copy the entire
./getvar out_rootfs_overlay_dirto the image again -
no need to worry about BR2_TARGET_ROOTFS_EXT2_SIZE
-
We can already make host files appear on the guest with 9P, but they appear on a subdirectory instead of the root.
If they would appear on the root instead, that would be even more awesome, because you would just use the exact same paths relative to the root transparently.
For example, we wouldn’t have to mess around with variables such as PATH and LD_LIBRARY_PATH.
The idea is to:
-
9P mount our overlay directory
./getvar out_rootfs_overlay_diron the guest, which we already do at/mnt/9p/out_rootfs_overlay -
then create an overlay with that directory and the root, and
chrootinto it.I was unable to mount directly to
/avoid thechroot: https://stackoverflow.com/questions/41119656/how-can-i-overlayfs-the-root-filesystem-on-linux https://unix.stackexchange.com/questions/316018/how-to-use-overlayfs-to-protect-the-root-filesystem ** https://unix.stackexchange.com/questions/420646/mount-root-as-overlayfs
We already have a prototype of this running from fstab on guest at /mnt/overlay, but it has the following shortcomings:
-
changes to underlying filesystems are not visible on the overlay unless you remount with
mount -r remount /mnt/overlay, as mentioned on the kernel docs:Changes to the underlying filesystems while part of a mounted overlay filesystem are not allowed. If the underlying filesystem is changed, the behavior of the overlay is undefined, though it will not result in a crash or deadlock.
This makes everything very inconvenient if you are inside
chrootaction. You would have to leavechroot, remount, then come back. -
the overlay does not contain sub-filesystems, e.g.
/proc. We would have to re-mount them. But should be doable with some automation.
Even more awesome than chroot would be to pivot_root, but I couldn’t get that working either:
12.2. Secondary disk
A simpler and possibly less overhead alternative to 9P would be to generate a secondary disk image with the benchmark you want to rebuild.
Then you can umount and re-mount on guest without reboot.
We don’t support this yet, but it should not be too hard to hack it up, maybe by hooking into rootfs-post-build-script.
This was not possible from gem5 fs.py as of 60600f09c25255b3c8f72da7fb49100e2682093a: https://stackoverflow.com/questions/50862906/how-to-attach-multiple-disk-images-in-a-simulation-with-gem5-fs-py/51037661#51037661
13. Graphics
Both QEMU and gem5 are capable of outputting graphics to the screen, and taking mouse and keyboard input.
13.1. QEMU text mode
Text mode is the default mode for QEMU.
The opposite of text mode is QEMU graphic mode
In text mode, we just show the serial console directly on the current terminal, without opening a QEMU GUI window.
You cannot see any graphics from text mode, but text operations in this mode, including:
-
scrolling up: Section 13.2.1, “Scroll up in graphic mode”
-
copy paste to and from the terminal
making this a good default, unless you really need to use with graphics.
Text mode works by sending the terminal character by character to a serial device.
This is different from a display screen, where each character is a bunch of pixels, and it would be much harder to convert that into actual terminal text.
For more details, see:
Note that you can still see an image even in text mode with the VNC:
./run --vnc
and on another terminal:
./vnc
but there is not terminal on the VNC window, just the CONFIG_LOGO penguin.
13.1.1. Quit QEMU from text mode
However, our QEMU setup captures Ctrl + C and other common signals and sends them to the guest, which makes it hard to quit QEMU for the first time since there is no GUI either.
The simplest way to quit QEMU, is to do:
Ctrl-A X
Alternative methods include:
-
quitcommand on the QEMU monitor -
pkill qemu
13.2. QEMU graphic mode
Enable graphic mode with:
./run --graphic
Outcome: you see a penguin due to CONFIG_LOGO.
For a more exciting GUI experience, see: Section 13.4, “X11 Buildroot”
Text mode is the default due to the following considerable advantages:
-
copy and paste commands and stdout output to / from host
-
get full panic traces when you start making the kernel crash :-) See also: https://unix.stackexchange.com/questions/208260/how-to-scroll-up-after-a-kernel-panic
-
have a large scroll buffer, and be able to search it, e.g. by using tmux on host
-
one less window floating around to think about in addition to your shell :-)
-
graphics mode has only been properly tested on
x86_64.
Text mode has the following limitations over graphics mode:
-
you can’t see graphics such as those produced by X11 Buildroot
-
very early kernel messages such as
early console in extract_kernelonly show on the GUI, since at such early stages, not even the serial has been setup.
x86_64 has a VGA device enabled by default, as can be seen as:
./qemu-monitor info qtree
and the Linux kernel picks it up through the fbdev graphics system as can be seen from:
cat /dev/urandom > /dev/fb0
flooding the screen with colors. See also: https://superuser.com/questions/223094/how-do-i-know-if-i-have-kms-enabled
13.2.1. Scroll up in graphic mode
Scroll up in QEMU graphic mode:
Shift-PgUp
but I never managed to increase that buffer:
The superior alternative is to use text mode and GNU screen or tmux.
13.2.2. QEMU Graphic mode arm
13.2.2.1. QEMU graphic mode arm terminal
TODO: on arm, we see the penguin and some boot messages, but don’t get a shell at then end:
./run --arch aarch64 --graphic
I think it does not work because the graphic window is DRM only, i.e.:
cat /dev/urandom > /dev/fb0
fails with:
cat: write error: No space left on device
and has no effect, and the Linux kernel does not appear to have a built-in DRM console as it does for fbdev with fbcon.
There is however one out-of-tree implementation: kmscon.
13.2.2.2. QEMU graphic mode arm terminal implementation
arm and aarch64 rely on the QEMU CLI option:
-device virtio-gpu-pci
and the kernel config options:
CONFIG_DRM=y
CONFIG_DRM_VIRTIO_GPU=y
Unlike x86, arm and aarch64 don’t have a display device attached by default, thus the need for virtio-gpu-pci.
See also https://wiki.qemu.org/Documentation/Platforms/ARM (recently edited and corrected by yours truly… :-)).
13.2.2.3. QEMU graphic mode arm VGA
TODO: how to use VGA on ARM? https://stackoverflow.com/questions/20811203/how-can-i-output-to-vga-through-qemu-arm Tried:
-device VGA
# We use virtio-gpu because the legacy VGA framebuffer is
# very troublesome on aarch64, and virtio-gpu is the only
# video device that doesn't implement it.
so maybe it is not possible?
13.3. gem5 graphic mode
gem5 does not have a "text mode", since it cannot redirect the Linux terminal to same host terminal where the executable is running: you are always forced to connect to the terminal with gem-shell.
TODO could not get it working on x86_64, only ARM.
More concretely, first build the kernel with the gem5 arm Linux kernel patches, and then run:
./build-linux \
  --arch arm \
  --custom-config-file-gem5 \
  --linux-build-id gem5-v4.15 \
;
./run --arch arm --emulator gem5 --linux-build-id gem5-v4.15
and then on another shell:
vinagre localhost:5900
The CONFIG_LOGO penguin only appears after several seconds, together with kernel messages of type:
[    0.152755] [drm] found ARM HDLCD version r0p0
[    0.152790] hdlcd 2b000000.hdlcd: bound virt-encoder (ops 0x80935f94)
[    0.152795] [drm] Supports vblank timestamp caching Rev 2 (21.10.2013).
[    0.152799] [drm] No driver support for vblank timestamp query.
[    0.215179] Console: switching to colour frame buffer device 240x67
[    0.230389] hdlcd 2b000000.hdlcd: fb0:  frame buffer device
[    0.230509] [drm] Initialized hdlcd 1.0.0 20151021 for 2b000000.hdlcd on minor 0
The port 5900 is incremented by one if you already have something running on that port, gem5 stdout tells us the right port on stdout as:
system.vncserver: Listening for connections on port 5900
and when we connect it shows a message:
info: VNC client attached
Alternatively, you can also dump each new frame to an image file with --frame-capture:
./run \
  --arch arm \
  --emulator gem5 \
  --linux-build-id gem5-v4.15 \
  -- --frame-capture \
;
This creates on compressed PNG whenever the screen image changes inside the m5out directory with filename of type:
frames_system.vncserver/fb.<frame-index>.<timestamp>.png.gz
It is fun to see how we get one new frame whenever the white underscore cursor appears and reappears under the penguin!
The last frame is always available uncompressed at: system.framebuffer.png.
TODO kmscube failed on aarch64 with:
kmscube[706]: unhandled level 2 translation fault (11) at 0x00000000, esr 0x92000006, in libgbm.so.1.0.0[7fbf6a6000+e000]
Tested on: 38fd6153d965ba20145f53dc1bb3ba34b336bde9
13.3.1. Graphic mode gem5 aarch64
For aarch64 we also need to configure the kernel with linux_config/display:
git -C "$(./getvar linux_source_dir)" fetch https://gem5.googlesource.com/arm/linux gem5/v4.15:gem5/v4.15
git -C "$(./getvar linux_source_dir)" checkout gem5/v4.15
./build-linux \
  --arch aarch64 \
  --config-fragment linux_config/display \
  --custom-config-file-gem5 \
  --linux-build-id gem5-v4.15 \
;
git -C "$(./getvar linux_source_dir)" checkout -
./run --arch aarch64 --emulator gem5 --linux-build-id gem5-v4.15
This is because the gem5 aarch64 defconfig does not enable HDLCD like the 32 bit one arm one for some reason.
13.3.2. gem5 graphic mode DP650
TODO get working. There is an unmerged patchset at: https://gem5-review.googlesource.com/c/public/gem5/+/11036/1
The DP650 is a newer display hardware than HDLCD. TODO is its interface publicly documented anywhere? Since it has a gem5 model and in-tree Linux kernel support, that information cannot be secret?
The key option to enable support in Linux is DRM_MALI_DISPLAY=y which we enable at linux_config/display.
Build the kernel exactly as for Graphic mode gem5 aarch64 and then run with:
./run --arch aarch64 --dp650 --emulator gem5 --linux-build-id gem5-v4.15
13.3.3. Graphic mode gem5 internals
We cannot use mainline Linux because the gem5 arm Linux kernel patches are required at least to provide the CONFIG_DRM_VIRT_ENCODER option.
gem5 emulates the HDLCD ARM Holdings hardware for arm and aarch64.
The kernel uses HDLCD to implement the DRM interface, the required kernel config options are present at: linux_config/display.
TODO: minimize out the --custom-config-file. If we just remove it on arm: it does not work with a failing dmesg:
[    0.066208] [drm] found ARM HDLCD version r0p0
[    0.066241] hdlcd 2b000000.hdlcd: bound virt-encoder (ops drm_vencoder_ops)
[    0.066247] [drm] Supports vblank timestamp caching Rev 2 (21.10.2013).
[    0.066252] [drm] No driver support for vblank timestamp query.
[    0.066276] hdlcd 2b000000.hdlcd: Cannot do DMA to address 0x0000000000000000
[    0.066281] swiotlb: coherent allocation failed for device 2b000000.hdlcd size=8294400
[    0.066288] CPU: 0 PID: 1 Comm: swapper/0 Not tainted 4.15.0 #1
[    0.066293] Hardware name: V2P-AARCH64 (DT)
[    0.066296] Call trace:
[    0.066301]  dump_backtrace+0x0/0x1b0
[    0.066306]  show_stack+0x24/0x30
[    0.066311]  dump_stack+0xb8/0xf0
[    0.066316]  swiotlb_alloc_coherent+0x17c/0x190
[    0.066321]  __dma_alloc+0x68/0x160
[    0.066325]  drm_gem_cma_create+0x98/0x120
[    0.066330]  drm_fbdev_cma_create+0x74/0x2e0
[    0.066335]  __drm_fb_helper_initial_config_and_unlock+0x1d8/0x3a0
[    0.066341]  drm_fb_helper_initial_config+0x4c/0x58
[    0.066347]  drm_fbdev_cma_init_with_funcs+0x98/0x148
[    0.066352]  drm_fbdev_cma_init+0x40/0x50
[    0.066357]  hdlcd_drm_bind+0x220/0x428
[    0.066362]  try_to_bring_up_master+0x21c/0x2b8
[    0.066367]  component_master_add_with_match+0xa8/0xf0
[    0.066372]  hdlcd_probe+0x60/0x78
[    0.066377]  platform_drv_probe+0x60/0xc8
[    0.066382]  driver_probe_device+0x30c/0x478
[    0.066388]  __driver_attach+0x10c/0x128
[    0.066393]  bus_for_each_dev+0x70/0xb0
[    0.066398]  driver_attach+0x30/0x40
[    0.066402]  bus_add_driver+0x1d0/0x298
[    0.066408]  driver_register+0x68/0x100
[    0.066413]  __platform_driver_register+0x54/0x60
[    0.066418]  hdlcd_platform_driver_init+0x20/0x28
[    0.066424]  do_one_initcall+0x44/0x130
[    0.066428]  kernel_init_freeable+0x13c/0x1d8
[    0.066433]  kernel_init+0x18/0x108
[    0.066438]  ret_from_fork+0x10/0x1c
[    0.066444] hdlcd 2b000000.hdlcd: Failed to set initial hw configuration.
[    0.066470] hdlcd 2b000000.hdlcd: master bind failed: -12
[    0.066477] hdlcd: probe of 2b000000.hdlcd failed with error -12
So what other options are missing from gem5_defconfig? It would be cool to minimize it out to better understand the options.
13.4. X11 Buildroot
Once you’ve seen the CONFIG_LOGO penguin as a sanity check, you can try to go for a cooler X11 Buildroot setup.
Build and run:
./build-buildroot --config-fragment buildroot_config/x11
./run --graphic
Inside QEMU:
startx
And then from the GUI you can start exciting graphical programs such as:
xcalc
xeyes
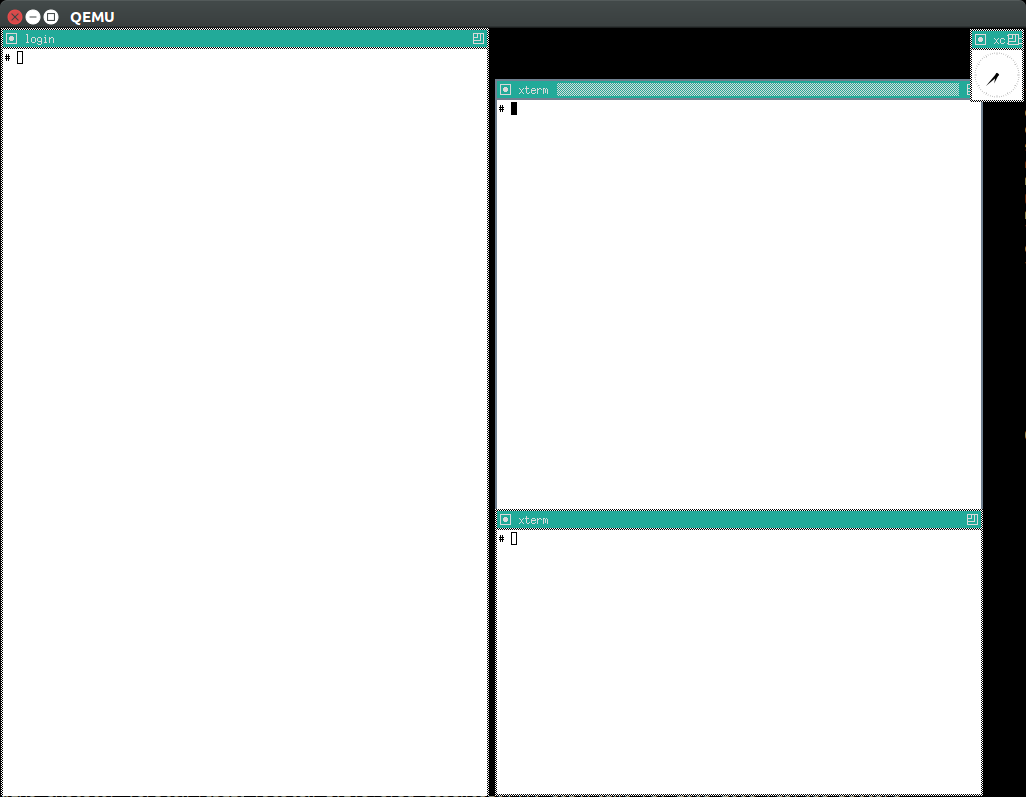
We don’t build X11 by default because it takes a considerable amount of time (about 20%), and is not expected to be used by most users: you need to pass the -x flag to enable it.
More details: https://unix.stackexchange.com/questions/70931/how-to-install-x11-on-my-own-linux-buildroot-system/306116#306116
Not sure how well that graphics stack represents real systems, but if it does it would be a good way to understand how it works.
To x11 packages have an xserver prefix as in:
./build-buildroot --config-fragment buildroot_config/x11 -- xserver_xorg-server-reconfigure
the easiest way to find them out is to just list "$(./getvar buildroot_build_build_dir)/x*.
TODO as of: c2696c978d6ca88e8b8599c92b1beeda80eb62b2 I noticed that startx leads to a BUG_ON:
[ 2.809104] WARNING: CPU: 0 PID: 51 at drivers/gpu/drm/ttm/ttm_bo_vm.c:304 ttm_bo_vm_open+0x37/0x40
13.4.1. X11 Buildroot mouse not moving
TODO 9076c1d9bcc13b6efdb8ef502274f846d8d4e6a1 I’m 100% sure that it was working before, but I didn’t run it forever, and it stopped working at some point. Needs bisection, on whatever commit last touched x11 stuff.
-show-cursor did not help, I just get to see the host cursor, but the guest cursor still does not move.
Doing:
watch -n 1 grep i8042 /proc/interrupts
shows that interrupts do happen when mouse and keyboard presses are done, so I expect that it is some wrong either with:
-
QEMU. Same behaviour if I try the host’s QEMU 2.10.1 however.
-
X11 configuration. We do have
BR2_PACKAGE_XDRIVER_XF86_INPUT_MOUSE=y.
/var/log/Xorg.0.log contains the following interesting lines:
[    27.549] (II) LoadModule: "mouse"
[    27.549] (II) Loading /usr/lib/xorg/modules/input/mouse_drv.so
[    27.590] (EE) <default pointer>: Cannot find which device to use.
[    27.590] (EE) <default pointer>: cannot open input device
[    27.590] (EE) PreInit returned 2 for "<default pointer>"
[    27.590] (II) UnloadModule: "mouse"
The file /dev/inputs/mice does not exist.
Note that our current link:kernel_confi_fragment sets:
# CONFIG_INPUT_MOUSE is not set
# CONFIG_INPUT_MOUSEDEV_PSAUX is not set
for gem5, so you might want to remove those lines to debug this.
13.4.2. X11 Buildroot ARM
On ARM, startx hangs at a message:
vgaarb: this pci device is not a vga device
and nothing shows on the screen, and:
grep EE /var/log/Xorg.0.log
says:
(EE) Failed to load module "modesetting" (module does not exist, 0)
A friend told me this but I haven’t tried it yet:
-
xf86-video-modesettingis likely the missing ingredient, but it does not seem possible to activate it from Buildroot currently without patching things. -
xf86-video-fbdevshould work as well, but we need to make sure fbdev is enabled, and maybe add some line to theXorg.conf
14. Networking
14.1. Enable networking
We disable networking by default because it starts an userland process, and we want to keep the number of userland processes to a minimum to make the system more understandable as explained at: Section 29.18.3, “Resource tradeoff guidelines”
To enable networking on Buildroot, simply run:
ifup -a
That command goes over all (-a) the interfaces in /etc/network/interfaces and brings them up.
Then test it with:
wget google.com
cat index.html
Disable networking with:
ifdown -a
To enable networking by default after boot, use the methods documented at Run command at the end of BusyBox init.
14.2. ping
ping does not work within QEMU by default, e.g.:
ping google.com
hangs after printing the header:
PING google.com (216.58.204.46): 56 data bytes
14.3. Guest host networking
In this section we discuss how to interact between the guest and the host through networking.
First ensure that you can access the external network since that is easier to get working, see: Section 14, “Networking”.
14.3.1. Host to guest networking
14.3.1.1. nc host to guest
With nc we can create the most minimal example possible as a sanity check.
On guest run:
nc -l -p 45455
Then on host run:
echo asdf | nc localhost 45455
asdf appears on the guest.
This uses:
-
BusyBox'
ncutility, which is enabled withCONFIG_NC=y -
ncfrom thenetcat-openbsdpackage on an Ubuntu 18.04 host
Only this specific port works by default since we have forwarded it on the QEMU command line.
We us this exact procedure to connect to gdbserver.
14.3.1.2. ssh into guest
Not enabled by default due to the build / runtime overhead. To enable, build with:
./build-buildroot --config 'BR2_PACKAGE_OPENSSH=y'
Then inside the guest turn on sshd:
./sshd.sh
Source: rootfs_overlay/lkmc/sshd.sh
And finally on host:
ssh root@localhost -p 45456
14.3.1.3. gem5 host to guest networking
Could not do port forwarding from host to guest, and therefore could not use gdbserver: https://stackoverflow.com/questions/48941494/how-to-do-port-forwarding-from-guest-to-host-in-gem5
14.3.2. Guest to host networking
First Enable networking.
Then in the host, start a server:
python -m SimpleHTTPServer 8000
And then in the guest, find the IP we need to hit with:
ip rounte
which gives:
default via 10.0.2.2 dev eth0
10.0.2.0/24 dev eth0 scope link  src 10.0.2.15
so we use in the guest:
wget 10.0.2.2:8000
14.4. 9P
The 9p protocol allows the guest to mount a host directory.
Both QEMU and 9P gem5 support 9P.
14.4.1. 9P vs NFS
All of 9P and NFS (and sshfs) allow sharing directories between guest and host.
Advantages of 9P
-
requires
sudoon the host to mount -
we could share a guest directory to the host, but this would require running a server on the guest, which adds simulation overhead
Furthermore, this would be inconvenient, since what we usually want to do is to share host cross built files with the guest, and to do that we would have to copy the files over after the guest starts the server.
-
QEMU implements 9P natively, which makes it very stable and convenient, and must mean it is a simpler protocol than NFS as one would expect.
This is not the case for gem5 7bfb7f3a43f382eb49853f47b140bfd6caad0fb8 unfortunately, which relies on the diod host daemon, although it is not unfeasible that future versions could implement it natively as well.
Advantages of NFS:
-
way more widely used and therefore stable and available, not to mention that it also works on real hardware.
-
the name does not start with a digit, which is an invalid identifier in all programming languages known to man. Who in their right mind would call a software project as such? It does not even match the natural order of Plan 9; Plan then 9: P9!
14.4.2. 9P getting started
As usual, we have already set everything up for you. On host:
cd "$(./getvar p9_dir)"
uname -a > host
Guest:
cd /mnt/9p/data
cat host
uname -a > guest
Host:
cat guest
The main ingredients for this are:
-
9Psettings in our kernel configs -
9pentry on our rootfs_overlay/etc/fstabAlternatively, you could also mount your own with:
mkdir /mnt/my9p
mount -t 9p -o trans=virtio,version=9p2000.L host0 /mnt/my9p
-
Launch QEMU with
-virtfsas in your run scriptWhen we tried:
security_model=mapped
writes from guest failed due to user mismatch problems: https://serverfault.com/questions/342801/read-write-access-for-passthrough-9p-filesystems-with-libvirt-qemu
Bibliography:
14.4.3. 9P gem5
TODO seems possible! Lets do it:
14.4.4. NFS
TODO: get working.
9P is better with emulation, but let’s just get this working for fun.
First make sure that this works: Section 14.3.2, “Guest to host networking”.
Then, build the kernel with NFS support:
./build-linux --config-fragment linux_config/nfs
Now on host:
sudo apt-get install nfs-kernel-server
Now edit /etc/exports to contain:
/tmp *(rw,sync,no_root_squash,no_subtree_check)
and restart the server:
sudo systemctl restart nfs-kernel-server
Now on guest:
mkdir /mnt/nfs
mount -t nfs 10.0.2.2:/tmp /mnt/nfs
TODO: failing with:
mount: mounting 10.0.2.2:/tmp on /mnt/nfs failed: No such device
And now the /tmp directory from host is not mounted on guest!
If you don’t want to start the NFS server after the next boot automatically so save resources, do:
systemctl disable nfs-kernel-server
15. Linux kernel
15.1. Linux kernel configuration
15.1.1. Modify kernel config
To modify a single option on top of our default kernel configs, do:
./build-linux --config 'CONFIG_FORTIFY_SOURCE=y'
Kernel modules depend on certain kernel configs, and therefore in general you might have to clean and rebuild the kernel modules after changing the kernel config:
./build-modules --clean
./build-modules
and then proceed as in Your first kernel module hack.
You might often get way without rebuilding the kernel modules however.
To use an extra kernel config fragment file on top of our defaults, do:
printf '
CONFIG_IKCONFIG=y
CONFIG_IKCONFIG_PROC=y
' > data/myconfig
./build-linux --config-fragment 'data/myconfig'
To use just your own exact .config instead of our defaults ones, use:
./build-linux --custom-config-file data/myconfig
There is also a shortcut --custom-config-file to use the gem5 arm Linux kernel patches.
The following options can all be used together, sorted by decreasing config setting power precedence:
-
--config -
--config-fragment -
--custom-config-file
To do a clean menu config yourself and use that for the build, do:
./build-linux --clean
./build-linux --custom-config-target menuconfig
But remember that every new build re-configures the kernel by default, so to keep your configs you will need to use on further builds:
./build-linux --no-configure
So what you likely want to do instead is to save that as a new defconfig and use it later as:
./build-linux --no-configure --no-modules-install savedefconfig
cp "$(./getvar linux_build_dir)/defconfig" data/myconfig
./build-linux --custom-config-file data/myconfig
You can also use other config generating targets such as defconfig with the same method as shown at: Section 15.1.3.1.1, “Linux kernel defconfig”.
15.1.2. Find the kernel config
Get the build config in guest:
zcat /proc/config.gz
or with our shortcut:
./conf.sh
or to conveniently grep for a specific option case insensitively:
./conf.sh ikconfig
Source: rootfs_overlay/lkmc/conf.sh.
This is enabled by:
CONFIG_IKCONFIG=y
CONFIG_IKCONFIG_PROC=y
From host:
cat "$(./getvar linux_config)"
Just for fun https://stackoverflow.com/questions/14958192/how-to-get-the-config-from-a-linux-kernel-image/14958263#14958263:
./linux/scripts/extract-ikconfig "$(./getvar vmlinux)"
although this can be useful when someone gives you a random image.
15.1.3. About our Linux kernel configs
By default, build-linux generates a .config that is a mixture of:
-
a base config extracted from Buildroot’s minimal per machine
.config, which has the minimal options needed to boot as explained at: Section 15.1.3.1, “About Buildroot’s kernel configs”. -
small overlays put top of that
To find out which kernel configs are being used exactly, simply run:
./build-linux --dry-run
and look for the merge_config.sh call. This script from the Linux kernel tree, as the name suggests, merges multiple configuration files into one as explained at: https://unix.stackexchange.com/questions/224887/how-to-script-make-menuconfig-to-automate-linux-kernel-build-configuration/450407#450407
For each arch, the base of our configs are named as:
linux_config/buildroot-<arch>
These configs are extracted directly from a Buildroot build with update-buildroot-kernel-configs.
Note that Buildroot can sed override some of the configurations, e.g. it forces CONFIG_BLK_DEV_INITRD=y when BR2_TARGET_ROOTFS_CPIO is on. For this reason, those configs are not simply copy pasted from Buildroot files, but rather from a Buildroot kernel build, and then minimized with make savedefconfig: https://stackoverflow.com/questions/27899104/how-to-create-a-defconfig-file-from-a-config
On top of those, we add the following by default:
-
linux_config/min: see: Section 15.1.3.1.2, “Linux kernel min config”
-
linux_config/default: other optional configs that we enable by default because they increase visibility, or expose some cool feature, and don’t significantly increase build time nor add significant runtime overhead
We have since observed that the kernel size itself is very bloated compared to
defconfigas shown at: Section 15.1.3.1.1, “Linux kernel defconfig”.
15.1.3.1. About Buildroot’s kernel configs
To see Buildroot’s base configs, start from buildroot/configs/qemu_x86_64_defconfig.
That file contains BR2_LINUX_KERNEL_CUSTOM_CONFIG_FILE="board/qemu/x86_64/linux-4.15.config", which points to the base config file used: board/qemu/x86_64/linux-4.15.config.
arm, on the other hand, uses buildroot/configs/qemu_arm_vexpress_defconfig, which contains BR2_LINUX_KERNEL_DEFCONFIG="vexpress", and therefore just does a make vexpress_defconfig, and gets its config from the Linux kernel tree itself.
15.1.3.1.1. Linux kernel defconfig
To boot defconfig from disk on Linux and see a shell, all we need is these missing virtio options:
./build-linux \
  --linux-build-id defconfig \
  --custom-config-target defconfig \
  --config CONFIG_VIRTIO_PCI=y \
  --config CONFIG_VIRTIO_BLK=y \
;
./run --linux-build-id defconfig
Oh, and check this out:
du -h \
  "$(./getvar vmlinux)" \
  "$(./getvar --linux-build-id defconfig vmlinux)" \
;
Output:
360M    /path/to/linux-kernel-module-cheat/out/linux/default/x86_64/vmlinux
47M     /path/to/linux-kernel-module-cheat/out/linux/defconfig/x86_64/vmlinux
Brutal. Where did we go wrong?
The extra virtio options are not needed if we use initrd:
./build-linux \
  --linux-build-id defconfig \
  --custom-config-target defconfig \
;
./run --initrd --linux-build-id defconfig
On aarch64, we can boot from initrd with:
./build-linux \
  --arch aarch64 \
  --linux-build-id defconfig \
  --custom-config-target defconfig \
;
./run \
  --arch aarch64 \
  --initrd \
  --linux-build-id defconfig \
  --memory 2G \
;
We need the 2G of memory because the CPIO is 600MiB due to a humongous amount of loadable kernel modules!
In aarch64, the size situation is inverted from x86_64, and this can be seen on the vmlinux size as well:
118M    /path/to/linux-kernel-module-cheat/out/linux/default/aarch64/vmlinux
240M    /path/to/linux-kernel-module-cheat/out/linux/defconfig/aarch64/vmlinux
So it seems that the ARM devs decided rather than creating a minimal config that boots QEMU, to try and make a single config that boots every board in existence. Terrible!
Bibliography: https://unix.stackexchange.com/questions/29439/compiling-the-kernel-with-default-configurations/204512#204512
Tested on 1e2b7f1e5e9e3073863dc17e25b2455c8ebdeadd + 1.
15.1.3.1.2. Linux kernel min config
linux_config/min contains minimal tweaks required to boot gem5 or for using our slightly different QEMU command line options than Buildroot on all archs.
It is one of the default config fragments we use, as explained at: Section 15.1.3, “About our Linux kernel configs”>.
Having the same config working for both QEMU and gem5 (oh, the hours of bisection) means that you can deal with functional matters in QEMU, which runs much faster, and switch to gem5 only for performance issues.
We can build just with min on top of the base config with:
./build-linux \
  --arch aarch64 \
  --config-fragment linux_config/min \
  --custom-config-file linux_config/buildroot-aarch64 \
  --linux-build-id min \
;
vmlinux had a very similar size to the default. It seems that linux_config/buildroot-aarch64 contains or implies most linux_config/default options already? TODO: that seems odd, really?
Tested on 649d06d6758cefd080d04dc47fd6a5a26a620874 + 1.
15.1.3.2. Notable alternate gem5 kernel configs
Other configs which we had previously tested at 4e0d9af81fcce2ce4e777cb82a1990d7c2ca7c1e are:
-
armandaarch64configs present in the official ARM gem5 Linux kernel fork as described at: Section 18.9, “gem5 arm Linux kernel patches”. Some of the configs present there are added by the patches. -
Jason’s magic
x86_64config: http://web.archive.org/web/20171229121642/http://www.lowepower.com/jason/files/config which is referenced at: http://web.archive.org/web/20171229121525/http://www.lowepower.com/jason/setting-up-gem5-full-system.html. QEMU boots with that by removing# CONFIG_VIRTIO_PCI is not set.
15.2. Kernel version
15.2.1. Find the kernel version
We try to use the latest possible kernel major release version.
In QEMU:
cat /proc/version
or in the source:
cd "$(./getvar linux_source_dir)"
git log | grep -E '    Linux [0-9]+\.' | head
15.2.2. Update the Linux kernel
During update all you kernel modules may break since the kernel API is not stable.
They are usually trivial breaks of things moving around headers or to sub-structs.
The userland, however, should simply not break, as Linus enforces strict backwards compatibility of userland interfaces.
This backwards compatibility is just awesome, it makes getting and running the latest master painless.
This also makes this repo the perfect setup to develop the Linux kernel.
In case something breaks while updating the Linux kernel, you can try to bisect it to understand the root cause, see: Section 29.14, “Bisection”.
15.2.2.1. Update the Linux kernel LKMC procedure
First, use use the branching procedure described at: Section 29.16, “Update a forked submodule”
Because the kernel is so central to this repository, almost all tests must be re-run, so basically just follow the full testing procedure described at: Section 29.13, “Test this repo”. The only tests that can be skipped are essentially the Baremetal tests.
Before comitting, don’t forget to update:
-
the
linux_kernel_versionconstant in common.py -
the tagline of this repository on:
-
this README
-
the GitHub project description
-
15.2.3. Downgrade the Linux kernel
The kernel is not forward compatible, however, so downgrading the Linux kernel requires downgrading the userland too to the latest Buildroot branch that supports it.
The default Linux kernel version is bumped in Buildroot with commit messages of type:
linux: bump default to version 4.9.6
So you can try:
git log --grep 'linux: bump default to version'
Those commits change BR2_LINUX_KERNEL_LATEST_VERSION in /linux/Config.in.
You should then look up if there is a branch that supports that kernel. Staying on branches is a good idea as they will get backports, in particular ones that fix the build as newer host versions come out.
Finally, after downgrading Buildroot, if something does not work, you might also have to make some changes to how this repo uses Buildroot, as the Buildroot configuration options might have changed.
We don’t expect those changes to be very difficult. A good way to approach the task is to:
-
do a dry run build to get the equivalent Bash commands used:
./build-buildroot --dry-run
-
build the Buildroot documentation for the version you are going to use, and check if all Buildroot build commands make sense there
Then, if you spot an option that is wrong, some grepping in this repo should quickly point you to the code you need to modify.
It also possible that you will need to apply some patches from newer Buildroot versions for it to build, due to incompatibilities with the host Ubuntu packages and that Buildroot version. Just read the error message, and try:
-
git log master — packages/<pkg> -
Google the error message for mailing list hits
Successful port reports:
15.3. Kernel command line parameters
Bootloaders can pass a string as input to the Linux kernel when it is booting to control its behaviour, much like the execve system call does to userland processes.
This allows us to control the behaviour of the kernel without rebuilding anything.
With QEMU, QEMU itself acts as the bootloader, and provides the -append option and we expose it through ./run --kernel-cli, e.g.:
./run --kernel-cli 'foo bar'
Then inside the host, you can check which options were given with:
cat /proc/cmdline
They are also printed at the beginning of the boot message:
dmesg | grep "Command line"
See also:
The arguments are documented in the kernel documentation: https://www.kernel.org/doc/html/v4.14/admin-guide/kernel-parameters.html
When dealing with real boards, extra command line options are provided on some magic bootloader configuration file, e.g.:
-
GRUB configuration files: https://askubuntu.com/questions/19486/how-do-i-add-a-kernel-boot-parameter
-
Raspberry pi
/boot/cmdline.txton a magic partition: https://raspberrypi.stackexchange.com/questions/14839/how-to-change-the-kernel-commandline-for-archlinuxarm-on-raspberry-pi-effectly
15.3.1. Kernel command line parameters escaping
Double quotes can be used to escape spaces as in opt="a b", but double quotes themselves cannot be escaped, e.g. opt"a\"b"
This even lead us to use base64 encoding with --eval!
15.3.2. Kernel command line parameters definition points
There are two methods:
-
__setupas in:__setup("console=", console_setup); -
core_paramas in:core_param(panic, panic_timeout, int, 0644);
core_param suggests how they are different:
/**
 * core_param - define a historical core kernel parameter.

...

 * core_param is just like module_param(), but cannot be modular and
 * doesn't add a prefix (such as "printk.").  This is for compatibility
 * with __setup(), and it makes sense as truly core parameters aren't
 * tied to the particular file they're in.
 */
15.3.3. rw
By default, the Linux kernel mounts the root filesystem as readonly. TODO rationale?
This cannot be observed in the default BusyBox init, because by default our rootfs_overlay/etc/inittab does:
/bin/mount -o remount,rw /
Analogously, Ubuntu 18.04 does in its fstab something like:
UUID=/dev/sda1 / ext4 errors=remount-ro 0 1
which uses default mount rw flags.
We have however removed those setups init setups to keep things more minimal, and replaced them with the rw kernel boot parameter makes the root mounted as writable.
To observe the default readonly behaviour, hack the run script to remove replace init, and then run on a raw shell:
./run --kernel-cli 'init=/bin/sh'
Now try to do:
touch a
which fails with:
touch: a: Read-only file system
We can also observe the read-onlyness with:
mount -t proc /proc
mount
which contains:
/dev/root on / type ext2 (ro,relatime,block_validity,barrier,user_xattr)
and so it is Read Only as shown by ro.
15.3.4. norandmaps
Disable userland address space randomization. Test it out by running rand_check.out twice:
./run --eval-after './linux/rand_check.out;./linux/poweroff.out'
./run --eval-after './linux/rand_check.out;./linux/poweroff.out'
If we remove it from our run script by hacking it up, the addresses shown by linux/rand_check.out vary across boots.
Equivalent to:
echo 0 > /proc/sys/kernel/randomize_va_space
15.4. printk
printk is the most simple and widely used way of getting information from the kernel, so you should familiarize yourself with its basic configuration.
We use printk a lot in our kernel modules, and it shows on the terminal by default, along with stdout and what you type.
Hide all printk messages:
dmesg -n 1
or equivalently:
echo 1 > /proc/sys/kernel/printk
See also: https://superuser.com/questions/351387/how-to-stop-kernel-messages-from-flooding-my-console
Do it with a Kernel command line parameters to affect the boot itself:
./run --kernel-cli 'loglevel=5'
and now only boot warning messages or worse show, which is useful to identify problems.
Our default printk format is:
<LEVEL>[TIMESTAMP] MESSAGE
e.g.:
<6>[ 2.979121] Freeing unused kernel memory: 2024K
where:
-
LEVEL: higher means less serious -
TIMESTAMP: seconds since boot
This format is selected by the following boot options:
-
console_msg_format=syslog: add the<LEVEL>part. Added in v4.16. -
printk.time=y: add the[TIMESTAMP]part
The debug highest level is a bit more magic, see: Section 15.4.2, “pr_debug” for more info.
15.4.1. ignore_loglevel
./run --kernel-cli 'ignore_loglevel'
enables all log levels, and is basically the same as:
./run --kernel-cli 'loglevel=8'
except that you don’t need to know what is the maximum level.
15.4.2. pr_debug
Debug messages are not printable by default without recompiling.
But the awesome CONFIG_DYNAMIC_DEBUG=y option which we enable by default allows us to do:
echo 8 > /proc/sys/kernel/printk
echo 'file kernel/module.c +p' > /sys/kernel/debug/dynamic_debug/control
./linux/myinsmod.out hello.ko
and we have a shortcut at:
./pr_debug.sh
Source: rootfs_overlay/lkmc/pr_debug.sh.
Wildcards are also accepted, e.g. enable all messages from all files:
echo 'file * +p' > /sys/kernel/debug/dynamic_debug/control
TODO: why is this not working:
echo 'func sys_init_module +p' > /sys/kernel/debug/dynamic_debug/control
Enable messages in specific modules:
echo 8 > /proc/sys/kernel/printk
echo 'module myprintk +p' > /sys/kernel/debug/dynamic_debug/control
insmod myprintk.ko
Source: kernel_modules/myprintk.c
This outputs the pr_debug message:
printk debug
but TODO: it also shows debug messages even without enabling them explicitly:
echo 8 > /proc/sys/kernel/printk
insmod myprintk.ko
and it shows as enabled:
# grep myprintk /sys/kernel/debug/dynamic_debug/control
/root/linux-kernel-module-cheat/out/kernel_modules/x86_64/kernel_modules/panic.c:12 [myprintk]myinit =p "pr_debug\012"
Enable pr_debug for boot messages as well, before we can reach userland and write to /proc:
./run --kernel-cli 'dyndbg="file * +p" loglevel=8'
Get ready for the noisiest boot ever, I think it overflows the printk buffer and funny things happen.
15.4.2.1. pr_debug != printk(KERN_DEBUG
When CONFIG_DYNAMIC_DEBUG is set, printk(KERN_DEBUG is not the exact same as pr_debug( since printk(KERN_DEBUG messages are visible with:
./run --kernel-cli 'initcall_debug logleve=8'
which outputs lines of type:
<7>[    1.756680] calling  clk_disable_unused+0x0/0x130 @ 1
<7>[    1.757003] initcall clk_disable_unused+0x0/0x130 returned 0 after 111 usecs
which are printk(KERN_DEBUG inside init/main.c in v4.16.
Mentioned at: https://stackoverflow.com/questions/37272109/how-to-get-details-of-all-modules-drivers-got-initialized-probed-during-kernel-b
This likely comes from the ifdef split at init/main.c:
/* If you are writing a driver, please use dev_dbg instead */
#if defined(CONFIG_DYNAMIC_DEBUG)
#include <linux/dynamic_debug.h>

/* dynamic_pr_debug() uses pr_fmt() internally so we don't need it here */
#define pr_debug(fmt, ...) \
    dynamic_pr_debug(fmt, ##__VA_ARGS__)
#elif defined(DEBUG)
#define pr_debug(fmt, ...) \
    printk(KERN_DEBUG pr_fmt(fmt), ##__VA_ARGS__)
#else
#define pr_debug(fmt, ...) \
    no_printk(KERN_DEBUG pr_fmt(fmt), ##__VA_ARGS__)
#endif
15.5. Linux kernel entry point
start_kernel is a good definition of it: https://stackoverflow.com/questions/18266063/does-kernel-have-main-function/33422401#33422401
15.6. Kernel module APIs
15.6.1. Kernel module parameters
The Linux kernel allows passing module parameters at insertion time through the init_module and finit_module system calls.
The insmod tool exposes that as:
insmod params.ko i=3 j=4
Parameters are declared in the module as:
static u32 i = 0;
module_param(i, int, S_IRUSR | S_IWUSR);
MODULE_PARM_DESC(i, "my favorite int");
Automated test:
./params.sh
echo $?
Outcome: the test passes:
0
Sources:
As shown in the example, module parameters can also be read and modified at runtime from sysfs.
We can obtain the help text of the parameters with:
modinfo params.ko
The output contains:
parm:           j:my second favorite int
parm:           i:my favorite int
15.6.1.1. modprobe.conf
modprobe insertion can also set default parameters via the /etc/modprobe.conf file:
modprobe params
cat /sys/kernel/debug/lkmc_params
Output:
12 34
This is specially important when loading modules with Kernel module dependencies or else we would have no opportunity of passing those.
modprobe.conf doesn’t actually insmod anything for us: https://superuser.com/questions/397842/automatically-load-kernel-module-at-boot-angstrom/1267464#1267464
15.6.2. Kernel module dependencies
One module can depend on symbols of another module that are exported with EXPORT_SYMBOL:
./dep.sh
echo $?
Outcome: the test passes:
0
Sources:
The kernel deduces dependencies based on the EXPORT_SYMBOL that each module uses.
Symbols exported by EXPORT_SYMBOL can be seen with:
insmod dep.ko
grep lkmc_dep /proc/kallsyms
sample output:
ffffffffc0001030 r __ksymtab_lkmc_dep   [dep]
ffffffffc000104d r __kstrtab_lkmc_dep   [dep]
ffffffffc0002300 B lkmc_dep     [dep]
This requires CONFIG_KALLSYMS_ALL=y.
Dependency information is stored by the kernel module build system in the .ko files' MODULE_INFO, e.g.:
modinfo dep2.ko
contains:
depends: dep
We can double check with:
strings 3 dep2.ko | grep -E 'depends'
The output contains:
depends=dep
Module dependencies are also stored at:
cd /lib/module/*
grep dep modules.dep
Output:
extra/dep2.ko: extra/dep.ko
extra/dep.ko:
TODO: what for, and at which point point does Buildroot / BusyBox generate that file?
15.6.2.1. Kernel module dependencies with modprobe
Unlike insmod, modprobe deals with kernel module dependencies for us.
First get kernel_modules buildroot package working.
Then, for example:
modprobe buildroot_dep2
outputs to dmesg:
42
and then:
lsmod
outputs:
Module                  Size  Used by    Tainted: G
buildroot_dep2         16384  0
buildroot_dep          16384  1 buildroot_dep2
Sources:
Removal also removes required modules that have zero usage count:
modprobe -r buildroot_dep2
modprobe uses information from the modules.dep file to decide the required dependencies. That file contains:
extra/buildroot_dep2.ko: extra/buildroot_dep.ko
Bibliography:
15.6.3. MODULE_INFO
Module metadata is stored on module files at compile time. Some of the fields can be retrieved through the THIS_MODULE struct module:
insmod module_info.ko
Dmesg output:
name = module_info
version = 1.0
Source: kernel_modules/module_info.c
Some of those are also present on sysfs:
cat /sys/module/module_info/version
Output:
1.0
And we can also observe them with the modinfo command line utility:
modinfo module_info.ko
sample output:
filename:       module_info.ko
license:        GPL
version:        1.0
srcversion:     AF3DE8A8CFCDEB6B00E35B6
depends:
vermagic:       4.17.0 SMP mod_unload modversions
Module information is stored in a special .modinfo section of the ELF file:
./run-toolchain readelf -- -SW "$(./getvar kernel_modules_build_subdir)/module_info.ko"
contains:
[ 5] .modinfo PROGBITS 0000000000000000 0000d8 000096 00 A 0 0 8
and:
./run-toolchain readelf -- -x .modinfo "$(./getvar kernel_modules_build_subdir)/module_info.ko"
gives:
  0x00000000 6c696365 6e73653d 47504c00 76657273 license=GPL.vers
  0x00000010 696f6e3d 312e3000 61736466 3d717765 ion=1.0.asdf=qwe
  0x00000020 72000000 00000000 73726376 65727369 r.......srcversi
  0x00000030 6f6e3d41 46334445 38413843 46434445 on=AF3DE8A8CFCDE
  0x00000040 42364230 30453335 42360000 00000000 B6B00E35B6......
  0x00000050 64657065 6e64733d 006e616d 653d6d6f depends=.name=mo
  0x00000060 64756c65 5f696e66 6f007665 726d6167 dule_info.vermag
  0x00000070 69633d34 2e31372e 3020534d 50206d6f ic=4.17.0 SMP mo
  0x00000080 645f756e 6c6f6164 206d6f64 76657273 d_unload modvers
  0x00000090 696f6e73 2000                       ions .
I think a dedicated section is used to allow the Linux kernel and command line tools to easily parse that information from the ELF file as we’ve done with readelf.
Bibliography:
15.6.4. vermagic
Vermagic is a magic string present in the kernel and on MODULE_INFO of kernel modules. It is used to verify that the kernel module was compiled against a compatible kernel version and relevant configuration:
insmod vermagic.ko
Possible dmesg output:
VERMAGIC_STRING = 4.17.0 SMP mod_unload modversions
Source: kernel_modules/vermagic.c
If we artificially create a mismatch with MODULE_INFO(vermagic, the insmod fails with:
insmod: can't insert 'vermagic_fail.ko': invalid module format
and dmesg says the expected and found vermagic found:
vermagic_fail: version magic 'asdfqwer' should be '4.17.0 SMP mod_unload modversions '
Source: kernel_modules/vermagic_fail.c
The kernel’s vermagic is defined based on compile time configurations at include/linux/vermagic.h:
#define VERMAGIC_STRING                                                 \
        UTS_RELEASE " "                                                 \
        MODULE_VERMAGIC_SMP MODULE_VERMAGIC_PREEMPT                     \
        MODULE_VERMAGIC_MODULE_UNLOAD MODULE_VERMAGIC_MODVERSIONS       \
        MODULE_ARCH_VERMAGIC                                            \
        MODULE_RANDSTRUCT_PLUGIN
The SMP part of the string for example is defined on the same file based on the value of CONFIG_SMP:
#ifdef CONFIG_SMP
#define MODULE_VERMAGIC_SMP "SMP "
#else
#define MODULE_VERMAGIC_SMP ""
TODO how to get the vermagic from running kernel from userland? https://lists.kernelnewbies.org/pipermail/kernelnewbies/2012-October/006306.html
kmod modprobe has a flag to skip the vermagic check:
--force-modversion
This option just strips modversion information from the module before loading, so it is not a kernel feature.
15.6.5. init_module
init_module and cleanup_module are an older alternative to the module_init and module_exit macros:
insmod init_module.ko
rmmod init_module
Dmesg output:
init_module
cleanup_module
Source: kernel_modules/init_module.c
TODO why were module_init and module_exit created? https://stackoverflow.com/questions/3218320/what-is-the-difference-between-module-init-and-init-module-in-a-linux-kernel-mod
15.6.6. Floating point in kernel modules
It is generally hard / impossible to use floating point operations in the kernel. TODO understand details.
A quick (x86-only for now because lazy) example is shown at: kernel_modules/float.c
Usage:
insmod float.ko myfloat=1 enable_fpu=1
We have to call: kernel_fpu_begin() before starting FPU operations, and kernel_fpu_end() when we are done. This particular example however did not blow up without it at lkmc 7f917af66b17373505f6c21d75af9331d624b3a9 + 1:
insmod float.ko myfloat=1 enable_fpu=0
The v5.1 documentation under arch/x86/include/asm/fpu/api.h reads:
 * Use kernel_fpu_begin/end() if you intend to use FPU in kernel context. It
 * disables preemption so be careful if you intend to use it for long periods
 * of time.
The example sets in the kernel_modules/Makefile:
CFLAGS_REMOVE_float.o += -mno-sse -mno-sse2
to avoid:
error: SSE register return with SSE disabled
We found those flags with ./build-modules --verbose.
Bibliography:
15.7. Kernel panic and oops
To test out kernel panics and oops in controlled circumstances, try out the modules:
insmod panic.ko
insmod oops.ko
Source:
A panic can also be generated with:
echo c > /proc/sysrq-trigger
Panic vs oops: https://unix.stackexchange.com/questions/91854/whats-the-difference-between-a-kernel-oops-and-a-kernel-panic
How to generate them:
When a panic happens, Shift-PgUp does not work as it normally does, and it is hard to get the logs if on are on QEMU graphic mode:
15.7.1. Kernel panic
On panic, the kernel dies, and so does our terminal.
The panic trace looks like:
panic: loading out-of-tree module taints kernel.
panic myinit
Kernel panic - not syncing: hello panic
CPU: 0 PID: 53 Comm: insmod Tainted: G           O     4.16.0 #6
Hardware name: QEMU Standard PC (i440FX + PIIX, 1996), BIOS rel-1.11.0-0-g63451fca13-prebuilt.qemu-project.org 04/01/2014
Call Trace:
 dump_stack+0x7d/0xba
 ? 0xffffffffc0000000
 panic+0xda/0x213
 ? printk+0x43/0x4b
 ? 0xffffffffc0000000
 myinit+0x1d/0x20 [panic]
 do_one_initcall+0x3e/0x170
 do_init_module+0x5b/0x210
 load_module+0x2035/0x29d0
 ? kernel_read_file+0x7d/0x140
 ? SyS_finit_module+0xa8/0xb0
 SyS_finit_module+0xa8/0xb0
 do_syscall_64+0x6f/0x310
 ? trace_hardirqs_off_thunk+0x1a/0x32
 entry_SYSCALL_64_after_hwframe+0x42/0xb7
RIP: 0033:0x7ffff7b36206
RSP: 002b:00007fffffffeb78 EFLAGS: 00000206 ORIG_RAX: 0000000000000139
RAX: ffffffffffffffda RBX: 000000000000005c RCX: 00007ffff7b36206
RDX: 0000000000000000 RSI: 000000000069e010 RDI: 0000000000000003
RBP: 000000000069e010 R08: 00007ffff7ddd320 R09: 0000000000000000
R10: 00007ffff7ddd320 R11: 0000000000000206 R12: 0000000000000003
R13: 00007fffffffef4a R14: 0000000000000000 R15: 0000000000000000
Kernel Offset: disabled
---[ end Kernel panic - not syncing: hello panic
Notice how our panic message hello panic is visible at:
Kernel panic - not syncing: hello panic
15.7.1.1. Kernel module stack trace to source line
The log shows which module each symbol belongs to if any, e.g.:
myinit+0x1d/0x20 [panic]
says that the function myinit is in the module panic.
To find the line that panicked, do:
./run-gdb
and then:
info line *(myinit+0x1d)
which gives us the correct line:
Line 7 of "/root/linux-kernel-module-cheat/out/kernel_modules/x86_64/kernel_modules/panic.c" starts at address 0xbf00001c <myinit+28> and ends at 0xbf00002c <myexit>.
as explained at: https://stackoverflow.com/questions/8545931/using-gdb-to-convert-addresses-to-lines/27576029#27576029
The exact same thing can be done post mortem with:
./run-toolchain gdb -- \
  -batch \
  -ex 'info line *(myinit+0x1d)' \
  "$(./getvar kernel_modules_build_subdir)/panic.ko" \
;
Related:
15.7.1.2. BUG_ON
Basically just calls panic("BUG!") for most archs.
15.7.1.3. Exit emulator on panic
For testing purposes, it is very useful to quit the emulator automatically with exit status non zero in case of kernel panic, instead of just hanging forever.
15.7.1.3.1. Exit QEMU on panic
Enabled by default with:
-
panic=-1command line option which reboots the kernel immediately on panic, see: Section 15.7.1.4, “Reboot on panic” -
QEMU
-no-reboot, which makes QEMU exit when the guest tries to reboot
Also asked at https://unix.stackexchange.com/questions/443017/can-i-make-qemu-exit-with-failure-on-kernel-panic which also mentions the x86_64 -device pvpanic, but I don’t see much advantage to it.
TODO neither method exits with exit status different from 0, so for now we are just grepping the logs for panic messages, which sucks.
One possibility that gets close would be to use GDB step debug to break at the panic function, and then send a QEMU monitor from GDB quit command if that happens, but I don’t see a way to exit with non-zero status to indicate error.
15.7.1.3.2. Exit gem5 on panic
gem5 9048ef0ffbf21bedb803b785fb68f83e95c04db8 (January 2019) can detect panics automatically if the option system.panic_on_panic is on.
It parses kernel symbols and detecting when the PC reaches the address of the panic function. gem5 then prints to stdout:
Kernel panic in simulated kernel
and exits with status -6.
At gem5 ff52563a214c71fcd1e21e9f00ad839612032e3b (July 2018) behaviour was different, and just exited 0: https://www.mail-archive.com/gem5-users@gem5.org/msg15870.html TODO find fixing commit.
We enable the system.panic_on_panic option by default on arm and aarch64, which makes gem5 exit immediately in case of panic, which is awesome!
If we don’t set system.panic_on_panic, then gem5 just hangs on an infinite guest loop.
TODO: why doesn’t gem5 x86 ff52563a214c71fcd1e21e9f00ad839612032e3b support system.panic_on_panic as well? Trying to set system.panic_on_panic there fails with:
tried to set or access non-existentobject parameter: panic_on_panic
However, at that commit panic on x86 makes gem5 crash with:
panic: i8042 "System reset" command not implemented.
which is a good side effect of an unimplemented hardware feature, since the simulation actually stops.
The implementation of panic detection happens at: https://github.com/gem5/gem5/blob/1da285dfcc31b904afc27e440544d006aae25b38/src/arch/arm/linux/system.cc#L73
        kernelPanicEvent = addKernelFuncEventOrPanic<Linux::KernelPanicEvent>(
            "panic", "Kernel panic in simulated kernel", dmesg_output);
Here we see that the symbol "panic" for the panic() function is the one being tracked.
15.7.1.4. Reboot on panic
Make the kernel reboot after n seconds after panic:
echo 1 > /proc/sys/kernel/panic
Can also be controlled with the panic= kernel boot parameter.
0 to disable, -1 to reboot immediately.
Bibliography:
15.7.1.5. Panic trace show addresses instead of symbols
If CONFIG_KALLSYMS=n, then addresses are shown on traces instead of symbol plus offset.
In v4.16 it does not seem possible to configure that at runtime. GDB step debugging with:
./run --eval-after 'insmod dump_stack.ko' --gdb-wait --tmux-args dump_stack
shows that traces are printed at arch/x86/kernel/dumpstack.c:
static void printk_stack_address(unsigned long address, int reliable,
                 char *log_lvl)
{
    touch_nmi_watchdog();
    printk("%s %s%pB\n", log_lvl, reliable ? "" : "? ", (void *)address);
}
and %pB is documented at Documentation/core-api/printk-formats.rst:
If KALLSYMS are disabled then the symbol address is printed instead.
I wasn’t able do disable CONFIG_KALLSYMS to test this this out however, it is being selected by some other option? But I then used make menuconfig to see which options select it, and they were all off…
15.7.2. Kernel oops
On oops, the shell still lives after.
However we:
-
leave the normal control flow, and
oops afternever gets printed: an interrupt is serviced -
cannot
rmmod oopsafterwards
It is possible to make oops lead to panics always with:
echo 1 > /proc/sys/kernel/panic_on_oops
insmod oops.ko
An oops stack trace looks like:
BUG: unable to handle kernel NULL pointer dereference at 0000000000000000
IP: myinit+0x18/0x30 [oops]
PGD dccf067 P4D dccf067 PUD dcc1067 PMD 0
Oops: 0002 [#1] SMP NOPTI
Modules linked in: oops(O+)
CPU: 0 PID: 53 Comm: insmod Tainted: G           O     4.16.0 #6
Hardware name: QEMU Standard PC (i440FX + PIIX, 1996), BIOS rel-1.11.0-0-g63451fca13-prebuilt.qemu-project.org 04/01/2014
RIP: 0010:myinit+0x18/0x30 [oops]
RSP: 0018:ffffc900000d3cb0 EFLAGS: 00000282
RAX: 000000000000000b RBX: ffffffffc0000000 RCX: ffffffff81e3e3a8
RDX: 0000000000000001 RSI: 0000000000000086 RDI: ffffffffc0001033
RBP: ffffc900000d3e30 R08: 69796d2073706f6f R09: 000000000000013b
R10: ffffea0000373280 R11: ffffffff822d8b2d R12: 0000000000000000
R13: ffffffffc0002050 R14: ffffffffc0002000 R15: ffff88000dc934c8
FS:  00007ffff7ff66a0(0000) GS:ffff88000fc00000(0000) knlGS:0000000000000000
CS:  0010 DS: 0000 ES: 0000 CR0: 0000000080050033
CR2: 0000000000000000 CR3: 000000000dcd2000 CR4: 00000000000006f0
Call Trace:
 do_one_initcall+0x3e/0x170
 do_init_module+0x5b/0x210
 load_module+0x2035/0x29d0
 ? SyS_finit_module+0xa8/0xb0
 SyS_finit_module+0xa8/0xb0
 do_syscall_64+0x6f/0x310
 ? trace_hardirqs_off_thunk+0x1a/0x32
 entry_SYSCALL_64_after_hwframe+0x42/0xb7
RIP: 0033:0x7ffff7b36206
RSP: 002b:00007fffffffeb78 EFLAGS: 00000206 ORIG_RAX: 0000000000000139
RAX: ffffffffffffffda RBX: 000000000000005c RCX: 00007ffff7b36206
RDX: 0000000000000000 RSI: 000000000069e010 RDI: 0000000000000003
RBP: 000000000069e010 R08: 00007ffff7ddd320 R09: 0000000000000000
R10: 00007ffff7ddd320 R11: 0000000000000206 R12: 0000000000000003
R13: 00007fffffffef4b R14: 0000000000000000 R15: 0000000000000000
Code: <c7> 04 25 00 00 00 00 00 00 00 00 e8 b2 33 09 c1 31 c0 c3 0f 1f 44
RIP: myinit+0x18/0x30 [oops] RSP: ffffc900000d3cb0
CR2: 0000000000000000
---[ end trace 3cdb4e9d9842b503 ]---
To find the line that oopsed, look at the RIP register:
RIP: 0010:myinit+0x18/0x30 [oops]
and then on GDB:
./run-gdb
run
info line *(myinit+0x18)
which gives us the correct line:
Line 7 of "/root/linux-kernel-module-cheat/out/kernel_modules/x86_64/kernel_modules/panic.c" starts at address 0xbf00001c <myinit+28> and ends at 0xbf00002c <myexit>.
This-did not work on arm due to GDB step debug kernel module insmodded by init on ARM so we need to either:
-
Kernel module stack trace to source line post-mortem method
15.7.3. dump_stack
The dump_stack function produces a stack trace much like panic and oops, but causes no problems and we return to the normal control flow, and can cleanly remove the module afterwards:
insmod dump_stack.ko
Source: kernel_modules/dump_stack.c
15.7.4. WARN_ON
The WARN_ON macro basically just calls dump_stack.
One extra side effect is that we can make it also panic with:
echo 1 > /proc/sys/kernel/panic_on_warn
insmod warn_on.ko
Source: kernel_modules/warn_on.c
Can also be activated with the panic_on_warn boot parameter.
15.8. Pseudo filesystems
Pseudo filesystems are filesystems that don’t represent actual files in a hard disk, but rather allow us to do special operations on filesystem-related system calls.
What each pseudo-file does for each related system call does is defined by its File operations.
Bibliography:
15.8.1. debugfs
Debugfs is the simplest pseudo filesystem to play around with:
./debugfs.sh
echo $?
Outcome: the test passes:
0
Sources:
Debugfs is made specifically to help test kernel stuff. Just mount, set File operations, and we are done.
For this reason, it is the filesystem that we use whenever possible in our tests.
debugfs.sh explicitly mounts a debugfs at a custom location, but the most common mount point is /sys/kernel/debug.
This mount not done automatically by the kernel however: we, like most distros, do it from userland with our fstab.
Debugfs support requires the kernel to be compiled with CONFIG_DEBUG_FS=y.
Only the more basic file operations can be implemented in debugfs, e.g. mmap never gets called:
Bibliography: https://github.com/chadversary/debugfs-tutorial
15.8.2. procfs
Procfs is just another fops entry point:
./procfs.sh
echo $?
Outcome: the test passes:
0
Procfs is a little less convenient than debugfs, but is more used in serious applications.
Procfs can run all system calls, including ones that debugfs can’t, e.g. mmap.
Sources:
Bibliography:
15.8.2.1. /proc/version
Its data is shared with uname(), which is a POSIX C function and has a Linux syscall to back it up.
Where the data comes from and how to modify it:
In this repo, leaking host information, and to make builds more reproducible, we are setting:
-
user and date to dummy values with
KBUILD_BUILD_USERandKBUILD_BUILD_TIMESTAMP -
hostname to the kernel git commit with
KBUILD_BUILD_HOSTandKBUILD_BUILD_VERSION
A sample result is:
Linux version 4.19.0-dirty (lkmc@84df9525b0c27f3ebc2ebb1864fa62a97fdedb7d) (gcc version 6.4.0 (Buildroot 2018.05-00002-gbc60382b8f)) #1 SMP Thu Jan 1 00:00:00 UTC 1970
15.8.3. sysfs
Sysfs is more restricted than procfs, as it does not take an arbitrary file_operations:
./sysfs.sh
echo $?
Outcome: the test passes:
0
Sources:
Vs procfs:
You basically can only do open, close, read, write, and lseek on sysfs files.
It is similar to a seq_file file operation, except that write is also implemented.
TODO: what are those kobject structs? Make a more complex example that shows what they can do.
Bibliography:
15.8.4. Character devices
Character devices can have arbitrary File operations associated to them:
./character_device.sh
echo $?
Outcome: the test passes:
0
Sources:
Unlike procfs entires, character device files are created with userland mknod or mknodat syscalls:
mknod </dev/path_to_dev> c <major> <minor>
Intuitively, for physical devices like keyboards, the major number maps to which driver, and the minor number maps to which device it is.
A single driver can drive multiple compatible devices.
The major and minor numbers can be observed with:
ls -l /dev/urandom
Output:
crw-rw-rw- 1 root root 1, 9 Jun 29 05:45 /dev/urandom
which means:
-
c(first letter): this is a character device. Would bebfor a block device. -
1, 9: the major number is1, and the minor9
To avoid device number conflicts when registering the driver we:
-
ask the kernel to allocate a free major number for us with:
register_chrdev(0 -
find ouf which number was assigned by grepping
/proc/devicesfor the kernel module name
Bibliography: https://unix.stackexchange.com/questions/37829/understanding-character-device-or-character-special-files/371758#371758
15.8.4.1. Automatically create character device file on insmod
And also destroy it on rmmod:
./character_device_create.sh echo $?
Outcome: the test passes:
0
Sources:
15.9. Pseudo files
15.9.1. File operations
File operations are the main method of userland driver communication. struct file_operations determines what the kernel will do on filesystem system calls of Pseudo filesystems.
This example illustrates the most basic system calls: open, read, write, close and lseek:
./fops.sh echo $?
Outcome: the test passes:
0
Sources:
Then give this a try:
sh -x ./fops.sh
We have put printks on each fop, so this allows you to see which system calls are being made for each command.
No, there no official documentation: https://stackoverflow.com/questions/15213932/what-are-the-struct-file-operations-arguments
15.9.2. seq_file
Writing trivial read File operations is repetitive and error prone. The seq_file API makes the process much easier for those trivial cases:
./seq_file.sh echo $?
Outcome: the test passes:
0
Sources:
In this example we create a debugfs file that behaves just like a file that contains:
0 1 2
However, we only store a single integer in memory and calculate the file on the fly in an iterator fashion.
seq_file does not provide write: https://stackoverflow.com/questions/30710517/how-to-implement-a-writable-proc-file-by-using-seq-file-in-a-driver-module
Bibliography:
15.9.2.1. seq_file single_open
If you have the entire read output upfront, single_open is an even more convenient version of seq_file:
./seq_file.sh echo $?
Outcome: the test passes:
0
Sources:
This example produces a debugfs file that behaves like a file that contains:
ab cd
15.9.3. poll
The poll system call allows an user process to do a non-busy wait on a kernel event:
./poll.sh
Outcome: jiffies gets printed to stdout every second from userland.
Sources:
Typically, we are waiting for some hardware to make some piece of data available available to the kernel.
The hardware notifies the kernel that the data is ready with an interrupt.
To simplify this example, we just fake the hardware interrupts with a kthread that sleeps for a second in an infinite loop.
15.9.4. ioctl
The ioctl system call is the best way to pass an arbitrary number of parameters to the kernel in a single go:
./ioctl.sh echo $?
Outcome: the test passes:
0
Sources:
ioctl is one of the most important methods of communication with real device drivers, which often take several fields as input.
ioctl takes as input:
-
an integer
request: it usually identifies what type of operation we want to do on this call -
an untyped pointer to memory: can be anything, but is typically a pointer to a
structThe type of the
structoften depends on therequestinputThis
structis defined on a uapi-style C header that is used both to compile the kernel module and the userland executable.The fields of this
structcan be thought of as arbitrary input parameters.
And the output is:
-
an integer return value.
man ioctldocuments:Usually, on success zero is returned. A few
ioctl()requests use the return value as an output parameter and return a nonnegative value on success. On error, -1 is returned, and errno is set appropriately. -
the input pointer data may be overwritten to contain arbitrary output
Bibliography:
15.9.5. mmap
The mmap system call allows us to share memory between user and kernel space without copying:
./mmap.sh echo $?
Outcome: the test passes:
0
Sources:
In this example, we make a tiny 4 byte kernel buffer available to user-space, and we then modify it on userspace, and check that the kernel can see the modification.
mmap, like most more complex File operations, does not work with debugfs as of 4.9, so we use a procfs file for it.
Example adapted from: https://coherentmusings.wordpress.com/2014/06/10/implementing-mmap-for-transferring-data-from-user-space-to-kernel-space/
Bibliography:
15.9.6. Anonymous inode
Anonymous inodes allow getting multiple file descriptors from a single filesystem entry, which reduces namespace pollution compared to creating multiple device files:
./anonymous_inode.sh echo $?
Outcome: the test passes:
0
Sources:
This example gets an anonymous inode via ioctl from a debugfs entry by using anon_inode_getfd.
Reads to that inode return the sequence: 1, 10, 100, … 10000000, 1, 100, …
15.9.7. netlink sockets
Netlink sockets offer a socket API for kernel / userland communication:
./netlink.sh echo $?
Outcome: the test passes:
0
Sources:
Launch multiple user requests in parallel to stress our socket:
insmod netlink.ko sleep=1 for i in `seq 16`; do ./netlink.out & done
TODO: what is the advantage over read, write and poll? https://stackoverflow.com/questions/16727212/how-netlink-socket-in-linux-kernel-is-different-from-normal-polling-done-by-appl
Bibliography:
15.10. kthread
Kernel threads are managed exactly like userland threads; they also have a backing task_struct, and are scheduled with the same mechanism:
insmod kthread.ko
Source: kernel_modules/kthread.c
Outcome: dmesg counts from 0 to 9 once every second infinitely many times:
0 1 2 ... 8 9 0 1 2 ...
The count stops when we rmmod:
rmmod kthread
The sleep is done with usleep_range, see: Section 15.10.2, “sleep”.
Bibliography:
15.10.1. kthreads
Let’s launch two threads and see if they actually run in parallel:
insmod kthreads.ko
Source: kernel_modules/kthreads.c
Outcome: two threads count to dmesg from 0 to 9 in parallel.
Each line has output of form:
<thread_id> <count>
Possible very likely outcome:
1 0 2 0 1 1 2 1 1 2 2 2 1 3 2 3
The threads almost always interleaved nicely, thus confirming that they are actually running in parallel.
15.10.2. sleep
Count to dmesg every one second from 0 up to n - 1:
insmod sleep.ko n=5
Source: kernel_modules/sleep.c
The sleep is done with a call to usleep_range directly inside module_init for simplicity.
Bibliography:
15.10.3. Workqueues
A more convenient front-end for kthread:
insmod workqueue_cheat.ko
Outcome: count from 0 to 9 infinitely many times
Stop counting:
rmmod workqueue_cheat
Source: kernel_modules/workqueue_cheat.c
The workqueue thread is killed after the worker function returns.
We can’t call the module just workqueue.c because there is already a built-in with that name: https://unix.stackexchange.com/questions/364956/how-can-insmod-fail-with-kernel-module-is-already-loaded-even-is-lsmod-does-not
15.10.3.1. Workqueue from workqueue
Count from 0 to 9 every second infinitely many times by scheduling a new work item from a work item:
insmod work_from_work.ko
Stop:
rmmod work_from_work
The sleep is done indirectly through: queue_delayed_work, which waits the specified time before scheduling the work.
Source: kernel_modules/work_from_work.c
15.10.4. schedule
Let’s block the entire kernel! Yay:
./run --eval-after 'dmesg -n 1;insmod schedule.ko schedule=0'
Outcome: the system hangs, the only way out is to kill the VM.
Source: kernel_modules/schedule.c
kthreads only allow interrupting if you call schedule(), and the schedule=0 kernel module parameter turns it off.
Sleep functions like usleep_range also end up calling schedule.
If we allow schedule() to be called, then the system becomes responsive:
./run --eval-after 'dmesg -n 1;insmod schedule.ko schedule=1'
and we can observe the counting with:
dmesg -w
The system also responds if we add another core:
./run --cpus 2 --eval-after 'dmesg -n 1;insmod schedule.ko schedule=0'
15.10.5. Wait queues
Wait queues are a way to make a thread sleep until an event happens on the queue:
insmod wait_queue.c
Dmesg output:
0 0 1 0 2 0 # Wait one second. 0 1 1 1 2 1 # Wait one second. 0 2 1 2 2 2 ...
Stop the count:
rmmod wait_queue
Source: kernel_modules/wait_queue.c
This example launches three threads:
-
one thread generates events every with
wake_up -
the other two threads wait for that with
wait_event, and print a dmesg when it happens.The
wait_eventmacro works a bit like:while (!cond) sleep_until_event
15.11. Timers
Count from 0 to 9 infinitely many times in 1 second intervals using timers:
insmod timer.ko
Stop counting:
rmmod timer
Source: kernel_modules/timer.c
Timers are callbacks that run when an interrupt happens, from the interrupt context itself.
Therefore they produce more accurate timing than thread scheduling, which is more complex, but you can’t do too much work inside of them.
Bibliography:
15.12. IRQ
15.12.1. irq.ko
Brute force monitor every shared interrupt that will accept us:
./run --eval-after 'insmod irq.ko' --graphic
Source: kernel_modules/irq.c.
Now try the following:
-
press a keyboard key and then release it after a few seconds
-
press a mouse key, and release it after a few seconds
-
move the mouse around
Outcome: dmesg shows which IRQ was fired for each action through messages of type:
handler irq = 1 dev = 250
dev is the character device for the module and never changes, as can be confirmed by:
grep lkmc_irq /proc/devices
The IRQs that we observe are:
-
1for keyboard press and release.If you hold the key down for a while, it starts firing at a constant rate. So this happens at the hardware level!
-
12mouse actions
This only works if for IRQs for which the other handlers are registered as IRQF_SHARED.
We can see which ones are those, either via dmesg messages of type:
genirq: Flags mismatch irq 0. 00000080 (myirqhandler0) vs. 00015a00 (timer) request_irq irq = 0 ret = -16 request_irq irq = 1 ret = 0
which indicate that 0 is not, but 1 is, or with:
cat /proc/interrupts
which shows:
0: 31 IO-APIC 2-edge timer 1: 9 IO-APIC 1-edge i8042, myirqhandler0
so only 1 has myirqhandler0 attached but not 0.
The QEMU monitor also has some interrupt statistics for x86_64:
./qemu-monitor info irq
TODO: properly understand how each IRQ maps to what number.
15.12.2. dummy-irq
The Linux kernel v4.16 mainline also has a dummy-irq module at drivers/misc/dummy-irq.c for monitoring a single IRQ.
We build it by default with:
CONFIG_DUMMY_IRQ=m
And then you can do
./run --graphic
and in guest:
modprobe dummy-irq irq=1
Outcome: when you click a key on the keyboard, dmesg shows:
dummy-irq: interrupt occurred on IRQ 1
However, this module is intended to fire only once as can be seen from its source:
static int count = 0;
if (count == 0) {
printk(KERN_INFO "dummy-irq: interrupt occurred on IRQ %d\n",
irq);
count++;
}
and furthermore interrupt 1 and 12 happen immediately TODO why, were they somehow pending?
So so see something interesting, you need to monitor an interrupt that is more rare than the keyboard, e.g. platform_device.
15.12.3. /proc/interrupts
In the guest with QEMU graphic mode:
watch -n 1 cat /proc/interrupts
Then see how clicking the mouse and keyboard affect the interrupt counts.
This confirms that:
-
1: keyboard
-
12: mouse click and drags
The module also shows which handlers are registered for each IRQ, as we have observed at irq.ko
When in text mode, we can also observe interrupt line 4 with handler ttyS0 increase continuously as IO goes through the UART.
15.13. Kernel utility functions
15.13.1. kstrto
Convert a string to an integer:
./kstrto.sh echo $?
Outcome: the test passes:
0
Sources:
15.13.2. virt_to_phys
Convert a virtual address to physical:
insmod virt_to_phys.ko cat /sys/kernel/debug/lkmc_virt_to_phys
Source: kernel_modules/virt_to_phys.c
Sample output:
*kmalloc_ptr = 0x12345678 kmalloc_ptr = ffff88000e169ae8 virt_to_phys(kmalloc_ptr) = 0xe169ae8 static_var = 0x12345678 &static_var = ffffffffc0002308 virt_to_phys(&static_var) = 0x40002308
We can confirm that the kmalloc_ptr translation worked with:
./qemu-monitor 'xp 0xe169ae8'
which reads four bytes from a given physical address, and gives the expected:
000000000e169ae8: 0x12345678
TODO it only works for kmalloc however, for the static variable:
./qemu-monitor 'xp 0x40002308'
it gave a wrong value of 00000000.
Bibliography:
15.13.2.1. Userland physical address experiments
Only tested in x86_64.
The Linux kernel exposes physical addresses to userland through:
-
/proc/<pid>/maps -
/proc/<pid>/pagemap -
/dev/mem
In this section we will play with them.
First get a virtual address to play with:
./posix/virt_to_phys_test.out &
Sample output:
vaddr 0x600800 pid 110
The program:
-
allocates a
volatilevariable and sets is value to0x12345678 -
prints the virtual address of the variable, and the program PID
-
runs a while loop until until the value of the variable gets mysteriously changed somehow, e.g. by nasty tinkerers like us
Then, translate the virtual address to physical using /proc/<pid>/maps and /proc/<pid>/pagemap:
./linux/virt_to_phys_user.out 110 0x600800
Sample output physical address:
0x7c7b800
Now we can verify that linux/virt_to_phys_user.out gave the correct physical address in the following ways:
Bibliography:
15.13.2.1.1. QEMU xp
The xp QEMU monitor command reads memory at a given physical address.
First launch linux/virt_to_phys_user.out as described at Userland physical address experiments.
On a second terminal, use QEMU to read the physical address:
./qemu-monitor 'xp 0x7c7b800'
Output:
0000000007c7b800: 0x12345678
Yes!!! We read the correct value from the physical address.
We could not find however to write to memory from the QEMU monitor, boring.
15.13.2.1.2. /dev/mem
/dev/mem exposes access to physical addresses, and we use it through the convenient devmem BusyBox utility.
First launch linux/virt_to_phys_user.out as described at Userland physical address experiments.
Next, read from the physical address:
devmem 0x7c7b800
Possible output:
Memory mapped at address 0x7ff7dbe01000. Value at address 0X7C7B800 (0x7ff7dbe01800): 0x12345678
which shows that the physical memory contains the expected value 0x12345678.
0x7ff7dbe01000 is a new virtual address that devmem maps to the physical address to be able to read from it.
Modify the physical memory:
devmem 0x7c7b800 w 0x9abcdef0
After one second, we see on the screen:
i 9abcdef0 [1]+ Done ./posix/virt_to_phys_test.out
so the value changed, and the while loop exited!
This example requires:
-
CONFIG_STRICT_DEVMEM=n, otherwisedevmemfails with:devmem: mmap: Operation not permitted
-
nopatkernel parameter
which we set by default.
15.13.2.1.3. pagemap_dump.out
Dump the physical address of all pages mapped to a given process using /proc/<pid>/maps and /proc/<pid>/pagemap.
First launch linux/virt_to_phys_user.out as described at Userland physical address experiments. Suppose that the output was:
# ./posix/virt_to_phys_test.out & vaddr 0x601048 pid 63 # ./linux/virt_to_phys_user.out 63 0x601048 0x1a61048
Now obtain the page map for the process:
./linux/pagemap_dump.out 63
Sample output excerpt:
vaddr pfn soft-dirty file/shared swapped present library 400000 1ede 0 1 0 1 ./posix/virt_to_phys_test.out 600000 1a6f 0 0 0 1 ./posix/virt_to_phys_test.out 601000 1a61 0 0 0 1 ./posix/virt_to_phys_test.out 602000 2208 0 0 0 1 [heap] 603000 220b 0 0 0 1 [heap] 7ffff78ec000 1fd4 0 1 0 1 /lib/libuClibc-1.0.30.so
Source: userland/linux/pagemap_dump.c
Adapted from: https://github.com/dwks/pagemap/blob/8a25747bc79d6080c8b94eac80807a4dceeda57a/pagemap2.c
Meaning of the flags:
-
vaddr: first virtual address of a page the belongs to the process. Notably:./run-toolchain readelf -- -l "$(./getvar userland_build_dir)/posix/virt_to_phys_test.out"
contains:
Type Offset VirtAddr PhysAddr FileSiz MemSiz Flags Align ... LOAD 0x0000000000000000 0x0000000000400000 0x0000000000400000 0x000000000000075c 0x000000000000075c R E 0x200000 LOAD 0x0000000000000e98 0x0000000000600e98 0x0000000000600e98 0x00000000000001b4 0x0000000000000218 RW 0x200000 Section to Segment mapping: Segment Sections... ... 02 .interp .hash .dynsym .dynstr .rela.plt .init .plt .text .fini .rodata .eh_frame_hdr .eh_frame 03 .ctors .dtors .jcr .dynamic .got.plt .data .bssfrom which we deduce that:
-
400000is the text segment -
600000is the data segment
-
-
pfn: add three zeroes to it, and you have the physical address.Three zeroes is 12 bits which is 4kB, which is the size of a page.
For example, the virtual address
0x601000haspfnof0x1a61, which means that its physical address is0x1a61000This is consistent with what
linux/virt_to_phys_user.outtold us: the virtual address0x601048has physical address0x1a61048.048corresponds to the three last zeroes, and is the offset within the page.Also, this value falls inside
0x601000, which as previously analyzed is the data section, which is the normal location for global variables such as ours. -
soft-dirty: TODO -
file/shared: TODO.1seems to indicate that the page can be shared across processes, possibly for read-only pages? E.g. the text segment has1, but the data has0. -
swapped: TODO swapped to disk? -
present: TODO vs swapped? -
library: which executable owns that page
This program works in two steps:
-
parse the human readable lines lines from
/proc/<pid>/maps. This files contains lines of form:7ffff7b6d000-7ffff7bdd000 r-xp 00000000 fe:00 658 /lib/libuClibc-1.0.22.so
which tells us that:
-
7f8af99f8000-7f8af99ff000is a virtual address range that belong to the process, possibly containing multiple pages. -
/lib/libuClibc-1.0.22.sois the name of the library that owns that memory
-
-
loop over each page of each address range, and ask
/proc/<pid>/pagemapfor more information about that page, including the physical address
15.14. Linux kernel tracing
Good overviews:
-
http://www.brendangregg.com/blog/2015-07-08/choosing-a-linux-tracer.html by Brendan Greg, AKA the master of tracing. Also: https://github.com/brendangregg/perf-tools
I hope to have examples of all methods some day, since I’m obsessed with visibility.
15.14.1. CONFIG_PROC_EVENTS
Logs proc events such as process creation to a netlink socket.
We then have a userland program that listens to the events and prints them out:
# ./linux/proc_events.out & # set mcast listen ok # sleep 2 & sleep 1 fork: parent tid=48 pid=48 -> child tid=79 pid=79 fork: parent tid=48 pid=48 -> child tid=80 pid=80 exec: tid=80 pid=80 exec: tid=79 pid=79 # exit: tid=80 pid=80 exit_code=0 exit: tid=79 pid=79 exit_code=0 echo a a #
Source: userland/linux/proc_events.c
TODO: why exit: tid=79 shows after exit: tid=80?
Note how echo a is a Bash built-in, and therefore does not spawn a new process.
TODO: why does this produce no output?
./linux/proc_events.out >f &
TODO can you get process data such as UID and process arguments? It seems not since exec_proc_event contains so little data: https://github.com/torvalds/linux/blob/v4.16/include/uapi/linux/cn_proc.h#L80 We could try to immediately read it from /proc, but there is a risk that the process finished and another one took its PID, so it wouldn’t be reliable.
15.14.1.1. CONFIG_PROC_EVENTS aarch64
0111ca406bdfa6fd65a2605d353583b4c4051781 was failing with:
>>> kernel_modules 1.0 Building
/usr/bin/make -j8 -C '/linux-kernel-module-cheat//out/aarch64/buildroot/build/kernel_modules-1.0/user' BR2_PACKAGE_OPENBLAS="" CC="/linux-kernel-module-cheat//out/aarch64/buildroot/host/bin/aarch64-buildroot-linux-uclibc-gcc" LD="/linux-kernel-module-cheat//out/aarch64/buildroot/host/bin/aarch64-buildroot-linux-uclibc-ld"
/linux-kernel-module-cheat//out/aarch64/buildroot/host/bin/aarch64-buildroot-linux-uclibc-gcc -ggdb3 -fopenmp -O0 -std=c99 -Wall -Werror -Wextra -o 'proc_events.out' 'proc_events.c'
In file included from /linux-kernel-module-cheat//out/aarch64/buildroot/host/aarch64-buildroot-linux-uclibc/sysroot/usr/include/signal.h:329:0,
from proc_events.c:12:
/linux-kernel-module-cheat//out/aarch64/buildroot/host/aarch64-buildroot-linux-uclibc/sysroot/usr/include/sys/ucontext.h:50:16: error: field ‘uc_mcontext’ has incomplete type
mcontext_t uc_mcontext;
^~~~~~~~~~~
so we commented it out.
Related threads:
If we try to naively update uclibc to 1.0.29 with buildroot_override, which contains the above mentioned patch, clean aarch64 test build fails with:
../utils/ldd.c: In function 'elf_find_dynamic':
../utils/ldd.c:238:12: warning: cast to pointer from integer of different size [-Wint-to-pointer-cast]
return (void *)byteswap_to_host(dynp->d_un.d_val);
^
/tmp/user/20321/cciGScKB.o: In function `process_line_callback':
msgmerge.c:(.text+0x22): undefined reference to `escape'
/tmp/user/20321/cciGScKB.o: In function `process':
msgmerge.c:(.text+0xf6): undefined reference to `poparser_init'
msgmerge.c:(.text+0x11e): undefined reference to `poparser_feed_line'
msgmerge.c:(.text+0x128): undefined reference to `poparser_finish'
collect2: error: ld returned 1 exit status
Makefile.in:120: recipe for target '../utils/msgmerge.host' failed
make[2]: *** [../utils/msgmerge.host] Error 1
make[2]: *** Waiting for unfinished jobs....
/tmp/user/20321/ccF8V8jF.o: In function `process':
msgfmt.c:(.text+0xbf3): undefined reference to `poparser_init'
msgfmt.c:(.text+0xc1f): undefined reference to `poparser_feed_line'
msgfmt.c:(.text+0xc2b): undefined reference to `poparser_finish'
collect2: error: ld returned 1 exit status
Makefile.in:120: recipe for target '../utils/msgfmt.host' failed
make[2]: *** [../utils/msgfmt.host] Error 1
package/pkg-generic.mk:227: recipe for target '/data/git/linux-kernel-module-cheat/out/aarch64/buildroot/build/uclibc-custom/.stamp_built' failed
make[1]: *** [/data/git/linux-kernel-module-cheat/out/aarch64/buildroot/build/uclibc-custom/.stamp_built] Error 2
Makefile:79: recipe for target '_all' failed
make: *** [_all] Error 2
Buildroot master has already moved to uclibc 1.0.29 at f8546e836784c17aa26970f6345db9d515411700, but it is not yet in any tag… so I’m not tempted to update it yet just for this.
15.14.2. ftrace
Trace a single function:
cd /sys/kernel/debug/tracing/ # Stop tracing. echo 0 > tracing_on # Clear previous trace. echo > trace # List the available tracers, and pick one. cat available_tracers echo function > current_tracer # List all functions that can be traced # cat available_filter_functions # Choose one. echo __kmalloc > set_ftrace_filter # Confirm that only __kmalloc is enabled. cat enabled_functions echo 1 > tracing_on # Latest events. head trace # Observe trace continuously, and drain seen events out. cat trace_pipe &
Sample output:
# tracer: function
#
# entries-in-buffer/entries-written: 97/97 #P:1
#
# _-----=> irqs-off
# / _----=> need-resched
# | / _---=> hardirq/softirq
# || / _--=> preempt-depth
# ||| / delay
# TASK-PID CPU# |||| TIMESTAMP FUNCTION
# | | | |||| | |
head-228 [000] .... 825.534637: __kmalloc <-load_elf_phdrs
head-228 [000] .... 825.534692: __kmalloc <-load_elf_binary
head-228 [000] .... 825.534815: __kmalloc <-load_elf_phdrs
head-228 [000] .... 825.550917: __kmalloc <-__seq_open_private
head-228 [000] .... 825.550953: __kmalloc <-tracing_open
head-229 [000] .... 826.756585: __kmalloc <-load_elf_phdrs
head-229 [000] .... 826.756627: __kmalloc <-load_elf_binary
head-229 [000] .... 826.756719: __kmalloc <-load_elf_phdrs
head-229 [000] .... 826.773796: __kmalloc <-__seq_open_private
head-229 [000] .... 826.773835: __kmalloc <-tracing_open
head-230 [000] .... 827.174988: __kmalloc <-load_elf_phdrs
head-230 [000] .... 827.175046: __kmalloc <-load_elf_binary
head-230 [000] .... 827.175171: __kmalloc <-load_elf_phdrs
Trace all possible functions, and draw a call graph:
echo 1 > max_graph_depth echo 1 > events/enable echo function_graph > current_tracer
Sample output:
# CPU DURATION FUNCTION CALLS
# | | | | | | |
0) 2.173 us | } /* ntp_tick_length */
0) | timekeeping_update() {
0) 4.176 us | ntp_get_next_leap();
0) 5.016 us | update_vsyscall();
0) | raw_notifier_call_chain() {
0) 2.241 us | notifier_call_chain();
0) + 19.879 us | }
0) 3.144 us | update_fast_timekeeper();
0) 2.738 us | update_fast_timekeeper();
0) ! 117.147 us | }
0) | _raw_spin_unlock_irqrestore() {
0) 4.045 us | _raw_write_unlock_irqrestore();
0) + 22.066 us | }
0) ! 265.278 us | } /* update_wall_time */
TODO: what do + and ! mean?
Each enable under the events/ tree enables a certain set of functions, the higher the enable more functions are enabled.
TODO: can you get function arguments? https://stackoverflow.com/questions/27608752/does-ftrace-allow-capture-of-system-call-arguments-to-the-linux-kernel-or-only
15.14.3. Kprobes
kprobes is an instrumentation mechanism that injects arbitrary code at a given address in a trap instruction, much like GDB. Oh, the good old kernel. :-)
./build-linux --config 'CONFIG_KPROBES=y'
Then on guest:
insmod kprobe_example.ko sleep 4 & sleep 4 &'
Outcome: dmesg outputs on every fork:
<_do_fork> pre_handler: p->addr = 0x00000000e1360063, ip = ffffffff810531d1, flags = 0x246 <_do_fork> post_handler: p->addr = 0x00000000e1360063, flags = 0x246 <_do_fork> pre_handler: p->addr = 0x00000000e1360063, ip = ffffffff810531d1, flags = 0x246 <_do_fork> post_handler: p->addr = 0x00000000e1360063, flags = 0x246
Source: kernel_modules/kprobe_example.c
TODO: it does not work if I try to immediately launch sleep, why?
insmod kprobe_example.ko sleep 4 & sleep 4 &
I don’t think your code can refer to the surrounding kernel code however: the only visible thing is the value of the registers.
You can then hack it up to read the stack and read argument values, but do you really want to?
There is also a kprobes + ftrace based mechanism with CONFIG_KPROBE_EVENTS=y which does read the memory for us based on format strings that indicate type… https://github.com/torvalds/linux/blob/v4.16/Documentation/trace/kprobetrace.txt Horrendous. Used by: https://github.com/brendangregg/perf-tools/blob/98d42a2a1493d2d1c651a5c396e015d4f082eb20/execsnoop
Bibliography:
15.14.4. Count boot instructions
TODO: didn’t port during refactor after 3b0a343647bed577586989fb702b760bd280844a. Reimplementing should not be hard.
Results (boot not excluded) are shown at: Table 1, “Boot instruction counts for various setups”
| Commit | Arch | Simulator | Instruction count |
|---|---|---|---|
7228f75ac74c896417fb8c5ba3d375a14ed4d36b |
arm |
QEMU |
680k |
7228f75ac74c896417fb8c5ba3d375a14ed4d36b |
arm |
gem5 AtomicSimpleCPU |
160M |
7228f75ac74c896417fb8c5ba3d375a14ed4d36b |
arm |
gem5 HPI |
155M |
7228f75ac74c896417fb8c5ba3d375a14ed4d36b |
x86_64 |
QEMU |
3M |
7228f75ac74c896417fb8c5ba3d375a14ed4d36b |
x86_64 |
gem5 AtomicSimpleCPU |
528M |
QEMU:
./trace-boot --arch x86_64
sample output:
instructions 1833863 entry_address 0x1000000 instructions_firmware 20708
gem5:
./run --arch aarch64 --emulator gem5 --eval 'm5 exit' # Or: # ./run --arch aarch64 --emulator gem5 --eval 'm5 exit' -- --cpu-type=HPI --caches ./gem5-stat --arch aarch64 sim_insts
Notes:
-
0x1000000is the address where QEMU puts the Linux kernel at with-kernelin x86.It can be found from:
./run-toolchain readelf -- -e "$(./getvar vmlinux)" | grep Entry
TODO confirm further. If I try to break there with:
./run-gdb *0x1000000
but I have no corresponding source line. Also note that this line is not actually the first line, since the kernel messages such as
early console in extract_kernelhave already shown on screen at that point. This does not break at all:./run-gdb extract_kernel
It only appears once on every log I’ve seen so far, checked with
grep 0x1000000 trace.txtThen when we count the instructions that run before the kernel entry point, there is only about 100k instructions, which is insignificant compared to the kernel boot itself.
TODO
--arch armand--arch aarch64does not count firmware instructions properly because the entry point address of the ELF file (ffffff8008080000foraarch64) does not show up on the trace at all. Tested on f8c0502bb2680f2dbe7c1f3d7958f60265347005. -
We can also discount the instructions after
initruns by usingreadelfto get the initial address ofinit. One easy way to do that now is to just run:./run-gdb --userland "$(./getvar userland_build_dir)/linux/poweroff.out" main
And get that from the traces, e.g. if the address is
4003a0, then we search:grep -n 4003a0 trace.txt
I have observed a single match for that instruction, so it must be the init, and there were only 20k instructions after it, so the impact is negligible.
-
to disable networking. Is replacing
initenough?CONFIG_NET=ndid not significantly reduce instruction counts, so maybe replacinginitis enough. -
gem5 simulates memory latencies. So I think that the CPU loops idle while waiting for memory, and counts will be higher.
15.15. Linux kernel hardening
Make it harder to get hacked and easier to notice that you were, at the cost of some (small?) runtime overhead.
15.15.1. CONFIG_FORTIFY_SOURCE
Detects buffer overflows for us:
./build-linux --config 'CONFIG_FORTIFY_SOURCE=y' --linux-build-id fortify ./build-modules --clean ./build-modules ./build-buildroot ./run --eval-after 'insmod strlen_overflow.ko' --linux-build-id fortify
Possible dmesg output:
strlen_overflow: loading out-of-tree module taints kernel. detected buffer overflow in strlen ------------[ cut here ]------------
followed by a trace.
You may not get this error because this depends on strlen overflowing at least until the next page: if a random \0 appears soon enough, it won’t blow up as desired.
TODO not always reproducible. Find a more reproducible failure. I could not observe it on:
insmod memcpy_overflow.ko
Source: kernel_modules/strlen_overflow.c
15.15.2. Linux security modules
15.15.2.1. SELinux
TODO get a hello world permission control working:
./build-linux \ --config-fragment linux_config/selinux \ --linux-build-id selinux \ ; ./build-buildroot --config 'BR2_PACKAGE_REFPOLICY=y' ./run --enable-kvm --linux-build-id selinux
Source: linux_config/selinux
This builds:
-
BR2_PACKAGE_REFPOLICY, which includes a reference/etc/selinux/configpolicy: https://github.com/SELinuxProject/refpolicyrefpolicy in turn depends on:
-
BR2_PACKAGE_SETOOLS, which contains tools such asgetenforced: https://github.com/SELinuxProject/setoolssetools depends on:
-
BR2_PACKAGE_LIBSELINUX, which is the backing userland library
After boot finishes, we see:
Starting auditd: mkdir: invalid option -- 'Z'
which comes from /etc/init.d/S01auditd, because BusyBox' mkdir does not have the crazy -Z option like Ubuntu. That’s amazing!
The kernel logs contain:
SELinux: Initializing.
Inside the guest we now have:
getenforce
which initially says:
Disabled
TODO: if we try to enforce:
setenforce 1
it does not work and outputs:
setenforce: SELinux is disabled
SELinux requires glibc as mentioned at: Section 19.10, “libc choice”.
15.16. User mode Linux
I once got UML running on a minimal Buildroot setup at: https://unix.stackexchange.com/questions/73203/how-to-create-rootfs-for-user-mode-linux-on-fedora-18/372207#372207
But in part because it is dying, I didn’t spend much effort to integrate it into this repo, although it would be a good fit in principle, since it is essentially a virtualization method.
Maybe some brave soul will send a pull request one day.
15.17. UIO
UIO is a kernel subsystem that allows to do certain types of driver operations from userland.
This would be awesome to improve debuggability and safety of kernel modules.
VFIO looks like a newer and better UIO replacement, but there do not exist any examples of how to use it: https://stackoverflow.com/questions/49309162/interfacing-with-qemu-edu-device-via-userspace-i-o-uio-linux-driver
TODO get something interesting working. I currently don’t understand the behaviour very well.
TODO how to ACK interrupts? How to ensure that every interrupt gets handled separately?
TODO how to write to registers. Currently using /dev/mem and lspci.
This example should handle interrupts from userland and print a message to stdout:
./uio_read.sh
TODO: what is the expected behaviour? I should have documented this when I wrote this stuff, and I’m that lazy right now that I’m in the middle of a refactor :-)
UIO interface in a nutshell:
-
blocking read / poll: waits until interrupts
-
write: callirqcontrolcallback. Default: 0 or 1 to enable / disable interrupts. -
mmap: access device memory
Sources:
Bibliography:
-
https://stackoverflow.com/questions/15286772/userspace-vs-kernel-space-driver
-
https://01.org/linuxgraphics/gfx-docs/drm/driver-api/uio-howto.html
-
https://stackoverflow.com/questions/7986260/linux-interrupt-handling-in-user-space
-
https://yurovsky.github.io/2014/10/10/linux-uio-gpio-interrupt/
-
https://github.com/bmartini/zynq-axis/blob/65a3a448fda1f0ea4977adfba899eb487201853d/dev/axis.c
-
https://yurovsky.github.io/2014/10/10/linux-uio-gpio-interrupt/
-
http://nairobi-embedded.org/uio_example.html that website has QEMU examples for everything as usual. The example has a kernel-side which creates the memory mappings and is used by the user.
-
userland driver stability questions:
15.18. Linux kernel interactive stuff
15.18.1. Linux kernel console fun
Requires Graphics.
You can also try those on the Ctrl-Alt-F3 of your Ubuntu host, but it is much more fun inside a VM!
Stop the cursor from blinking:
echo 0 > /sys/class/graphics/fbcon/cursor_blink
Rotate the console 90 degrees! https://askubuntu.com/questions/237963/how-do-i-rotate-my-display-when-not-using-an-x-server
echo 1 > /sys/class/graphics/fbcon/rotate
Relies on: CONFIG_FRAMEBUFFER_CONSOLE_ROTATION=y.
Documented under: Documentation/fb/.
TODO: font and keymap. Mentioned at: https://cmcenroe.me/2017/05/05/linux-console.html and I think can be done with BusyBox loadkmap and loadfont, we just have to understand their formats, related:
15.18.2. Linux kernel magic keys
Requires Graphics.
Let’s have some fun.
I think most are implemented under:
drivers/tty
TODO find all.
Scroll up / down the terminal:
Shift-PgDown Shift-PgUp
Or inside ./qemu-monitor:
sendkey shift-pgup sendkey shift-pgdown
15.18.2.1. Ctrl Alt Del
Run /sbin/reboot on guest:
Ctrl-Alt-Del
Enabled from our rootfs_overlay/etc/inittab:
::ctrlaltdel:/sbin/reboot
Linux tries to reboot, and QEMU shutdowns due to the -no-reboot option which we set by default for, see: Section 15.7.1.3, “Exit emulator on panic”.
Under the hood, behaviour is controlled by the reboot syscall:
man 2 reboot
reboot calls can set either of the these behaviours for Ctrl-Alt-Del:
-
do a hard shutdown syscall. Set in ublibc C code with:
reboot(RB_ENABLE_CAD)
or from procfs with:
echo 1 > /proc/sys/kernel/ctrl-alt-del
-
send a SIGINT to the init process. This is what BusyBox' init does, and it then execs the string set in
inittab.Set in uclibc C code with:
reboot(RB_DISABLE_CAD)
or from procfs with:
echo 0 > /proc/sys/kernel/ctrl-alt-del
Minimal example:
./run --kernel-cli 'init=/lkmc/linux/ctrl_alt_del.out' --graphic
Source: userland/linux/ctrl_alt_del.c
When you hit Ctrl-Alt-Del in the guest, our tiny init handles a SIGINT sent by the kernel and outputs to stdout:
cad
To map between man 2 reboot and the uClibc RB_* magic constants see:
less "$(./getvar buildroot_build_build_dir)"/uclibc-*/include/sys/reboot.h"
The procfs mechanism is documented at:
less linux/Documentation/sysctl/kernel.txt
which says:
When the value in this file is 0, ctrl-alt-del is trapped and sent to the init(1) program to handle a graceful restart. When, however, the value is > 0, Linux's reaction to a Vulcan Nerve Pinch (tm) will be an immediate reboot, without even syncing its dirty buffers. Note: when a program (like dosemu) has the keyboard in 'raw' mode, the ctrl-alt-del is intercepted by the program before it ever reaches the kernel tty layer, and it's up to the program to decide what to do with it.
Bibliography:
15.18.2.2. SysRq
We cannot test these actual shortcuts on QEMU since the host captures them at a lower level, but from:
./qemu-monitor
we can for example crash the system with:
sendkey alt-sysrq-c
Same but boring because no magic key:
echo c > /proc/sysrq-trigger
Implemented in:
drivers/tty/sysrq.c
On your host, on modern systems that don’t have the SysRq key you can do:
Alt-PrtSc-space
which prints a message to dmesg of type:
sysrq: SysRq : HELP : loglevel(0-9) reboot(b) crash(c) terminate-all-tasks(e) memory-full-oom-kill(f) kill-all-tasks(i) thaw-filesystems(j) sak(k) show-backtrace-all-active-cpus(l) show-memory-usage(m) nice-all-RT-tasks(n) poweroff(o) show-registers(p) show-all-timers(q) unraw(r) sync(s) show-task-states(t) unmount(u) show-blocked-tasks(w) dump-ftrace-buffer(z)
Individual SysRq can be enabled or disabled with the bitmask:
/proc/sys/kernel/sysrq
The bitmask is documented at:
less linux/Documentation/admin-guide/sysrq.rst
Bibliography: https://en.wikipedia.org/wiki/Magic_SysRq_key
15.18.3. TTY
In order to play with TTYs, do this:
printf ' tty2::respawn:/sbin/getty -n -L -l /lkmc/loginroot.sh tty2 0 vt100 tty3::respawn:-/bin/sh tty4::respawn:/sbin/getty 0 tty4 tty63::respawn:-/bin/sh ::respawn:/sbin/getty -L ttyS0 0 vt100 ::respawn:/sbin/getty -L ttyS1 0 vt100 ::respawn:/sbin/getty -L ttyS2 0 vt100 # Leave one serial empty. #::respawn:/sbin/getty -L ttyS3 0 vt100 ' >> rootfs_overlay/etc/inittab ./build-buildroot ./run --graphic -- \ -serial telnet::1235,server,nowait \ -serial vc:800x600 \ -serial telnet::1236,server,nowait \ ;
and on a second shell:
telnet localhost 1235
We don’t add more TTYs by default because it would spawn more processes, even if we use askfirst instead of respawn.
On the GUI, switch TTYs with:
-
Alt-LeftorAlt-Right:go to previous / next populated/dev/ttyNTTY. Skips over empty TTYs. -
Alt-Fn: go to the nth TTY. If it is not populated, don’t go there. -
chvt <n>: go to the n-th virtual TTY, even if it is empty: https://superuser.com/questions/33065/console-commands-to-change-virtual-ttys-in-linux-and-openbsd
You can also test this on most hosts such as Ubuntu 18.04, except that when in the GUI, you must use Ctrl-Alt-Fx to switch to another terminal.
Next, we also have the following shells running on the serial ports, hit enter to activate them:
-
/dev/ttyS0: first shell that was used to run QEMU, corresponds to QEMU’s-serial mon:stdio.It would also work if we used
-serial stdio, but:-
Ctrl-Cwould kill QEMU instead of going to the guest -
Ctrl-A Cwouldn’t open the QEMU console there
-
-
/dev/ttyS1: second shell runningtelnet -
/dev/ttyS2: go on the GUI and enterCtrl-Alt-2, corresponds to QEMU’s-serial vc. Go back to the main console withCtrl-Alt-1.
although we cannot change between terminals from there.
Each populated TTY contains a "shell":
-
-/bin/sh: goes directly into anshwithout a login prompt.The trailing dash
-can be used on any command. It makes the command that follows take over the TTY, which is what we typically want for interactive shells: https://askubuntu.com/questions/902998/how-to-check-which-tty-am-i-usingThe
gettyexecutable however also does this operation and therefore dispenses the-. -
/sbin/gettyasks for password, and then gives you anshWe can overcome the password prompt with the
-l /lkmc/loginroot.shtechnique explained at: https://askubuntu.com/questions/902998/how-to-check-which-tty-am-i-using but I don’t see any advantage over-/bin/shcurrently.
Identify the current TTY with the command:
tty
Bibliography:
-
https://unix.stackexchange.com/questions/270272/how-to-get-the-tty-in-which-bash-is-running/270372
-
https://unix.stackexchange.com/questions/187319/how-to-get-the-real-name-of-the-controlling-terminal
-
https://unix.stackexchange.com/questions/77796/how-to-get-the-current-terminal-name
-
https://askubuntu.com/questions/902998/how-to-check-which-tty-am-i-using
This outputs:
-
/dev/consolefor the initial GUI terminal. But I think it is the same as/dev/tty1, because if I try to dotty1::respawn:-/bin/sh
it makes the terminal go crazy, as if multiple processes are randomly eating up the characters.
-
/dev/ttyNfor the other graphic TTYs. Note that there are only 63 available ones, from/dev/tty1to/dev/tty63(/dev/tty0is the current one): https://superuser.com/questions/449781/why-is-there-so-many-linux-dev-tty. I think this is determined by:#define MAX_NR_CONSOLES 63
in
linux/include/uapi/linux/vt.h. -
/dev/ttySNfor the text shells.These are Serial ports, see this to understand what those represent physically: https://unix.stackexchange.com/questions/307390/what-is-the-difference-between-ttys0-ttyusb0-and-ttyama0-in-linux/367882#367882
There are only 4 serial ports, I think this is determined by QEMU. TODO check.
Get the TTY in bulk for all processes:
./psa.sh
Source: rootfs_overlay/lkmc/psa.sh.
The TTY appears under the TT section, which is enabled by -o tty. This shows the TTY device number, e.g.:
4,1
and we can then confirm it with:
ls -l /dev/tty1
Next try:
insmod kthread.ko
and switch between virtual terminals, to understand that the dmesg goes to whatever current virtual terminal you are on, but not the others, and not to the serial terminals.
Bibliography:
15.18.3.1. Start a getty from outside of init
TODO: how to place an sh directly on a TTY as well without getty?
If I try the exact same command that the inittab is doing from a regular shell after boot:
/sbin/getty 0 tty1
it fails with:
getty: setsid: Operation not permitted
The following however works:
./run --eval 'getty 0 tty1 & getty 0 tty2 & getty 0 tty3 & sleep 99999999' --graphic
presumably because it is being called from init directly?
Outcome: Alt-Right cycles between three TTYs, tty1 being the default one that appears under the boot messages.
man 2 setsid says that there is only one failure possibility:
EPERM The process group ID of any process equals the PID of the calling process. Thus, in particular, setsid() fails if the calling process is already a process group leader.
We can get some visibility into it to try and solve the problem with:
./psa.sh
15.18.3.2. console kernel boot parameter
Take the command described at TTY and try adding the following:
-
-e 'console=tty7': boot messages still show on/dev/tty1(TODO how to change that?), but we don’t get a shell at the end of boot there.Instead, the shell appears on
/dev/tty7. -
-e 'console=tty2'like/dev/tty7, but/dev/tty2is broken, because we have two shells there:-
one due to the
::respawn:-/bin/shentry which uses whateverconsolepoints to -
another one due to the
tty2::respawn:/sbin/gettyentry we added
-
-
-e 'console=ttyS0'much liketty2, but messages show only on serial, and the terminal is broken due to having multiple shells on it -
-e 'console=tty1 console=ttyS0': boot messages show on bothtty1andttyS0, but onlyS0gets a shell because it came last
15.18.4. CONFIG_LOGO
If you run in Graphics, then you get a Penguin image for every core above the console! https://askubuntu.com/questions/80938/is-it-possible-to-get-the-tux-logo-on-the-text-based-boot
This is due to the CONFIG_LOGO=y option which we enable by default.
reset on the terminal then kills the poor penguins.
When CONFIG_LOGO=y is set, the logo can be disabled at boot with:
./run --kernel-cli 'logo.nologo'
Looks like a recompile is needed to modify the image…
15.19. DRM
DRM / DRI is the new interface that supersedes fbdev:
./build-buildroot --config 'BR2_PACKAGE_LIBDRM=y' ./build-userland --package libdrm -- userland/libs/libdrm/modeset.c ./run --eval-after './libs/libdrm/modeset.out' --graphic
Source: userland/libs/libdrm/modeset.c
Outcome: for a few seconds, the screen that contains the terminal gets taken over by changing colors of the rainbow.
TODO not working for aarch64, it takes over the screen for a few seconds and the kernel messages disappear, but the screen stays black all the time.
./build-buildroot --config 'BR2_PACKAGE_LIBDRM=y' ./build-userland --package libdrm ./build-buildroot ./run --eval-after './libs/libdrm/modeset.out' --graphic
kmscube however worked, which means that it must be a bug with this demo?
We set CONFIG_DRM=y on our default kernel configuration, and it creates one device file for each display:
# ls -l /dev/dri total 0 crw------- 1 root root 226, 0 May 28 09:41 card0 # grep 226 /proc/devices 226 drm # ls /sys/module/drm /sys/module/drm_kms_helper/
Try creating new displays:
./run --arch aarch64 --graphic -- -device virtio-gpu-pci
to see multiple /dev/dri/cardN, and then use a different display with:
./run --eval-after './libs/libdrm/modeset.out' --graphic
Bibliography:
Tested on: 93e383902ebcc03d8a7ac0d65961c0e62af9612b
15.19.1. kmscube
./build-buildroot --config-fragment buildroot_config/kmscube
Outcome: a colored spinning cube coded in OpenGL + EGL takes over your display and spins forever: https://www.youtube.com/watch?v=CqgJMgfxjsk
It is a bit amusing to see OpenGL running outside of a window manager window like that: https://stackoverflow.com/questions/3804065/using-opengl-without-a-window-manager-in-linux/50669152#50669152
TODO: it is very slow, about 1FPS. I tried Buildroot master ad684c20d146b220dd04a85dbf2533c69ec8ee52 with:
make qemu_x86_64_defconfig printf " BR2_CCACHE=y BR2_PACKAGE_HOST_QEMU=y BR2_PACKAGE_HOST_QEMU_LINUX_USER_MODE=n BR2_PACKAGE_HOST_QEMU_SYSTEM_MODE=y BR2_PACKAGE_HOST_QEMU_VDE2=y BR2_PACKAGE_KMSCUBE=y BR2_PACKAGE_MESA3D=y BR2_PACKAGE_MESA3D_DRI_DRIVER_SWRAST=y BR2_PACKAGE_MESA3D_OPENGL_EGL=y BR2_PACKAGE_MESA3D_OPENGL_ES=y BR2_TOOLCHAIN_BUILDROOT_CXX=y " >> .config
and the FPS was much better, I estimate something like 15FPS.
On Ubuntu 18.04 with NVIDIA proprietary drivers:
sudo apt-get instll kmscube kmscube
fails with:
drmModeGetResources failed: Invalid argument failed to initialize legacy DRM
See also: https://github.com/robclark/kmscube/issues/12 and https://stackoverflow.com/questions/26920835/can-egl-application-run-in-console-mode/26921287#26921287
Tested on: 2903771275372ccfecc2b025edbb0d04c4016930
15.19.2. kmscon
TODO get working.
Implements a console for DRM.
The Linux kernel has a built-in fbdev console called Linux kernel console fun but not for DRM it seems.
The upstream project seems dead with last commit in 2014: https://www.freedesktop.org/wiki/Software/kmscon/
Build failed in Ubuntu 18.04 with: https://github.com/dvdhrm/kmscon/issues/131 but this fork compiled but didn’t run on host: https://github.com/Aetf/kmscon/issues/2#issuecomment-392484043
Haven’t tested the fork on QEMU too much insanity.
15.19.3. libdri2
TODO get working.
Looks like a more raw alternative to libdrm:
./build-buildroot --config 'BR2_PACKABE_LIBDRI2=y' wget \ -O "$(./getvar userland_source_dir)/dri2test.c" \ https://raw.githubusercontent.com/robclark/libdri2/master/test/dri2test.c \ ; ./build-userland
but then I noticed that that example requires multiple files, and I don’t feel like integrating it into our build.
When I build it on Ubuntu 18.04 host, it does not generate any executable, so I’m confused.
15.20. Linux kernel testing
15.20.1. Linux Test Project
Tests a lot of Linux and POSIX userland visible interfaces.
Buildroot already has a package, so it is trivial to build it:
./build-buildroot --config 'BR2_PACKAGE_LTP_TESTSUITE=y'
So now let’s try and see if the exit system call is working:
/usr/lib/ltp-testsuite/testcases/bin/exit01
which gives successful output:
exit01 1 TPASS : exit() test PASSED
and has source code at: https://github.com/linux-test-project/ltp/blob/20190115/testcases/kernel/syscalls/exit/exit01.c
Besides testing any kernel modifications you make, LTP can also be used to the system call implementation of User mode simulation as shown at User mode Buildroot executables:
./run --userland "$(./getvar buildroot_target_dir)/usr/lib/ltp-testsuite/testcases/bin/exit01"
Tested at: 287c83f3f99db8c1ff9bbc85a79576da6a78e986 + 1.
15.20.2. stress
POSIX userland stress. Two versions:
./build-buildroot \ --config 'BR2_PACKAGE_STRESS=y' \ --config 'BR2_PACKAGE_STRESS_NG=y' \ ;
STRESS_NG is likely the best, but it requires glibc, see: Section 19.10, “libc choice”.
Websites:
stress usage:
stress --help stress -c 16 & ps
and notice how 16 threads were created in addition to a parent worker thread.
It just runs forever, so kill it when you get tired:
kill %1
stress -c 1 -t 1 makes gem5 irresponsive for a very long time.
15.21. Linux kernel build system
15.21.1. vmlinux vs bzImage vs zImage vs Image
Between all archs on QEMU and gem5 we touch all of those kernel built output files.
We are trying to maintain a description of each at: https://unix.stackexchange.com/questions/5518/what-is-the-difference-between-the-following-kernel-makefile-terms-vmlinux-vml/482978#482978
QEMU does not seem able to boot ELF files like vmlinux: https://superuser.com/questions/1376944/can-qemu-boot-linux-from-vmlinux-instead-of-bzimage
Converting arch/* images to vmlinux is possible in theory x86 with extract-vmlinux but we didn’t get any gem5 boots working from images generated like that for some reason, see: https://github.com/cirosantilli/linux-kernel-module-cheat/issues/79
16. Xen
TODO: get prototype working and then properly integrate:
./build-xen
Source: build-xen
This script attempts to build Xen for aarch64 and feed it into QEMU through submodules/boot-wrapper-aarch64
TODO: other archs not yet attempted.
The current bad behaviour is that it prints just:
Boot-wrapper v0.2
and nothing else.
We will also need CONFIG_XEN=y on the Linux kernel, but first Xen should print some Xen messages before the kernel is ever reached.
If we pass to QEMU the xen image directly instead of the boot wrapper one:
-kernel ../xen/xen/xen
then Xen messages do show up! So it seems that the configuration failure lies in the boot wrapper itself rather than Xen.
Maybe it is also possible to run Xen directly like this: QEMU can already load multiple images at different memory locations with the generic loader: https://github.com/qemu/qemu/blob/master/docs/generic-loader.txt which looks something along:
-kernel file1.elf -device loader,file=file2.elf
so as long as we craft the correct DTB and feed it into Xen so that it can see the kernel, it should work. TODO does QEMU support patching the auto-generated DTB with pre-generated options? In the worst case we can just dump it hand hack it up though with -machine dumpdtb, see: Section 8.4, “Device tree emulator generation”.
Bibliography:
-
this attempt was based on: https://wiki.xenproject.org/wiki/Xen_ARM_with_Virtualization_Extensions/FastModels which is the documentation for the ARM Fast Models closed source simulators.
-
https://wiki.xenproject.org/wiki/Xen_ARM_with_Virtualization_Extensions/qemu-system-aarch64 this is the only QEMU aarch64 Xen page on the web. It uses the Ubuntu aarc64 image, which has EDK2.
I however see no joy on blobs. Buildroot does not seem to support EDK 2.
17. QEMU
17.1. Introduction to QEMU
QEMU is a system simulator: it simulates a CPU and devices such as interrupt handlers, timers, UART, screen, keyboard, etc.
If you are familiar with VirtualBox, then QEMU then basically does the same thing: it opens a "window" inside your desktop that can run an operating system inside your operating system.
Also both can use very similar techniques: either binary translation or KVM. VirtualBox' binary translator is / was based on QEMU’s it seems: https://en.wikipedia.org/wiki/VirtualBox#Software-based_virtualization
The huge advantage of QEMU over VirtualBox is that is supports cross arch simulation, e.g. simulate an ARM guest on an x86 host.
QEMU is likely the leading cross arch system simulator as of 2018. It is even the default Android simulator that developers get with Android Studio 3 to develop apps without real hardware.
Another advantage of QEMU over virtual box is that it doesn’t have Oracle' hands all all over it, more like RedHat + ARM.
Another advantage of QEMU is that is has no nice configuration GUI. Because who needs GUIs when you have 50 million semi-documented CLI options? Android Studio adds a custom GUI configuration tool on top of it.
QEMU is also supported by Buildroot in-tree, see e.g.: https://github.com/buildroot/buildroot/blob/2018.05/configs/qemu_aarch64_virt_defconfig We however just build our own manually with build-qemu, as it gives more flexibility, and building QEMU is very easy!
All of this makes QEMU the natural choice of reference system simulator for this repo.
17.2. Disk persistency
We disable disk persistency for both QEMU and gem5 by default, to prevent the emulator from putting the image in an unknown state.
For QEMU, this is done by passing the snapshot option to -drive, and for gem5 it is the default behaviour.
If you hack up our run script to remove that option, then:
./run --eval-after 'date >f;poweroff'
followed by:
./run --eval-after 'cat f'
gives the date, because poweroff without -n syncs before shutdown.
The sync command also saves the disk:
sync
When you do:
./build-buildroot
the disk image gets overwritten by a fresh filesystem and you lose all changes.
Remember that if you forcibly turn QEMU off without sync or poweroff from inside the VM, e.g. by closing the QEMU window, disk changes may not be saved.
Persistency is also turned off when booting from initrd with a CPIO instead of with a disk.
Disk persistency is useful to re-run shell commands from the history of a previous session with Ctrl-R, but we felt that the loss of determinism was not worth it.
17.2.1. gem5 disk persistency
TODO how to make gem5 disk writes persistent?
As of cadb92f2df916dbb47f428fd1ec4932a2e1f0f48 there are some read_only entries in the config.ini under cow sections, but hacking them to true did not work:
diff --git a/configs/common/FSConfig.py b/configs/common/FSConfig.py
index 17498c42b..76b8b351d 100644
--- a/configs/common/FSConfig.py
+++ b/configs/common/FSConfig.py
@@ -60,7 +60,7 @@ os_types = { 'alpha' : [ 'linux' ],
}
class CowIdeDisk(IdeDisk):
- image = CowDiskImage(child=RawDiskImage(read_only=True),
+ image = CowDiskImage(child=RawDiskImage(read_only=False),
read_only=False)
def childImage(self, ci):
The directory of interest is src/dev/storage.
17.3. gem5 qcow2
qcow2 does not appear supported, there are not hits in the source tree, and there is a mention on Nate’s 2009 wishlist: http://gem5.org/Nate%27s_Wish_List
This would be good to allow storing smaller sparse ext2 images locally on disk.
17.4. Snapshot
QEMU allows us to take snapshots at any time through the monitor.
You can then restore CPU, memory and disk state back at any time.
qcow2 filesystems must be used for that to work.
To test it out, login into the VM with and run:
./run --eval-after 'umount /mnt/9p/*;./count.sh'
On another shell, take a snapshot:
./qemu-monitor savevm my_snap_id
The counting continues.
Restore the snapshot:
./qemu-monitor loadvm my_snap_id
and the counting goes back to where we saved. This shows that CPU and memory states were reverted.
The umount is needed because snapshotting conflicts with 9P, which we felt is a more valuable default. If you forget to unmount, the following error appears on the QEMU monitor:
Migration is disabled when VirtFS export path '/linux-kernel-module-cheat/out/x86_64/buildroot/build' is mounted in the guest using mount_tag 'host_out'
We can also verify that the disk state is also reversed. Guest:
echo 0 >f
Monitor:
./qemu-monitor savevm my_snap_id
Guest:
echo 1 >f
Monitor:
./qemu-monitor loadvm my_snap_id
Guest:
cat f
And the output is 0.
Our setup does not allow for snapshotting while using initrd.
Bibliography: https://stackoverflow.com/questions/40227651/does-qemu-emulator-have-checkpoint-function/48724371#48724371
17.4.1. Snapshot internals
Snapshots are stored inside the .qcow2 images themselves.
They can be observed with:
"$(./getvar buildroot_host_dir)/bin/qemu-img" info "$(./getvar qcow2_file)"
which after savevm my_snap_id and savevm asdf contains an output of type:
image: out/x86_64/buildroot/images/rootfs.ext2.qcow2
file format: qcow2
virtual size: 512M (536870912 bytes)
disk size: 180M
cluster_size: 65536
Snapshot list:
ID TAG VM SIZE DATE VM CLOCK
1 my_snap_id 47M 2018-04-27 21:17:50 00:00:15.251
2 asdf 47M 2018-04-27 21:20:39 00:00:18.583
Format specific information:
compat: 1.1
lazy refcounts: false
refcount bits: 16
corrupt: false
As a consequence:
-
it is possible to restore snapshots across boots, since they stay on the same image the entire time
-
it is not possible to use snapshots with initrd in our setup, since we don’t pass
-driveat all when initrd is enabled
17.5. Device models
This section documents:
-
how to interact with peripheral hardware device models through device drivers
-
how to write your own hardware device models for our emulators, see also: https://stackoverflow.com/questions/28315265/how-to-add-a-new-device-in-qemu-source-code
For the more complex interfaces, we focus on simplified educational devices, either:
-
present in the QEMU upstream:
-
added in our fork of QEMU:
17.5.1. PCI
Only tested in x86.
17.5.1.1. pci_min
PCI driver for our minimal pci_min.c QEMU fork device:
./run -- -device lkmc_pci_min
then:
insmod pci_min.ko
Sources:
-
Kernel module: kernel_modules/pci_min.c.
-
QEMU device: https://github.com/cirosantilli/qemu/blob/lkmc/hw/misc/lkmc_pci_min.c
Outcome:
<4>[ 10.608241] pci_min: loading out-of-tree module taints kernel. <6>[ 10.609935] probe <6>[ 10.651881] dev->irq = 11 lkmc_pci_min mmio_write addr = 0 val = 12345678 size = 4 <6>[ 10.668515] irq_handler irq = 11 dev = 251 lkmc_pci_min mmio_write addr = 4 val = 0 size = 4
What happened:
-
right at probe time, we write to a register
-
our hardware model is coded such that it generates an interrupt when written to
-
the Linux kernel interrupt handler write to another register, which tells the hardware to stop sending interrupts
Kernel messages and printks from inside QEMU are shown all together, to see that more clearly, run in QEMU graphic mode instead.
We don’t enable the device by default because it does not work for vanilla QEMU, which we often want to test with this repository.
Probe already does a MMIO write, which generates an IRQ and tests everything.
17.5.1.2. QEMU edu PCI device
Small upstream educational PCI device:
./qemu_edu.sh
This tests a lot of features of the edu device, to understand the results, compare the inputs with the documentation of the hardware: https://github.com/qemu/qemu/blob/v2.12.0/docs/specs/edu.txt
Sources:
-
kernel module: kernel_modules/qemu_edu.c
-
QEMU device: https://github.com/qemu/qemu/blob/v2.12.0/hw/misc/edu.c
-
test script: rootfs_overlay/lkmc/qemu_edu.sh
Works because we add to our default QEMU CLI:
-device edu
This example uses:
-
the QEMU
edueducational device, which is a minimal educational in-tree PCI example -
the
pci.kokernel module, which exercises theeduhardware.I’ve contacted the awesome original author author of
eduJiri Slaby, and he told there is no official kernel module example because this was created for a kernel module university course that he gives, and he didn’t want to give away answers. I don’t agree with that philosophy, so students, cheat away with this repo and go make startups instead.
TODO exercise DMA on the kernel module. The edu hardware model has that feature:
17.5.1.3. Manipulate PCI registers directly
In this section we will try to interact with PCI devices directly from userland without kernel modules.
First identify the PCI device with:
lspci
In our case for example, we see:
00:06.0 Unclassified device [00ff]: Device 1234:11e8 (rev 10) 00:07.0 Unclassified device [00ff]: Device 1234:11e9
which we identify as being edu and pci_min respectively by the magic numbers: 1234:11e?
Alternatively, we can also do use the QEMU monitor:
./qemu-monitor info qtree
which gives:
dev: lkmc_pci_min, id ""
addr = 07.0
romfile = ""
rombar = 1 (0x1)
multifunction = false
command_serr_enable = true
x-pcie-lnksta-dllla = true
x-pcie-extcap-init = true
class Class 00ff, addr 00:07.0, pci id 1234:11e9 (sub 1af4:1100)
bar 0: mem at 0xfeb54000 [0xfeb54007]
dev: edu, id ""
addr = 06.0
romfile = ""
rombar = 1 (0x1)
multifunction = false
command_serr_enable = true
x-pcie-lnksta-dllla = true
x-pcie-extcap-init = true
class Class 00ff, addr 00:06.0, pci id 1234:11e8 (sub 1af4:1100)
bar 0: mem at 0xfea00000 [0xfeafffff]
Read the configuration registers as binary:
hexdump /sys/bus/pci/devices/0000:00:06.0/config
Get nice human readable names and offsets of the registers and some enums:
setpci --dumpregs
Get the values of a given config register from its human readable name, either with either bus or device id:
setpci -s 0000:00:06.0 BASE_ADDRESS_0 setpci -d 1234:11e9 BASE_ADDRESS_0
Note however that BASE_ADDRESS_0 also appears when you do:
lspci -v
as:
Memory at feb54000
Then you can try messing with that address with /dev/mem:
devmem 0xfeb54000 w 0x12345678
which writes to the first register of our pci_min device.
The device then fires an interrupt at irq 11, which is unhandled, which leads the kernel to say you are a bad boy:
lkmc_pci_min mmio_write addr = 0 val = 12345678 size = 4 <5>[ 1064.042435] random: crng init done <3>[ 1065.567742] irq 11: nobody cared (try booting with the "irqpoll" option)
followed by a trace.
Next, also try using our irq.ko IRQ monitoring module before triggering the interrupt:
insmod irq.ko devmem 0xfeb54000 w 0x12345678
Our kernel module handles the interrupt, but does not acknowledge it like our proper pci_min kernel module, and so it keeps firing, which leads to infinitely many messages being printed:
handler irq = 11 dev = 251
17.5.1.4. pciutils
There are two versions of setpci and lspci:
-
a simple one from BusyBox
-
a more complete one from pciutils which Buildroot has a package for, and is the default on Ubuntu 18.04 host. This is the one we enable by default.
17.5.1.5. Introduction to PCI
The PCI standard is non-free, obviously like everything in low level: https://pcisig.com/specifications but Google gives several illegal PDF hits :-)
And of course, the best documentation available is: http://wiki.osdev.org/PCI
Like every other hardware, we could interact with PCI on x86 using only IO instructions and memory operations.
But PCI is a complex communication protocol that the Linux kernel implements beautifully for us, so let’s use the kernel API.
Bibliography:
-
edu device source and spec in QEMU tree:
-
http://www.zarb.org/~trem/kernel/pci/pci-driver.c inb outb runnable example (no device)
-
LDD3 PCI chapter
-
another QEMU device + module, but using a custom QEMU device:
-
https://is.muni.cz/el/1433/podzim2016/PB173/um/65218991/ course given by the creator of the edu device. In Czech, and only describes API
17.5.1.6. PCI BFD
lspci -k shows something like:
00:04.0 Class 00ff: 1234:11e8 lkmc_pci
Meaning of the first numbers:
<8:bus>:<5:device>.<3:function>
Often abbreviated to BDF.
-
bus: groups PCI slots
-
device: maps to one slot
-
function: https://stackoverflow.com/questions/19223394/what-is-the-function-number-in-pci/44735372#44735372
Sometimes a fourth number is also added, e.g.:
0000:00:04.0
TODO is that the domain?
Class: pure magic: https://www-s.acm.illinois.edu/sigops/2007/roll_your_own/7.c.1.html TODO: does it have any side effects? Set in the edu device at:
k->class_id = PCI_CLASS_OTHERS
17.5.1.7. PCI BAR
Each PCI device has 6 BAR IOs (base address register) as per the PCI spec.
Each BAR corresponds to an address range that can be used to communicate with the PCI.
Each BAR is of one of the two types:
-
IORESOURCE_IO: must be accessed withinXandoutX -
IORESOURCE_MEM: must be accessed withioreadXandiowriteX. This is the saner method apparently, and what the edu device uses.
The length of each region is defined by the hardware, and communicated to software via the configuration registers.
The Linux kernel automatically parses the 64 bytes of standardized configuration registers for us.
QEMU devices register those regions with:
memory_region_init_io(&edu->mmio, OBJECT(edu), &edu_mmio_ops, edu,
"edu-mmio", 1 << 20);
pci_register_bar(pdev, 0, PCI_BASE_ADDRESS_SPACE_MEMORY, &edu->mmio);
17.5.2. GPIO
TODO: broken. Was working before we moved arm from -M versatilepb to -M virt around af210a76711b7fa4554dcc2abd0ddacfc810dfd4. Either make it work on -M virt if that is possible, or document precisely how to make it work with versatilepb, or hopefully vexpress which is newer.
QEMU does not have a very nice mechanism to observe GPIO activity: https://raspberrypi.stackexchange.com/questions/56373/is-it-possible-to-get-the-state-of-the-leds-and-gpios-in-a-qemu-emulation-like-t/69267#69267
The best you can do is to hack our build script to add:
HOST_QEMU_OPTS='--extra-cflags=-DDEBUG_PL061=1'
where PL061 is the dominating ARM Holdings hardware that handles GPIO.
Then compile with:
./build-buildroot --arch arm --config-fragment buildroot_config/gpio ./build-linux --config-fragment linux_config/gpio
then test it out with:
./gpio.sh
Source: rootfs_overlay/lkmc/gpio.sh
Buildroot’s Linux tools package provides some GPIO CLI tools: lsgpio, gpio-event-mon, gpio-hammer, TODO document them here.
17.5.3. LEDs
TODO: broken when arm moved to -M virt, same as GPIO.
Hack QEMU’s hw/misc/arm_sysctl.c with a printf:
static void arm_sysctl_write(void *opaque, hwaddr offset,
uint64_t val, unsigned size)
{
arm_sysctl_state *s = (arm_sysctl_state *)opaque;
switch (offset) {
case 0x08: /* LED */
printf("LED val = %llx\n", (unsigned long long)val);
and then rebuild with:
./build-qemu --arch arm ./build-linux --arch arm --config-fragment linux_config/leds
But beware that one of the LEDs has a heartbeat trigger by default (specified on dts), so it will produce a lot of output.
And then activate it with:
cd /sys/class/leds/versatile:0 cat max_brightness echo 255 >brightness
Relevant QEMU files:
-
hw/arm/versatilepb.c -
hw/misc/arm_sysctl.c
Relevant kernel files:
-
arch/arm/boot/dts/versatile-pb.dts -
drivers/leds/led-class.c -
drivers/leds/leds-sysctl.c
17.5.4. platform_device
Minimal platform device example coded into the -M versatilepb SoC of our QEMU fork.
Using this device now requires checking out to the branch:
git checkout platform-device git submodule sync
before building, it does not work on master.
Rationale: we found out that the kernels that build for qemu -M versatilepb don’t work on gem5 because versatilepb is an old pre-v7 platform, and gem5 requires armv7. So we migrated over to -M virt to have a single kernel for both gem5 and QEMU, and broke this since the single kernel was more important. TODO port to -M virt.
The module itself can be found at: https://github.com/cirosantilli/linux-kernel-module-cheat/blob/platform-device/kernel_modules/platform_device.c
Uses:
-
hw/misc/lkmc_platform_device.cminimal device added in our QEMU fork to-M versatilepb -
the device tree entry we added to our Linux kernel fork: https://github.com/cirosantilli/linux/blob/361bb623671a52a36a077a6dd45843389a687a33/arch/arm/boot/dts/versatile-pb.dts#L42
Expected outcome after insmod:
-
QEMU reports MMIO with printfs
-
IRQs are generated and handled by this module, which logs to dmesg
Without insmoding this module, try writing to the register with /dev/mem:
devmem 0x101e9000 w 0x12345678
We can also observe the interrupt with dummy-irq:
modprobe dummy-irq irq=34 insmod platform_device.ko
The IRQ number 34 was found by on the dmesg after:
insmod platform_device.ko
17.6. QEMU monitor
The QEMU monitor is a magic terminal that allows you to send text commands to the QEMU VM itself: https://en.wikibooks.org/wiki/QEMU/Monitor
While QEMU is running, on another terminal, run:
./qemu-monitor
or send one command such as info qtree and quit the monitor:
./qemu-monitor info qtree
or equivalently:
echo 'info qtree' | ./qemu-monitor
Source: qemu-monitor
qemu-monitor uses the -monitor QEMU command line option, which makes the monitor listen from a socket.
Alternatively, we can also enter the QEMU monitor from inside -nographics QEMU text mode with:
Ctrl-A C
and go back to the terminal with:
Ctrl-A C
When in graphic mode, we can do it from the GUI:
Ctrl-Alt ?
where ? is a digit 1, or 2, or, 3, etc. depending on what else is available on the GUI: serial, parallel and frame buffer.
Finally, we can also access QEMU monitor commands directly from GDB step debug with the monitor command:
./run-gdb
then inside that shell:
monitor info qtree
This way you can use both QEMU monitor and GDB commands to inspect the guest from inside a single shell! Pretty awesome.
In general, ./qemu-monitor is the best option, as it:
-
works on both modes
-
allows to use the host Bash history to re-run one off commands
-
allows you to search the output of commands on your host shell even when in graphic mode
Getting everything to work required careful choice of QEMU command line options:
17.6.1. QEMU monitor from guest
Peter Maydell said potentially not possible nicely as of August 2018: https://stackoverflow.com/questions/51747744/how-to-run-a-qemu-monitor-command-from-inside-the-guest/51764110#51764110
It is also worth looking into the QEMU Guest Agent tool qemu-gq that can be enabled with:
./build-buildroot --config 'BR2_PACKAGE_QEMU=y'
17.6.2. QEMU monitor from GDB
When doing GDB step debug it is possible to send QEMU monitor commands through the GDB monitor command, which saves you the trouble of opening yet another shell.
Try for example:
monitor help monitor info qtree
17.7. Debug the emulator
When you start hacking QEMU or gem5, it is useful to see what is going on inside the emulator themselves.
This is of course trivial since they are just regular userland programs on the host, but we make it a bit easier with:
./run --debug-vm
Then you could:
break edu_mmio_read run
And in QEMU:
./qemu_edu.sh
Or for a faster development loop:
./run --debug-vm-args '-ex "break edu_mmio_read" -ex "run"'
When in QEMU text mode, using --debug-vm makes Ctrl-C not get passed to the QEMU guest anymore: it is instead captured by GDB itself, so allow breaking. So e.g. you won’t be able to easily quit from a guest program like:
sleep 10
In graphic mode, make sure that you never click inside the QEMU graphic while debugging, otherwise you mouse gets captured forever, and the only solution I can find is to go to a TTY with Ctrl-Alt-F1 and kill QEMU.
You can still send key presses to QEMU however even without the mouse capture, just either click on the title bar, or alt tab to give it focus.
17.7.1. Debug gem5 Python scripts
Start pdb at the first instruction:
./run --emulator gem5 --gem5-exe-args='--pdb' --terminal
Requires --terminal as we must be on foreground.
Alternatively, you can add to the point of the code where you want to break the usual:
import ipdb; ipdb.set_trace()
and then run with:
./run --emulator gem5 --terminal
17.8. Tracing
QEMU can log several different events.
The most interesting are events which show instructions that QEMU ran, for which we have a helper:
./trace-boot --arch x86_64
Under the hood, this uses QEMU’s -trace option.
You can then inspect the address of each instruction run:
less "$(./getvar --arch x86_64 run_dir)/trace.txt"
Sample output excerpt:
exec_tb 0.000 pid=10692 tb=0x7fb4f8000040 pc=0xfffffff0 exec_tb 35.391 pid=10692 tb=0x7fb4f8000180 pc=0xfe05b exec_tb 21.047 pid=10692 tb=0x7fb4f8000340 pc=0xfe066 exec_tb 12.197 pid=10692 tb=0x7fb4f8000480 pc=0xfe06a
Get the list of available trace events:
./run --trace help
TODO: any way to show the actualy disassembled instruction executed directly from there? Possible with QEMU -d tracing.
Enable other specific trace events:
./run --trace trace1,trace2 ./qemu-trace2txt -a "$arch" less "$(./getvar -a "$arch" run_dir)/trace.txt"
This functionality relies on the following setup:
-
./configure --enable-trace-backends=simple. This logs in a binary format to the trace file.It makes 3x execution faster than the default trace backend which logs human readable data to stdout.
Logging with the default backend
loggreatly slows down the CPU, and in particular leads to this boot message:All QSes seen, last rcu_sched kthread activity 5252 (4294901421-4294896169), jiffies_till_next_fqs=1, root ->qsmask 0x0 swapper/0 R running task 0 1 0 0x00000008 ffff880007c03ef8 ffffffff8107aa5d ffff880007c16b40 ffffffff81a3b100 ffff880007c03f60 ffffffff810a41d1 0000000000000000 0000000007c03f20 fffffffffffffedc 0000000000000004 fffffffffffffedc ffffffff00000000 Call Trace: <IRQ> [<ffffffff8107aa5d>] sched_show_task+0xcd/0x130 [<ffffffff810a41d1>] rcu_check_callbacks+0x871/0x880 [<ffffffff810a799f>] update_process_times+0x2f/0x60
in which the boot appears to hang for a considerable time.
-
patch QEMU source to remove the
disablefromexec_tbin thetrace-eventsfile. See also: https://rwmj.wordpress.com/2016/03/17/tracing-qemu-guest-execution/
17.8.1. QEMU -d tracing
QEMU also has a second trace mechanism in addition to -trace, find out the events with:
./run -- -d help
Let’s pick the one that dumps executed instructions, in_asm:
./run --eval './linux/poweroff.out' -- -D out/trace.txt -d in_asm less out/trace.txt
Sample output excerpt:
---------------- IN: 0xfffffff0: ea 5b e0 00 f0 ljmpw $0xf000:$0xe05b ---------------- IN: 0x000fe05b: 2e 66 83 3e 88 61 00 cmpl $0, %cs:0x6188 0x000fe062: 0f 85 7b f0 jne 0xd0e1
TODO: after IN:, symbol names are meant to show, which is awesome, but I don’t get any. I do see them however when running a bare metal example from: https://github.com/cirosantilli/newlib-examples/tree/900a9725947b1f375323c7da54f69e8049158881
TODO: what is the point of having two mechanisms, -trace and -d? -d tracing is cool because it does not require a messy recompile, and it can also show symbols.
17.8.2. QEMU trace register values
TODO: is it possible to show the register values for each instruction?
This would include the memory values read into the registers.
Seems impossible due to optimizations that QEMU does:
PANDA can list memory addresses, so I bet it can also decode the instructions: https://github.com/panda-re/panda/blob/883c85fa35f35e84a323ed3d464ff40030f06bd6/panda/docs/LINE_Censorship.md I wonder why they don’t just upstream those things to QEMU’s tracing: https://github.com/panda-re/panda/issues/290
gem5 can do it as shown at: Section 17.8.6, “gem5 tracing”.
17.8.3. Trace source lines
We can further use Binutils' addr2line to get the line that corresponds to each address:
./trace-boot --arch x86_64 ./trace2line --arch x86_64 less "$(./getvar --arch x86_64 run_dir)/trace-lines.txt"
The last commands takes several seconds.
The format is as follows:
39368 _static_cpu_has arch/x86/include/asm/cpufeature.h:148
Where:
-
39368: number of consecutive times that a line ran. Makes the output much shorter and more meaningful -
_static_cpu_has: name of the function that contains the line -
arch/x86/include/asm/cpufeature.h:148: file and line
This could of course all be done with GDB, but it would likely be too slow to be practical.
TODO do even more awesome offline post-mortem analysis things, such as:
-
detect if we are in userspace or kernelspace. Should be a simple matter of reading the
-
read kernel data structures, and determine the current thread. Maybe we can reuse / extend the kernel’s GDB Python scripts??
17.8.4. QEMU record and replay
QEMU runs, unlike gem5, are not deterministic by default, however it does support a record and replay mechanism that allows you to replay a previous run deterministically.
This awesome feature allows you to examine a single run as many times as you would like until you understand everything:
# Record a run. ./run --eval-after './linux/rand_check.out;./linux/poweroff.out;' --record # Replay the run. ./run --eval-after './linux/rand_check.out;./linux/poweroff.out;' --replay
A convenient shortcut to do both at once to test the feature is:
./qemu-rr --eval-after './linux/rand_check.out;./linux/poweroff.out;'
By comparing the terminal output of both runs, we can see that they are the exact same, including things which normally differ across runs:
-
timestamps of dmesg output
-
rand_check.out output
The record and replay feature was revived around QEMU v3.0.0. It existed earlier but it rot completely. As of v3.0.0 it is still flaky: sometimes we get deadlocks, and only a limited number of command line arguments are supported.
Documented at: https://github.com/qemu/qemu/blob/v2.12.0/docs/replay.txt
TODO: using -r as above leads to a kernel warning:
rcu_sched detected stalls on CPUs/tasks
TODO: replay deadlocks intermittently at disk operations, last kernel message:
EXT4-fs (sda): re-mounted. Opts: block_validity,barrier,user_xattr
TODO replay with network gets stuck:
./qemu-rr --eval-after 'ifup -a;wget -S google.com;./linux/poweroff.out;'
after the message:
adding dns 10.0.2.3
There is explicit network support on the QEMU patches, but either it is buggy or we are not using the correct magic options.
Solved on unmerged c42634d8e3428cfa60672c3ba89cabefc720cde9 from https://github.com/ispras/qemu/tree/rr-180725
TODO arm and aarch64 only seem to work with initrd since I cannot plug a working IDE disk device? See also: https://lists.gnu.org/archive/html/qemu-devel/2018-02/msg05245.html
Then, when I tried with initrd and no disk:
./build-buildroot --arch aarch64 --initrd ./qemu-rr --arch aarch64 --eval-after './linux/rand_check.out;./linux/poweroff.out;' --initrd
QEMU crashes with:
ERROR:replay/replay-time.c:49:replay_read_clock: assertion failed: (replay_file && replay_mutex_locked())
I had the same error previously on x86-64, but it was fixed: https://bugs.launchpad.net/qemu/+bug/1762179 so maybe the forgot to fix it for aarch64?
Solved on unmerged c42634d8e3428cfa60672c3ba89cabefc720cde9 from https://github.com/ispras/qemu/tree/rr-180725
17.8.4.1. QEMU reverse debugging
TODO get working.
QEMU replays support checkpointing, and this allows for a simplistic "reverse debugging" implementation proposed at https://lists.gnu.org/archive/html/qemu-devel/2018-06/msg00478.html on the unmerged https://github.com/ispras/qemu/tree/rr-180725:
./run --eval-after './linux/rand_check.out;./linux/poweroff.out;' --record ./run --eval-after './linux/rand_check.out;./linux/poweroff.out;' --replay --gdb-wait
On another shell:
./run-gdb start_kernel
In GDB:
n n n n reverse-continue
and we are back at start_kernel
17.8.5. QEMU trace multicore
TODO: is there any way to distinguish which instruction runs on each core? Doing:
./run --arch x86_64 --cpus 2 --eval './linux/poweroff.out' --trace exec_tb ./qemu-trace2txt
just appears to output both cores intertwined without any clear differentiation.
17.8.6. gem5 tracing
gem5 provides also provides a tracing mechanism documented at: http://www.gem5.org/Trace_Based_Debugging:
./run --arch aarch64 --eval 'm5 exit' --emulator gem5 --trace ExecAll less "$(./getvar --arch aarch64 run_dir)/trace.txt"
Keep in mind however that the disassembly is very broken in several places as of 2019q2, so you can’t always trust it.
Output the trace to stdout instead of a file:
./run \ --arch aarch64 \ --emulator gem5 \ --eval 'm5 exit' \ --trace ExecAll \ --trace-stdout \ ;
We also have a shortcut for --trace ExecAll -trace-stdout with --trace-insts-stdout
./run \ --arch aarch64 \ --emulator gem5 \ --eval 'm5 exit' \ --trace-insts-stdout \ ;
This would produce a lot of output however, so you will likely not want that when tracing a Linux kernel boot instructions. But it can be very convenient for smaller traces such as Baremetal.
List all available debug flags:
./run --arch aarch64 --gem5-exe-args='--debug-help' --emulator gem5
but to understand most of them you have to look at the source code:
less "$(./getvar gem5_source_dir)/src/cpu/SConscript" less "$(./getvar gem5_source_dir)/src/cpu/exetrace.cc"
The most important trace flags to know about are:
-
Faults: CPU exceptions / interrupts, see an example at: ARM SVC instruction
The traces are generated from DPRINTF(<trace-id> calls scattered throughout the code.
As can be seen on the Sconstruct, Exec is just an alias that enables a set of flags.
Be warned, the trace is humongous, at 16Gb.
We can make the trace smaller by naming the trace file as trace.txt.gz, which enables GZIP compression, but that is not currently exposed on our scripts, since you usually just need something human readable to work on.
Enabling tracing made the runtime about 4x slower on the P51, with or without .gz compression.
Trace the source lines just like for QEMU with:
./trace-boot --arch aarch64 --emulator gem5 ./trace2line --arch aarch64 --emulator gem5 less "$(./getvar --arch aarch64 run_dir)/trace-lines.txt"
TODO: 7452d399290c9c1fc6366cdad129ef442f323564 ./trace2line this is too slow and takes hours. QEMU’s processing of 170k events takes 7 seconds. gem5’s processing is analogous, but there are 140M events, so it should take 7000 seconds ~ 2 hours which seems consistent with what I observe, so maybe there is no way to speed this up… The workaround is to just use gem5’s ExecSymbol to get function granularity, and then GDB individually if line detail is needed?
17.8.6.1. gem5 ExecAll trace format
This debug flag traces all instructions.
The output format is of type:
25007000: system.cpu T0 : @start_kernel : stp 25007000: system.cpu T0 : @start_kernel.0 : addxi_uop ureg0, sp, #-112 : IntAlu : D=0xffffff8008913f90 25007500: system.cpu T0 : @start_kernel.1 : strxi_uop x29, [ureg0] : MemWrite : D=0x0000000000000000 A=0xffffff8008913f90 25008000: system.cpu T0 : @start_kernel.2 : strxi_uop x30, [ureg0, #8] : MemWrite : D=0x0000000000000000 A=0xffffff8008913f98 25008500: system.cpu T0 : @start_kernel.3 : addxi_uop sp, ureg0, #0 : IntAlu : D=0xffffff8008913f90
There are two types of lines:
-
full instructions, as the first line. Only shown if the
ExecMacroflag is given. -
micro ops that constitute the instruction, the lines that follow. Yes,
aarch64also has microops: https://superuser.com/questions/934752/do-arm-processors-like-cortex-a9-use-microcode/934755#934755. Only shown if theExecMicroflag is given.
Breakdown:
-
25007500: time count in some unit. Note how the microops execute at further timestamps. -
system.cpu: distinguishes between CPUs when there are more than one. For example, running Section 26.8.3, “ARM multicore” with two cores producessystem.cpu0andsystem.cpu1 -
T0: thread number. TODO: hyperthread? How to play with it? -
@start_kernel: we are in thestart_kernelfunction. Awesome feature! Implemented with libelf https://sourceforge.net/projects/elftoolchain/ copy pasted in-treeext/libelf. To get raw addresses, remove theExecSymbol, which is enabled byExec. This can be done withExec,-ExecSymbol. -
.1as in@start_kernel.1: index of the microop -
stp: instruction disassembly. Note however that the disassembly of many instructions are very broken as of 2019q2, and you can’t just trust them blindly. -
strxi_uop x29, [ureg0]: microop disassembly. -
MemWrite : D=0x0000000000000000 A=0xffffff8008913f90: a memory write microop:-
Dstands for data, and represents the value that was written to memory or to a register -
Astands for address, and represents the address to which the value was written. It only shows when data is being written to memory, but not to registers.
-
The best way to verify all of this is to write some baremetal code
17.8.6.2. gem5 Registers trace format
This flag shows a more detailed register usage than gem5 ExecAll trace format.
For example, if we run in LKMC 0323e81bff1d55b978a4b36b9701570b59b981eb:
./run --arch aarch64 --baremetal userland/arch/aarch64/add.S --emulator gem5 --trace ExecAll,Registers --trace-stdout
then the stdout contains:
31000: system.cpu A0 T0 : @main_after_prologue : movz x0, #1, #0 : IntAlu : D=0x0000000000000001 flags=(IsInteger) 31500: system.cpu.[tid:0]: Setting int reg 34 (34) to 0. 31500: system.cpu.[tid:0]: Reading int reg 0 (0) as 0x1. 31500: system.cpu.[tid:0]: Setting int reg 1 (1) to 0x3. 31500: system.cpu A0 T0 : @main_after_prologue+4 : add x1, x0, #2 : IntAlu : D=0x0000000000000003 flags=(IsInteger) 32000: system.cpu.[tid:0]: Setting int reg 34 (34) to 0. 32000: system.cpu.[tid:0]: Reading int reg 1 (1) as 0x3. 32000: system.cpu.[tid:0]: Reading int reg 31 (34) as 0. 32000: system.cpu.[tid:0]: Setting int reg 0 (0) to 0x3.
which corresponds to the two following instructions:
mov x0, 1 add x1, x0, 2
TODO that format is either buggy or is very difficult to understand:
-
what is
34? Presumably some flags register? -
what do the numbers in parenthesis mean at
31 (34)? Presumably some flags register? -
why is the first instruction setting
reg 1and the second onereg 0, given that the first setsx0and the secondx1?
17.8.6.4. gem5 tracing internals
As of gem5 16eeee5356585441a49d05c78abc328ef09f7ace the default tracer is ExeTracer. It is set at:
src/cpu/BaseCPU.py:63:default_tracer = ExeTracer()
which then gets used at:
class BaseCPU(ClockedObject):
[...]
tracer = Param.InstTracer(default_tracer, "Instruction tracer")
All tracers derive from the common InstTracer base class:
git grep ': InstTracer'
gives:
src/arch/arm/tracers/tarmac_parser.hh:218: TarmacParser(const Params *p) : InstTracer(p), startPc(p->start_pc), src/arch/arm/tracers/tarmac_tracer.cc:57: : InstTracer(p), src/cpu/exetrace.hh:67: ExeTracer(const Params *params) : InstTracer(params) src/cpu/inst_pb_trace.cc:72: : InstTracer(p), buf(nullptr), bufSize(0), curMsg(nullptr) src/cpu/inteltrace.hh:63: IntelTrace(const IntelTraceParams *p) : InstTracer(p)
As mentioned at gem5 TARMAC traces, there appears to be no way to select those currently without hacking the config scripts.
TARMAC is described at: gem5 TARMAC traces.
TODO: are IntelTrace and TarmacParser useful for anything or just relics?
Then there is also the NativeTrace class:
src/cpu/nativetrace.hh:68:class NativeTrace : public ExeTracer
which gets implemented in a few different ISAs, but not all:
src/arch/arm/nativetrace.hh:40:class ArmNativeTrace : public NativeTrace src/arch/sparc/nativetrace.hh:41:class SparcNativeTrace : public NativeTrace src/arch/x86/nativetrace.hh:41:class X86NativeTrace : public NativeTrace
TODO: I can’t find any usages of those classes from in-tree configs.
17.9. QEMU GUI is unresponsive
Sometimes in Ubuntu 14.04, after the QEMU SDL GUI starts, it does not get updated after keyboard strokes, and there are artifacts like disappearing text.
We have not managed to track this problem down yet, but the following workaround always works:
Ctrl-Shift-U Ctrl-C root
This started happening when we switched to building QEMU through Buildroot, and has not been observed on later Ubuntu.
Using text mode is another workaround if you don’t need GUI features.
18. gem5
Getting started at: Section 1.2, “gem5 Buildroot setup”.
18.1. gem5 vs QEMU
-
advantages of gem5:
-
simulates a generic more realistic pipelined and optionally out of order CPU cycle by cycle, including a realistic DRAM memory access model with latencies, caches and page table manipulations. This allows us to:
-
do much more realistic performance benchmarking with it, which makes absolutely no sense in QEMU, which is purely functional
-
make certain functional observations that are not possible in QEMU, e.g.:
-
use Linux kernel APIs that flush cache memory like DMA, which are crucial for driver development. In QEMU, the driver would still work even if we forget to flush caches.
-
spectre / meltdown:
-
It is not of course truly cycle accurate, as that:
-
would require exposing proprietary information of the CPU designs: https://stackoverflow.com/questions/17454955/can-you-check-performance-of-a-program-running-with-qemu-simulator/33580850#33580850
-
would make the simulation even slower TODO confirm, by how much
but the approximation is reasonable.
It is used mostly for microarchitecture research purposes: when you are making a new chip technology, you don’t really need to specialize enormously to an existing microarchitecture, but rather develop something that will work with a wide range of future architectures.
-
-
runs are deterministic by default, unlike QEMU which has a special QEMU record and replay mode, that requires first playing the content once and then replaying
-
gem5 ARM at least appears to implement more low level CPU functionality than QEMU, e.g. QEMU only added EL2 in 2018: https://stackoverflow.com/questions/42824706/qemu-system-aarch64-entering-el1-when-emulating-a53-power-up See also: Section 26.8.1, “ARM exception levels”
-
-
disadvantage of gem5: slower than QEMU, see: Section 28.2.1, “Benchmark Linux kernel boot”
This implies that the user base is much smaller, since no Android devs.
Instead, we have only chip makers, who keep everything that really works closed, and researchers, who can’t version track or document code properly >:-) And this implies that:
-
the documentation is more scarce
-
it takes longer to support new hardware features
Well, not that AOSP is that much better anyways.
-
-
not sure: gem5 has BSD license while QEMU has GPL
This suits chip makers that want to distribute forks with secret IP to their customers.
On the other hand, the chip makers tend to upstream less, and the project becomes more crappy in average :-)
18.2. gem5 run benchmark
OK, this is why we used gem5 in the first place, performance measurements!
Let’s see how many cycles Dhrystone, which Buildroot provides, takes for a few different input parameters.
We will do that for various input parameters on full system by taking a checkpoint after the boot finishes a fast atomic CPU boot, and then we will restore in a more detailed mode and run the benchmark:
./build-buildroot --config 'BR2_PACKAGE_DHRYSTONE=y' # Boot fast, take checkpoint, and exit. ./run --arch aarch64 --emulator gem5 --eval-after './gem5.sh' # Restore the checkpoint after boot, and benchmark with input 1000. ./run \ --arch aarch64 \ --emulator gem5 \ --eval-after './gem5.sh' \ --gem5-readfile 'm5 resetstats;dhrystone 1000;m5 dumpstats' \ --gem5-restore 1 \ -- \ --cpu-type=HPI \ --restore-with-cpu=HPI \ --caches \ --l2cache \ --l1d_size=64kB \ --l1i_size=64kB \ --l2_size=256kB \ ; # Get the value for number of cycles. # head because there are two lines: our dumpstats and the # automatic dumpstats at the end which we don't care about. ./gem5-stat --arch aarch64 | head -n 1 # Now for input 10000. ./run \ --arch aarch64 \ --emulator gem5 \ --eval-after './gem5.sh' \ --gem5-readfile 'm5 resetstats;dhrystone 10000;m5 dumpstats' \ --gem5-restore 1 \ -- \ --cpu-type=HPI \ --restore-with-cpu=HPI \ --caches \ --l2cache \ --l1d_size=64kB \ --l1i_size=64kB \ --l2_size=256kB \ ; ./gem5-stat --arch aarch64 | head -n 1
If you ever need a shell to quickly inspect the system state after boot, you can just use:
./run \ --arch aarch64 \ --emulator gem5 \ --eval-after './gem5.sh' \ --gem5-readfile 'sh' \ --gem5-restore 1 \
This procedure is further automated and DRYed up at:
./gem5-bench-dhrystone cat out/gem5-bench-dhrystone.txt
Source: gem5-bench-dhrystone
Output at 2438410c25e200d9766c8c65773ee7469b599e4a + 1:
n cycles 1000 13665219 10000 20559002 100000 85977065
so as expected, the Dhrystone run with a larger input parameter 100000 took more cycles than the ones with smaller input parameters.
The gem5-stats commands output the approximate number of CPU cycles it took Dhrystone to run.
A more naive and simpler to understand approach would be a direct:
./run --arch aarch64 --emulator gem5 --eval 'm5 checkpoint;m5 resetstats;dhrystone 10000;m5 exit'
but the problem is that this method does not allow to easily run a different script without running the boot again. The ./gem5.sh script works around that by using m5 readfile as explained further at: Section 18.5.2, “gem5 checkpoint restore and run a different script”.
Now you can play a fun little game with your friends:
-
pick a computational problem
-
make a program that solves the computation problem, and outputs output to stdout
-
write the code that runs the correct computation in the smallest number of cycles possible
To find out why your program is slow, a good first step is to have a look at gem5 stats.txt file.
18.2.1. Skip extra benchmark instructions
A few imperfections of our benchmarking method are:
-
when we do
m5 resetstatsandm5 exit, there is some time passed before theexecsystem call returns and the actual benchmark starts and ends -
the benchmark outputs to stdout, which means so extra cycles in addition to the actual computation. But TODO: how to get the output to check that it is correct without such IO cycles?
Solutions to these problems include:
-
modify benchmark code with instrumentation directly, see m5ops instructions for an example.
-
monitor known addresses TODO possible? Create an example.
Those problems should be insignificant if the benchmark runs for long enough however.
18.2.2. gem5 system parameters
Besides optimizing a program for a given CPU setup, chip developers can also do the inverse, and optimize the chip for a given benchmark!
The rabbit hole is likely deep, but let’s scratch a bit of the surface.
18.2.2.1. Number of cores
./run --arch arm --cpus 2 --emulator gem5
Check with:
cat /proc/cpuinfo getconf _NPROCESSORS_CONF
18.2.2.1.1. Number of cores in QEMU user mode
TODO why in User mode simulation QEMU always shows the number of cores of the host. E.g., both of the following output the same as nproc on the host:
nproc ./run --userland userland/cpp/thread_hardware_concurrency.cpp ./run --cpus 2 --userland userland/cpp/thread_hardware_concurrency.cpp
This random page suggests that QEMU splits one host thread thread per guest thread, and thus presumably delegates context switching to the host kernel: https://qemu.weilnetz.de/w64/2012/2012-12-04/qemu-tech.html#User-emulation-specific-details
We can confirm that with:
./run --userland userland/posix/pthread_count.c --userland-args 4 ps Haux | grep qemu | wc
Remember QEMU user mode does not show stdout immediately though.
At 369a47fc6e5c2f4a7f911c1c058b6088f8824463 + 1 QEMU appears to spawn 3 host threads plus one for every new guest thread created. Remember that userland/posix/pthread_count.c spawns N + 1 total threads if you count the main thread.
18.2.2.1.2. Number of cores in gem5 user mode
gem5 user mode multi core has been particularly flaky compared to QEMU’s.
You have the limitation that you must have at least one core per guest thread, otherwise pthread_create fails. For example:
./run --cpus 1 --emulator gem5 --static --userland userland/posix/pthread_self.c --userland-args 1
fails because that process has a total of 2 threads: one for main and one extra thread spawned: userland/posix/pthread_self.c The error message is:
pthread_create: Resource temporarily unavailable
It works however if we add on extra CPU:
./run --cpus 2 --emulator gem5 --static --userland userland/posix/pthread_self.c --userland-args 1
This has to do with the fact that gem5 has a more simplistic thread implementation that does not spawn one host thread per guest thread CPU. Maybe this is required to achieve reproducible runs? What is the task switch algorithm then?
gem5 threading does however show the expected number of cores, e.g.:
./run --cpus 1 --userland userland/cpp/thread_hardware_concurrency.cpp --emulator gem5 --static ./run --cpus 2 --userland userland/cpp/thread_hardware_concurrency.cpp --emulator gem5 --static
outputs 1 and 2 respectively.
TODO: aarch64 seems to failing to spawn more than 2 threads at 369a47fc6e5c2f4a7f911c1c058b6088f8824463 + 1:
./run --arch aarch64 --cpus 3 --emulator gem5 --static --userland userland/posix/pthread_self.c --userland-args 2
fails with:
Exiting @ tick 18446744073709551615 because simulate() limit reached
18.2.2.1.3. gem5 se.py user mode with 2 or more pthreads fails with because simulate() limit reached
See bug report at: https://github.com/cirosantilli/linux-kernel-module-cheat/issues/81
18.2.2.1.4. gem5 ARM full system with more than 8 cores
Build the kernel with the gem5 arm Linux kernel patches, and then run:
./run \ --arch aarch64 \ --linux-build-id gem5-v4.15 \ --emulator gem5 \ --cpus 16 \ -- \ --param 'system.realview.gic.gem5_extensions = True' \ ;
18.2.2.2. gem5 cache size
A quick ./run --emulator gem5 -- -h leads us to the options:
--caches --l1d_size=1024 --l1i_size=1024 --l2cache --l2_size=1024 --l3_size=1024
But keep in mind that it only affects benchmark performance of the most detailed CPU types as shown at: Table 2, “gem5 cache support in function of CPU type”.
| arch | CPU type | caches used |
|---|---|---|
X86 |
|
no |
X86 |
|
?* |
ARM |
|
no |
ARM |
|
yes |
*: couldn’t test because of:
Cache sizes can in theory be checked with the methods described at: https://superuser.com/questions/55776/finding-l2-cache-size-in-linux:
getconf -a | grep CACHE lscpu cat /sys/devices/system/cpu/cpu0/cache/index2/size
but for some reason the Linux kernel is not seeing the cache sizes:
Behaviour breakdown:
-
arm QEMU and gem5 (both
AtomicSimpleCPUorHPI), x86 gem5:/sysfiles don’t exist, andgetconfandlscpuvalue empty -
x86 QEMU:
/sysfiles exist, butgetconfandlscpuvalues still empty
So we take a performance measurement approach instead:
./gem5-bench-cache -- --arch aarch64 cat "$(./getvar --arch aarch64 run_dir)/bench-cache.txt"
which gives:
cmd ./run --emulator gem5 --arch aarch64 --gem5-readfile "dhrystone 1000" --gem5-restore 1 -- --caches --l2cache --l1d_size=1024 --l1i_size=1024 --l2_size=1024 --l3_size=1024 --cpu-type=HPI --restore-with-cpu=HPI time 23.82 exit_status 0 cycles 93284622 instructions 4393457 cmd ./run --emulator gem5 --arch aarch64 --gem5-readfile "dhrystone 1000" --gem5-restore 1 -- --caches --l2cache --l1d_size=1024kB --l1i_size=1024kB --l2_size=1024kB --l3_size=1024kB --cpu-type=HPI --restore-with-cpu=HPI time 14.91 exit_status 0 cycles 10128985 instructions 4211458 cmd ./run --emulator gem5 --arch aarch64 --gem5-readfile "dhrystone 10000" --gem5-restore 1 -- --caches --l2cache --l1d_size=1024 --l1i_size=1024 --l2_size=1024 --l3_size=1024 --cpu-type=HPI --restore-with-cpu=HPI time 51.87 exit_status 0 cycles 188803630 instructions 12401336 cmd ./run --emulator gem5 --arch aarch64 --gem5-readfile "dhrystone 10000" --gem5-restore 1 -- --caches --l2cache --l1d_size=1024kB --l1i_size=1024kB --l2_size=1024kB --l3_size=1024kB --cpu-type=HPI --restore-with-cpu=HPI time 35.35 exit_status 0 cycles 20715757 instructions 12192527 cmd ./run --emulator gem5 --arch aarch64 --gem5-readfile "dhrystone 100000" --gem5-restore 1 -- --caches --l2cache --l1d_size=1024 --l1i_size=1024 --l2_size=1024 --l3_size=1024 --cpu-type=HPI --restore-with-cpu=HPI time 339.07 exit_status 0 cycles 1176559936 instructions 94222791 cmd ./run --emulator gem5 --arch aarch64 --gem5-readfile "dhrystone 100000" --gem5-restore 1 -- --caches --l2cache --l1d_size=1024kB --l1i_size=1024kB --l2_size=1024kB --l3_size=1024kB --cpu-type=HPI --restore-with-cpu=HPI time 240.37 exit_status 0 cycles 125666679 instructions 91738770
We make the following conclusions:
-
the number of instructions almost does not change: the CPU is waiting for memory all the extra time. TODO: why does it change at all?
-
the wall clock execution time is not directionally proportional to the number of cycles: here we had a 10x cycle increase, but only 2x time increase. This suggests that the simulation of cycles in which the CPU is waiting for memory to come back is faster.
18.2.2.3. gem5 memory latency
TODO These look promising:
--list-mem-types --mem-type=MEM_TYPE --mem-channels=MEM_CHANNELS --mem-ranks=MEM_RANKS --mem-size=MEM_SIZE
TODO: now to verify this with the Linux kernel? Besides raw performance benchmarks.
18.2.2.5. gem5 disk and network latency
TODO These look promising:
--ethernet-linkspeed --ethernet-linkdelay
and also: gem5-dist: https://publish.illinois.edu/icsl-pdgem5/
18.2.2.6. gem5 clock frequency
Clock frequency: TODO how does it affect performance in benchmarks?
./run --arch aarch64 --emulator gem5 -- --cpu-clock 10000000
Check with:
m5 resetstats sleep 10 m5 dumpstats
and then:
./gem5-stat --arch aarch64
TODO: why doesn’t this exist:
ls /sys/devices/system/cpu/cpu0/cpufreq
18.2.3. Interesting benchmarks
Buildroot built-in libraries, mostly under Libraries > Other:
-
Armadillo
C++: linear algebra -
fftw: Fourier transform
-
Flann
-
GSL: various
-
liblinear
-
libspacialindex
-
libtommath
-
qhull
There are not yet enabled, but it should be easy to so, see: Section 19.5, “Add new Buildroot packages”
18.2.3.1. BST vs heap vs hashmap
The following benchmark setup works both:
It has been used to answer:
To benchmark on the host, we do:
./build-userland-in-tree --force-rebuild --optimization-level 3 ./userland/cpp/bst_vs_heap_vs_hashmap.cpp ./userland/cpp/bst_vs_heap_vs_hashmap.out 10000000 10000 | tee bst_vs_heap_vs_hashmap.dat gnuplot \ -e 'input_noext="bst_vs_heap_vs_hashmap"' \ -e 'heap_zoom_max=50' \ -e 'hashmap_zoom_max=400' \ ./bst-vs-heap-vs-hashmap.gnuplot \ ; xdg-open bst_vs_heap_vs_hashmap.tmp.png
The parameters heap_zoom_max and hashmap_zoom_max are chosen manually interactively to best showcase the regions of interest in those plots.
First we build the benchmark with m5ops instructions enabled, and then we run it and extract the stats:
./build-userland \ --arch x86_64 \ --ccflags='-DLKMC_M5OPS_ENABLE=1' \ --force-rebuild userland/cpp/bst_vs_heap_vs_hashmap.cpp \ --static \ --optimization-level 3 \ ; ./run \ --arch x86_64 \ --emulator gem5 \ --static \ --userland userland/cpp/bst_vs_heap_vs_hashmap.cpp \ --userland-args='100000' \ -- \ --cpu-type=DerivO3CPU \ --caches \ --l2cache \ --l1d_size=32kB \ --l1i_size=32kB \ --l2_size=256kB \ --l3_size=20MB \ ; ./bst-vs-heap-vs-hashmap-gem5-stats --arch x86_64 | tee bst_vs_heap_vs_hashmap_gem5.dat gnuplot \ -e 'input_noext="bst_vs_heap_vs_hashmap_gem5"' \ -e 'heap_zoom_max=500' \ -e 'hashmap_zoom_max=400' \ ./bst-vs-heap-vs-hashmap.gnuplot \ ; xdg-open bst_vs_heap_vs_hashmap_gem5.tmp.png
TODO: the gem5 simulation blows up on a tcmalloc allocation somewhere near 25k elements as of 3fdd83c2c58327d9714fa2347c724b78d7c05e2b + 1, likely linked to the extreme inefficiency of the stats collection?
The cache sizes were chosen to match the host P51 to improve the comparison. Ideally we should also use the same standard library.
Note that this will take a long time, and will produce a humongous ~40Gb stats file as explained at: Section 18.10.2.1, “gem5 only dump selected stats”
Sources:
18.2.3.2. BLAS
Buildroot supports it, which makes everything just trivial:
./build-buildroot --config 'BR2_PACKAGE_OPENBLAS=y' ./build-userland --package openblas -- userland/libs/openblas/hello.c ./run --eval-after './libs/openblas/hello.out; echo $?'
Outcome: the test passes:
0
Source: userland/libs/openblas/hello.c
The test performs a general matrix multiplication:
| 1.0 -3.0 | | 1.0 2.0 1.0 | | 0.5 0.5 0.5 | | 11.0 - 9.0 5.0 |
1 * | 2.0 4.0 | * | -3.0 4.0 -1.0 | + 2 * | 0.5 0.5 0.5 | = | - 9.0 21.0 -1.0 |
| 1.0 -1.0 | | 0.5 0.5 0.5 | | 5.0 - 1.0 3.0 |
This can be deduced from the Fortran interfaces at
less "$(./getvar buildroot_build_build_dir)"/openblas-*/reference/dgemmf.f
which we can map to our call as:
C := alpha*op( A )*op( B ) + beta*C, SUBROUTINE DGEMMF( TRANA, TRANB, M,N,K, ALPHA,A,LDA,B,LDB,BETA,C,LDC) cblas_dgemm( CblasColMajor, CblasNoTrans, CblasTrans,3,3,2 ,1, A,3, B,3, 2 ,C,3 );
18.2.3.3. Eigen
Header only linear algebra library with a mainline Buildroot package:
./build-buildroot --config 'BR2_PACKAGE_EIGEN=y' ./build-userland --package eigen -- userland/libs/eigen/hello.cpp
Just create an array and print it:
./run --eval-after './libs/eigen/hello.out'
Output:
3 -1 2.5 1.5
Source: userland/libs/eigen/hello.cpp
This example just creates a matrix and prints it out.
Tested on: a4bdcf102c068762bb1ef26c591fcf71e5907525
18.2.3.4. PARSEC benchmark
We have ported parts of the PARSEC benchmark for cross compilation at: https://github.com/cirosantilli/parsec-benchmark See the documentation on that repo to find out which benchmarks have been ported. Some of the benchmarks were are segfaulting, they are documented in that repo.
There are two ways to run PARSEC with this repo:
-
without
pasecmgmt, most likely what you want
18.2.3.4.1. PARSEC benchmark without parsecmgmt
./build --arch arm --download-dependencies gem5-buildroot parsec-benchmark ./build-buildroot --arch arm --config 'BR2_PACKAGE_PARSEC_BENCHMARK=y' ./run --arch arm --emulator gem5
Once inside the guest, launch one of the test input sized benchmarks manually as in:
cd /parsec/ext/splash2x/apps/fmm/run ../inst/arm-linux.gcc/bin/fmm 1 < input_1
To find run out how to run many of the benchmarks, have a look at the test.sh script of the parse-benchmark repo.
From the guest, you can also run it as:
cd /parsec ./test.sh
but this might be a bit time consuming in gem5.
18.2.3.4.2. PARSEC change the input size
Running a benchmark of a size different than test, e.g. simsmall, requires a rebuild with:
./build-buildroot \ --arch arm \ --config 'BR2_PACKAGE_PARSEC_BENCHMARK=y' \ --config 'BR2_PACKAGE_PARSEC_BENCHMARK_INPUT_SIZE="simsmall"' \ -- parsec_benchmark-reconfigure \ ;
Large input may also require tweaking:
-
BR2_TARGET_ROOTFS_EXT2_SIZE if the unpacked inputs are large
-
Memory size, unless you want to meet the OOM killer, which is admittedly kind of fun
test.sh only contains the run commands for the test size, and cannot be used for simsmall.
The easiest thing to do, is to scroll up on the host shell after the build, and look for a line of type:
Running /root/linux-kernel-module-cheat/out/aarch64/buildroot/build/parsec-benchmark-custom/ext/splash2x/apps/ocean_ncp/inst/aarch64-linux.gcc/bin/ocean_ncp -n2050 -p1 -e1e-07 -r20000 -t28800
and then tweak the command found in test.sh accordingly.
Yes, we do run the benchmarks on host just to unpack / generate inputs. They are expected fail to run since they were build for the guest instead of host, including for x86_64 guest which has a different interpreter than the host’s (see file myexecutable).
The rebuild is required because we unpack input files on the host.
Separating input sizes also allows to create smaller images when only running the smaller benchmarks.
This limitation exists because parsecmgmt generates the input files just before running via the Bash scripts, but we can’t run parsecmgmt on gem5 as it is too slow!
One option would be to do that inside the guest with QEMU.
Also, we can’t generate all input sizes at once, because many of them have the same name and would overwrite one another…
PARSEC simply wasn’t designed with non native machines in mind…
18.2.3.4.3. PARSEC benchmark with parsecmgmt
Most users won’t want to use this method because:
-
running the
parsecmgmtBash scripts takes forever before it ever starts running the actual benchmarks on gem5Running on QEMU is feasible, but not the main use case, since QEMU cannot be used for performance measurements
-
it requires putting the full
.tarinputs on the guest, which makes the image twice as large (1x for the.tar, 1x for the unpacked input files)
It would be awesome if it were possible to use this method, since this is what Parsec supports officially, and so:
-
you don’t have to dig into what raw command to run
-
there is an easy way to run all the benchmarks in one go to test them out
-
you can just run any of the benchmarks that you want
but it simply is not feasible in gem5 because it takes too long.
If you still want to run this, try it out with:
./build-buildroot \ --arch aarch64 \ --config 'BR2_PACKAGE_PARSEC_BENCHMARK=y' \ --config 'BR2_PACKAGE_PARSEC_BENCHMARK_PARSECMGMT=y' \ --config 'BR2_TARGET_ROOTFS_EXT2_SIZE="3G"' \ -- parsec_benchmark-reconfigure \ ;
And then you can run it just as you would on the host:
cd /parsec/ bash . env.sh parsecmgmt -a run -p splash2x.fmm -i test
18.2.3.4.4. PARSEC uninstall
If you want to remove PARSEC later, Buildroot doesn’t provide an automated package removal mechanism as mentioned at: Section 19.6, “Remove Buildroot packages”, but the following procedure should be satisfactory:
rm -rf \ "$(./getvar buildroot_download_dir)"/parsec-* \ "$(./getvar buildroot_build_dir)"/build/parsec-* \ "$(./getvar buildroot_build_dir)"/build/packages-file-list.txt \ "$(./getvar buildroot_build_dir)"/images/rootfs.* \ "$(./getvar buildroot_build_dir)"/target/parsec-* \ ; ./build-buildroot --arch arm
18.2.3.4.5. PARSEC benchmark hacking
If you end up going inside submodules/parsec-benchmark to hack up the benchmark (you will!), these tips will be helpful.
Buildroot was not designed to deal with large images, and currently cross rebuilds are a bit slow, due to some image generation and validation steps.
A few workarounds are:
-
develop in host first as much as you can. Our PARSEC fork supports it.
If you do this, don’t forget to do a:
cd "$(./getvar parsec_source_dir)" git clean -xdf .
before going for the cross compile build.
-
patch Buildroot to work well, and keep cross compiling all the way. This should be totally viable, and we should do it.
Don’t forget to explicitly rebuild PARSEC with:
./build-buildroot \ --arch arm \ --config 'BR2_PACKAGE_PARSEC_BENCHMARK=y' \ -- parsec_benchmark-reconfigure \ ;
You may also want to test if your patches are still functionally correct inside of QEMU first, which is a faster emulator.
-
sell your soul, and compile natively inside the guest. We won’t do this, not only because it is evil, but also because Buildroot explicitly does not support it: https://buildroot.org/downloads/manual/manual.html#faq-no-compiler-on-target ARM employees have been known to do this: https://github.com/arm-university/arm-gem5-rsk/blob/aa3b51b175a0f3b6e75c9c856092ae0c8f2a7cdc/parsec_patches/qemu-patch.diff
18.3. gem5 kernel command line parameters
Analogous to QEMU:
./run --arch arm --kernel-cli 'init=/lkmc/linux/poweroff.out' --emulator gem5
Internals: when we give --command-line= to gem5, it overrides default command lines, including some mandatory ones which are required to boot properly.
Our run script hardcodes the require options in the default --command-line and appends extra options given by -e.
To find the default options in the first place, we removed --command-line and ran:
./run --arch arm --emulator gem5
and then looked at the line of the Linux kernel that starts with:
Kernel command line:
18.4. gem5 GDB step debug
18.4.1. gem5 GDB step debug kernel
Analogous to QEMU, on the first shell:
./run --arch arm --emulator gem5 --gdb-wait
On the second shell:
./run-gdb --arch arm --emulator gem5
On a third shell:
./gem5-shell
When you want to break, just do a Ctrl-C on GDB shell, and then continue.
And we now see the boot messages, and then get a shell. Now try the ./count.sh procedure described for QEMU at: Section 2.2, “GDB step debug kernel post-boot”.
18.4.2. gem5 GDB step debug userland process
We are unable to use gdbserver because of networking as mentioned at: Section 14.3.1.3, “gem5 host to guest networking”
The alternative is to do as in GDB step debug userland processes.
Next, follow the exact same steps explained at GDB step debug userland non-init without --gdb-wait, but passing --emulator gem5 to every command as usual.
But then TODO (I’ll still go crazy one of those days): for arm, while debugging ./linux/myinsmod.out hello.ko, after then line:
23 if (argc < 3) {
24 params = "";
I press n, it just runs the program until the end, instead of stopping on the next line of execution. The module does get inserted normally.
TODO:
./run-gdb --arch arm --emulator gem5 --userland gem5-1.0/gem5/util/m5/m5 main
breaks when m5 is run on guest, but does not show the source code.
18.5. gem5 checkpoint
Analogous to QEMU’s Snapshot, but better since it can be started from inside the guest, so we can easily checkpoint after a specific guest event, e.g. just before init is done.
Documentation: http://gem5.org/Checkpoints
./run --arch arm --emulator gem5
In the guest, wait for the boot to end and run:
m5 checkpoint
where m5 is a guest utility present inside the gem5 tree which we cross-compiled and installed into the guest.
To restore the checkpoint, kill the VM and run:
./run --arch arm --emulator gem5 --gem5-restore 1
The --gem5-restore option restores the checkpoint that was created most recently.
Let’s create a second checkpoint to see how it works, in guest:
date >f m5 checkpoint
Kill the VM, and try it out:
./run --arch arm --emulator gem5 --gem5-restore 1
Here we use --gem5-restore 1 again, since the second snapshot we took is now the most recent one
Now in the guest:
cat f
contains the date. The file f wouldn’t exist had we used the first checkpoint with --gem5-restore 2, which is the second most recent snapshot taken.
If you automate things with Kernel command line parameters as in:
./run --arch arm --eval 'm5 checkpoint;m5 resetstats;dhrystone 1000;m5 exit' --emulator gem5
Then there is no need to pass the kernel command line again to gem5 for replay:
./run --arch arm --emulator gem5 --gem5-restore 1
since boot has already happened, and the parameters are already in the RAM of the snapshot.
18.5.1. gem5 checkpoint internals
Checkpoints are stored inside the m5out directory at:
"$(./getvar --emulator gem5 m5out_dir)/cpt.<checkpoint-time>"
where <checkpoint-time> is the cycle number at which the checkpoint was taken.
fs.py exposes the -r N flag to restore checkpoints, which N-th checkpoint with the largest <checkpoint-time>: https://github.com/gem5/gem5/blob/e02ec0c24d56bce4a0d8636a340e15cd223d1930/configs/common/Simulation.py#L118
However, that interface is bad because if you had taken previous checkpoints, you have no idea what N to use, unless you memorize which checkpoint was taken at which cycle.
Therefore, just use our superior --gem5-restore flag, which uses directory timestamps to determine which checkpoint you created most recently.
The -r N integer value is just pure fs.py sugar, the backend at m5.instantiate just takes the actual tracepoint directory path as input.
18.5.2. gem5 checkpoint restore and run a different script
You want to automate running several tests from a single pristine post-boot state.
The problem is that boot takes forever, and after the checkpoint, the memory and disk states are fixed, so you can’t for example:
-
hack up an existing rc script, since the disk is fixed
-
inject new kernel boot command line options, since those have already been put into memory by the bootloader
There is however a few loopholes, m5 readfile being the simplest, as it reads whatever is present on the host.
So we can do it like:
# Boot, checkpoint and exit. printf 'echo "setup run";m5 exit' > "$(./getvar gem5_readfile_file)" ./run --emulator gem5 --eval 'm5 checkpoint;m5 readfile > a.sh;sh a.sh' # Restore and run the first benchmark. printf 'echo "first benchmark";m5 exit' > "$(./getvar gem5_readfile_file)" ./run --emulator gem5 --gem5-restore 1 # Restore and run the second benchmark. printf 'echo "second benchmark";m5 exit' > "$(./getvar gem5_readfile_file)" ./run --emulator gem5 --gem5-restore 1 # If something weird happened, create an interactive shell to examine the system. printf 'sh' > "$(./getvar gem5_readfile_file)" ./run --emulator gem5 --gem5-restore 1
Since this is such a common setup, we provide the following helpers for this operation:
-
rootfs_overlay/lkmc/gem5.sh. This script is analogous to gem5’s in-tree hack_back_ckpt.rcS, but with less noise.
-
./run --gem5-readfileis a convenient way to set them5 readfile
Their usage us exemplified at gem5 run benchmark.
Other loophole possibilities include:
-
expectas mentioned at: https://stackoverflow.com/questions/7013137/automating-telnet-session-using-bash-scripts#!/usr/bin/expect spawn telnet localhost 3456 expect "# $" send "pwd\r" send "ls /\r" send "m5 exit\r" expect eof
This is ugly however as it is not deterministic.
18.5.3. gem5 restore checkpoint with a different CPU
gem5 can switch to a different CPU model when restoring a checkpoint.
A common combo is to boot Linux with a fast CPU, make a checkpoint and then replay the benchmark of interest with a slower CPU.
An illustrative interactive run:
./run --arch arm --emulator gem5
In guest:
m5 checkpoint
And then restore the checkpoint with a different CPU:
./run --arch arm --emulator gem5 --gem5-restore 1 -- --caches --restore-with-cpu=HPI
18.6. Pass extra options to gem5
Pass options to the fs.py script:
-
get help:
./run --emulator gem5 -- -h
-
boot with the more detailed and slow
HPICPU model:./run --arch arm --emulator gem5 -- --caches --cpu-type=HPI
Pass options to the gem5 executable itself:
-
get help:
./run --gem5-exe-args='-h' --emulator gem5
18.7. gem5 exit after a number of instructions
Quit the simulation after 1024 instructions:
./run --emulator gem5 -- -I 1024
Can be nicely checked with gem5 tracing.
Cycles instead of instructions:
./run --emulator gem5 -- --memory 1024
Otherwise the simulation runs forever by default.
18.8. m5ops
m5ops are magic instructions which lead gem5 to do magic things, like quitting or dumping stats.
Documentation: http://gem5.org/M5ops
There are two main ways to use m5ops:
m5 is convenient if you only want to take snapshots before or after the benchmark, without altering its source code. It uses the m5ops instructions as its backend.
m5 cannot should / should not be used however:
-
in bare metal setups
-
when you want to call the instructions from inside interest points of your benchmark. Otherwise you add the syscall overhead to the benchmark, which is more intrusive and might affect results.
Why not just hardcode some m5ops instructions as in our example instead, since you are going to modify the source of the benchmark anyways?
18.8.1. m5
m5 is a guest command line utility that is installed and run on the guest, that serves as a CLI front-end for the m5ops
Its source is present in the gem5 tree: https://github.com/gem5/gem5/blob/6925bf55005c118dc2580ba83e0fa10b31839ef9/util/m5/m5.c
It is possible to guess what most tools do from the corresponding m5ops, but let’s at least document the less obvious ones here.
18.8.1.1. m5 exit
End the simulation.
Sane Python scripts will exit gem5 with status 0, which is what fs.py does.
18.8.1.2. m5 fail
End the simulation with a failure exit event:
m5 fail 1
Sane Python scripts would use that as the exit status of gem5, which would be useful for testing purposes, but fs.py at 200281b08ca21f0d2678e23063f088960d3c0819 just prints an error message:
Simulated exit code not 0! Exit code is 1
and exits with status 0.
We then parse that string ourselves in run and exit with the correct status…
TODO: it used to be like that, but it actually got changed to just print the message. Why? https://gem5-review.googlesource.com/c/public/gem5/+/4880
m5 fail is just a superset of m5 exit, which is just:
m5 fail 0
as can be seen from the source: https://github.com/gem5/gem5/blob/50a57c0376c02c912a978c4443dd58caebe0f173/src/sim/pseudo_inst.cc#L303
18.8.1.3. m5 writefile
Send a guest file to the host. 9P is a more advanced alternative.
Guest:
echo mycontent > myfileguest m5 writefile myfileguest myfilehost
Host:
cat "$(./getvar --arch aarch64 --emulator gem5 m5out_dir)/myfilehost"
Does not work for subdirectories, gem5 crashes:
m5 writefile myfileguest mydirhost/myfilehost
18.8.1.4. m5 readfile
Read a host file pointed to by the fs.py --script option to stdout.
Host:
date > "$(./getvar gem5_readfile_file)"
Guest:
m5 readfile
Outcome: date shows on guest.
18.8.1.5. m5 initparam
Ermm, just another m5 readfile that only takes integers and only from CLI options? Is this software so redundant?
Host:
./run --emulator gem5 --gem5-restore 1 -- --initparam 13 ./run --emulator gem5 --gem5-restore 1 -- --initparam 42
Guest:
m5 initparm
Outputs the given paramter.
18.8.1.6. m5 execfile
Trivial combination of m5 readfile + execute the script.
Host:
printf '#!/bin/sh echo asdf ' > "$(./getvar gem5_readfile_file)"
Guest:
touch /tmp/execfile chmod +x /tmp/execfile m5 execfile
Outcome:
adsf
18.8.2. m5ops instructions
gem5 allocates some magic instructions on unused instruction encodings for convenient guest instrumentation.
Those instructions are exposed through the m5 in tree executable.
To make things simpler to understand, you can play around with our own minimized educational m5 subset userland/c/m5ops.c.
The instructions used by ./c/m5ops.out are present in lkmc/m5ops.h in a very simple to understand and reuse inline assembly form.
To use that file, first rebuild m5ops.out with the m5ops instructions enabled and install it on the root filesystem:
./build-userland \ --arch aarch64 \ --ccflags='-DLKMC_M5OPS_ENABLE=1' \ --force-rebuild \ --static \ userland/c/m5ops.c \ ; ./build-buildroot --arch aarch64
We don’t enable -DLKMC_M5OPS_ENABLE=1 by default on userland executables because we try to use a single image for both gem5, QEMU and native, and those instructions would break the latter two. We enable it in the Baremetal setup by default since we already have different images for QEMU and gem5 there.
Then, from inside gem5 Buildroot setup, test it out with:
# checkpoint ./c/m5ops.out c # dumpstats ./c/m5ops.out d # exit ./c/m5ops.out e # dump resetstats ./c/m5ops.out r
In theory, the cleanest way to add m5ops to your benchmarks would be to do exactly what the m5 tool does:
-
include
include/gem5/asm/generic/m5ops.h -
link with the
.ofile underutil/m5for the correct arch, e.g.m5op_arm_A64.ofor aarch64.
However, I think it is usually not worth the trouble of hacking up the build system of the benchmark to do this, and I recommend just hardcoding in a few raw instructions here and there, and managing it with version control + sed.
Bibliography:
18.8.2.1. m5ops instructions interface
Let’s study how m5 uses them:
-
include/gem5/asm/generic/m5ops.h: defines the magic constants that represent the instructions -
util/m5/m5op_arm_A64.S: use the magic constants that represent the instructions using C preprocessor magic -
util/m5/m5.c: the actual executable. Gets linked tom5op_arm_A64.Swhich defines a function for each m5op.
We notice that there are two different implementations for each arch:
-
magic instructions, which don’t exist in the corresponding arch
-
magic memory addresses on a given page
TODO: what is the advantage of magic memory addresses? Because you have to do more setup work by telling the kernel never to touch the magic page. For the magic instructions, the only thing that could go wrong is if you run some crazy kind of fuzzing workload that generates random instructions.
Then, in aarch64 magic instructions for example, the lines:
.macro m5op_func, name, func, subfunc
.globl \name
\name:
.long 0xff000110 | (\func << 16) | (\subfunc << 12)
ret
define a simple function function for each m5op. Here we see that:
-
0xff000110is a base mask for the magic non-existing instruction -
\funcand\subfuncare OR-applied on top of the base mask, and define m5op this is.Those values will loop over the magic constants defined in
m5ops.hwith the deferred preprocessor idiom.For example,
exitis0x21due to:#define M5OP_EXIT 0x21
Finally, m5.c calls the defined functions as in:
m5_exit(ints[0]);
Therefore, the runtime "argument" that gets passed to the instruction, e.g. the delay in ticks until the exit for m5 exit, gets passed directly through the aarch64 calling convention.
Keep in mind that for all archs, m5.c does the calls with 64-bit integers:
uint64_t ints[2] = {0,0};
parse_int_args(argc, argv, ints, argc);
m5_fail(ints[1], ints[0]);
Therefore, for example:
-
aarch64 uses
x0for the first argument andx1for the second, since each is 64 bits log already -
arm uses
r0andr1for the first argument, andr2andr3for the second, since each register is only 32 bits long
That convention specifies that x0 to x7 contain the function arguments, so x0 contains the first argument, and x1 the second.
In our m5ops example, we just hardcode everything in the assembly one-liners we are producing.
We ignore the \subfunc since it is always 0 on the ops that interest us.
18.8.2.2. m5op annotations
include/gem5/asm/generic/m5ops.h also describes some annotation instructions.
18.9. gem5 arm Linux kernel patches
https://gem5.googlesource.com/arm/linux/ contains an ARM Linux kernel forks with a few gem5 specific Linux kernel patches on top of mainline created by ARM Holdings on top of a few upstream kernel releases.
The patches are optional: the vanilla kernel does boot. But they add some interesting gem5-specific optimizations, instrumentations and device support.
The patches also add defconfigs that are known to work well with gem5.
E.g. for arm v4.9 there is: https://gem5.googlesource.com/arm/linux/+/917e007a4150d26a0aa95e4f5353ba72753669c7/arch/arm/configs/gem5_defconfig.
In order to use those patches and their associated configs, and, we recommend using Linux kernel build variants as:
git -C "$(./getvar linux_source_dir)" fetch https://gem5.googlesource.com/arm/linux gem5/v4.15:gem5/v4.15 git -C "$(./getvar linux_source_dir)" checkout gem5/v4.15 ./build-linux \ --arch aarch64 \ --custom-config-file-gem5 \ --linux-build-id gem5-v4.15 \ ; git -C "$(./getvar linux_source_dir)" checkout - ./run \ --arch aarch64 \ --emulator gem5 \ --linux-build-id gem5-v4.15 \ ;
QEMU also boots that kernel successfully:
./run \ --arch aarch64 \ --linux-build-id gem5-v4.15 \ ;
but glibc kernel version checks make init fail with:
FATAL: kernel too old
because glibc was built to expect a newer Linux kernel as shown at: Section 10.4.1, “FATAL: kernel too old”. Your choices to sole this are:
-
see if there is a more recent gem5 kernel available, or port your patch of interest to the newest kernel
-
modify this repo to use uClibc, which is not hard because of Buildroot
-
patch glibc to remove that check, which is easy because glibc is in a submodule of this repo
It is obviously not possible to understand what they actually do from their commit message, so let’s explain them one by one here as we understand them:
-
drm: Add component-aware simple encoderallows you to see images through VNC, see: Section 13.3, “gem5 graphic mode” -
gem5: Add support for gem5’s extended GIC modeadds support for more than 8 cores, see: Section 18.2.2.1.4, “gem5 ARM full system with more than 8 cores”
Tested on 649d06d6758cefd080d04dc47fd6a5a26a620874 + 1.
18.9.1. gem5 arm Linux kernel patches boot speedup
We have observed that with the kernel patches, boot is 2x faster, falling from 1m40s to 50s.
With ts, we see that a large part of the difference is at the message:
clocksource: Switched to clocksource arch_sys_counter
which takes 4s on the patched kernel, and 30s on the unpatched one! TODO understand why, especially if it is a config difference, or if it actually comes from a patch.
18.10. m5out directory
When you run gem5, it generates an m5out directory at:
echo $(./getvar --arch arm --emulator gem5 m5out_dir)"
The location of that directory can be set with ./gem5.opt -d, and defaults to ./m5out.
The files in that directory contains some very important information about the run, and you should become familiar with every one of them.
18.10.1. system.terminal
Contains UART output, both from the Linux kernel or from the baremetal system.
Can also be seen live on m5term.
18.10.2. gem5 stats.txt
This file contains important statistics about the run:
cat "$(./getvar --arch aarch64 m5out_dir)/stats.txt"
Whenever we run m5 dumpstats or m5 exit, a section with the following format is added to that file:
---------- Begin Simulation Statistics ---------- [the stats] ---------- End Simulation Statistics ----------
That file contains several important execution metrics, e.g. number of cycles and several types of cache misses:
system.cpu.numCycles system.cpu.dtb.inst_misses system.cpu.dtb.inst_hits
For x86, it is interesting to try and correlate numCycles with:
18.10.3. config.ini
The config.ini file, contains a very good high level description of the system:
less $(./getvar --arch arm --emulator gem5 m5out_dir)"
That file contains a tree representation of the system, sample excerpt:
[root] type=Root children=system full_system=true [system] type=ArmSystem children=cpu cpu_clk_domain auto_reset_addr_64=false semihosting=Null [system.cpu] type=AtomicSimpleCPU children=dstage2_mmu dtb interrupts isa istage2_mmu itb tracer branchPred=Null [system.cpu_clk_domain] type=SrcClockDomain clock=500
Each node has:
-
a list of child nodes, e.g.
systemis a child ofroot, and bothcpuandcpu_clk_domainare children ofsystem -
a list of parameters, e.g.
system.semihostingisNull, which means that Semihosting was turned off-
the
typeparameter shows is present on every node, and it maps to aPythonobject that inherits fromSimObject.For example,
AtomicSimpleCPUmaps is defined at src/cpu/simple/AtomicSimpleCPU.py.
-
You can also get a simplified graphical view of the tree with:
xdg-open "$(./getvar --arch arm --emulator gem5 m5out_dir)/config.dot.pdf"
Modifying the config.ini file manually does nothing since it gets overwritten every time.
Set custom configs with the --param option of fs.py, e.g. we can make gem5 wait for GDB to connect with:
fs.py --param 'system.cpu[0].wait_for_remote_gdb = True'
More complex settings involving new classes however require patching the config files, although it is easy to hack this up. See for example: patches/manual/gem5-semihost.patch.
18.11. m5term
We use the m5term in-tree executable to connect to the terminal instead of a direct telnet.
If you use telnet directly, it mostly works, but certain interactive features don’t, e.g.:
-
up and down arrows for history navigation
-
tab to complete paths
-
Ctrl-Cto kill processes
TODO understand in detail what m5term does differently than telnet.
18.12. gem5 Python scripts without rebuild
We have made a crazy setup that allows you to just cd into submodules/gem5, and edit Python scripts directly there.
This is not normally possible with Buildroot, since normal Buildroot packages first copy files to the output directory ($(./getvar -a <arch> buildroot_build_build_dir)/<pkg>), and then build there.
So if you modified the Python scripts with this setup, you would still need to ./build to copy the modified files over.
For gem5 specifically however, we have hacked up the build so that we cd into the submodules/gem5 tree, and then do an out of tree build to out/common/gem5.
Another advantage of this method is the we factor out the arm and aarch64 gem5 builds which are identical and large, as well as the smaller arch generic pieces.
Using Buildroot for gem5 is still convenient because we use it to:
-
to cross build
m5for us -
check timestamps and skip the gem5 build when it is not requested
The out of build tree is required, because otherwise Buildroot would copy the output build of all archs to each arch directory, resulting in arch^2 build copies, which is significant.
18.13. gem5 fs_bigLITTLE
By default, we use configs/example/fs.py script.
The --gem5-script biglittle option enables the alternative configs/example/arm/fs_bigLITTLE.py script instead.
First apply:
patch -d "$(./getvar gem5_source_dir)" -p 1 < patches/manual/gem5-biglittle.patch
then:
./run --arch aarch64 --emulator gem5 --gem5-script biglittle
Advantages over fs.py:
-
more representative of mobile ARM SoCs, which almost always have big little cluster
-
simpler than
fs.py, and therefore easier to understand and modify
Disadvantages over fs.py:
-
only works for ARM, not other archs
-
not as many configuration options as
fs.py, many things are hardcoded
We setup 2 big and 2 small CPUs, but cat /proc/cpuinfo shows 4 identical CPUs instead of 2 of two different types, likely because gem5 does not expose some informational register much like the caches: https://www.mail-archive.com/gem5-users@gem5.org/msg15426.html config.ini does show that the two big ones are DerivO3CPU and the small ones are MinorCPU.
TODO: why is the --dtb required despite fs_bigLITTLE.py having a DTB generation capability? Without it, nothing shows on terminal, and the simulation terminates with simulate() limit reached @ 18446744073709551615. The magic vmlinux.vexpress_gem5_v1.20170616 works however without a DTB.
Tested on: 18c1c823feda65f8b54cd38e261c282eee01ed9f
18.14. gem5 unit tests
These are just very small GTest tests that test a single class in isolation, they don’t run any executables.
Build the unit tests and run them:
./build-gem5 --unit-tests
Running individual unit tests is not yet exposed, but it is easy to do: while running the full tests, GTest prints each test command being run, e.g.:
/path/to/build/ARM/base/circlebuf.test.opt --gtest_output=xml:/path/to/build/ARM/unittests.opt/base/circlebuf.test.xml [==========] Running 4 tests from 1 test case. [----------] Global test environment set-up. [----------] 4 tests from CircleBufTest [ RUN ] CircleBufTest.BasicReadWriteNoOverflow [ OK ] CircleBufTest.BasicReadWriteNoOverflow (0 ms) [ RUN ] CircleBufTest.SingleWriteOverflow [ OK ] CircleBufTest.SingleWriteOverflow (0 ms) [ RUN ] CircleBufTest.MultiWriteOverflow [ OK ] CircleBufTest.MultiWriteOverflow (0 ms) [ RUN ] CircleBufTest.PointerWrapAround [ OK ] CircleBufTest.PointerWrapAround (0 ms) [----------] 4 tests from CircleBufTest (0 ms total) [----------] Global test environment tear-down [==========] 4 tests from 1 test case ran. (0 ms total) [ PASSED ] 4 tests.
so you can just copy paste the command.
Building individual tests is possible with:
./build-gem5 --unit-test base/circlebuf.test
This does not run the test however.
Note that the command and it’s corresponding results don’t need to show consecutively on stdout because tests are run in parallel. You just have to match them based on the class name CircleBufTest to the file circlebuf.test.cpp.
Running the larger regression tests is exposed with:
./build-gem5 --regression-test quick/fs
but TODO: those require magic blobs on M5_PATH that we don’t currently automate.
18.15. gem5 build options
In order to use different build options, you might also want to use gem5 build variants to keep the build outputs separate from one another.
18.15.1. gem5 debug build
The gem5.debug executable has optimizations turned off unlike the default gem5.opt, and provides a much better debug experience:
./build-gem5 --arch aarch64 --gem5-build-type debug ./run --arch aarch64 --debug-vm --emulator gem5 --gem5-build-type debug
The build outputs are automatically stored in a different directory from other build types such as .opt build, which prevents .debug files from overwriting .opt ones.
Therefore, --gem5-build-id is not required.
The price to pay for debuggability is high however: a Linux kernel boot was about 14 times slower than opt at 71e927e63bda6507d5a528f22c78d65099bdf36f between the commands:
./run --arch aarch64 --eval 'm5 exit' --emulator gem5 --linux-build-id v4.16 ./run --arch aarch64 --eval 'm5 exit' --emulator gem5 --linux-build-id v4.16 --gem5-build-type debug
so you will likely only use this when it is unavoidable. This is also benchmarked at: Section 28.2.1, “Benchmark Linux kernel boot”
18.15.2. gem5 clang build
TODO test properly, benchmark vs GCC.
sudo apt-get install clang ./build-gem5 --clang ./run --clang --emulator gem5
18.15.3. gem5 sanitation build
If there gem5 appears to have a C++ undefined behaviour bug, which is often very difficult to track down, you can try to build it with the following extra SCons options:
./build-gem5 --gem5-build-id san --verbose -- --with-ubsan --without-tcmalloc
This will make GCC do a lot of extra sanitation checks at compile and run time.
As a result, the build and runtime will be way slower than normal, but that still might be the fastest way to solve undefined behaviour problems.
Ideally, we should also be able to run it with asan with --with-asan, but if we try then the build fails at gem5 16eeee5356585441a49d05c78abc328ef09f7ace (with two ubsan trivial fixes I’ll push soon):
=================================================================
==9621==ERROR: LeakSanitizer: detected memory leaks
Direct leak of 371712 byte(s) in 107 object(s) allocated from:
#0 0x7ff039804448 in malloc (/usr/lib/x86_64-linux-gnu/libasan.so.5+0x10c448)
#1 0x7ff03950d065 in dictresize ../Objects/dictobject.c:643
Direct leak of 23728 byte(s) in 26 object(s) allocated from:
#0 0x7ff039804448 in malloc (/usr/lib/x86_64-linux-gnu/libasan.so.5+0x10c448)
#1 0x7ff03945e40d in _PyObject_GC_Malloc ../Modules/gcmodule.c:1499
#2 0x7ff03945e40d in _PyObject_GC_Malloc ../Modules/gcmodule.c:1493
Direct leak of 2928 byte(s) in 43 object(s) allocated from:
#0 0x7ff03980487e in __interceptor_realloc (/usr/lib/x86_64-linux-gnu/libasan.so.5+0x10c87e)
#1 0x7ff03951d763 in list_resize ../Objects/listobject.c:62
#2 0x7ff03951d763 in app1 ../Objects/listobject.c:277
#3 0x7ff03951d763 in PyList_Append ../Objects/listobject.c:289
Direct leak of 2002 byte(s) in 3 object(s) allocated from:
#0 0x7ff039804448 in malloc (/usr/lib/x86_64-linux-gnu/libasan.so.5+0x10c448)
#1 0x7ff0394fd813 in PyString_FromStringAndSize ../Objects/stringobject.c:88
#2 0x7ff0394fd813 in PyString_FromStringAndSize ../Objects/stringobject.c:57 Direct leak of 40 byte(s) in 2 object(s) allocated from: #0 0x7ff039804448 in malloc (/usr/lib/x86_64-linux-gnu/libasan.so.5+0x10c448)
#1 0x7ff03951ea4b in PyList_New ../Objects/listobject.c:152
Indirect leak of 10384 byte(s) in 11 object(s) allocated from: #0 0x7ff039804448 in malloc (/usr/lib/x86_64-linux-gnu/libasan.so.5+0x10c448) #1 0x7ff03945e40d in _PyObject_GC_Malloc ../Modules/gcmodule.c:1499 #2 0x7ff03945e40d in _PyObject_GC_Malloc ../Modules/gcmodule.c:1493
Indirect leak of 4089 byte(s) in 6 object(s) allocated from:
#0 0x7ff039804448 in malloc (/usr/lib/x86_64-linux-gnu/libasan.so.5+0x10c448)
#1 0x7ff0394fd648 in PyString_FromString ../Objects/stringobject.c:143
Indirect leak of 2090 byte(s) in 3 object(s) allocated from:
#0 0x7ff039804448 in malloc (/usr/lib/x86_64-linux-gnu/libasan.so.5+0x10c448) #1 0x7ff0394eb36f in type_new ../Objects/typeobject.c:2421 #2 0x7ff0394eb36f in type_new ../Objects/typeobject.c:2094
Indirect leak of 1346 byte(s) in 2 object(s) allocated from:
#0 0x7ff039804448 in malloc (/usr/lib/x86_64-linux-gnu/libasan.so.5+0x10c448)
#1 0x7ff0394fd813 in PyString_FromStringAndSize ../Objects/stringobject.c:88 #2 0x7ff0394fd813 in PyString_FromStringAndSize ../Objects/stringobject.c:57 SUMMARY: AddressSanitizer: 418319 byte(s) leaked in 203 allocation(s).
From the message, this appears however to be a Python / pyenv11 bug however and not in gem5 specifically. I think it worked when I tried it in the past in an older gem5 / Ubuntu.
19. Buildroot
19.1. Introduction to Buildroot
Buildroot is a set of Make scripts that download and compile from source compatible versions of:
-
GCC
-
Linux kernel
-
C standard library: Buildroot supports several implementations, see: Section 19.10, “libc choice”
-
BusyBox: provides the shell and basic command line utilities
It therefore produces a pristine, blob-less, debuggable setup, where all moving parts are configured to work perfectly together.
Perhaps the awesomeness of Buildroot only sinks in once you notice that all it takes is 4 commands as explained at https://stackoverflow.com/questions/47557262/how-to-download-the-torvalds-linux-kernel-master-recompile-it-and-boot-it-wi/49349237#49349237
git clone https://github.com/buildroot/buildroot cd buildroot git checkout 2018.02 make qemu_aarch64_virt_defconfig make olddefconfig time make BR2_JLEVEL="$(nproc)" qemu-system-aarch64 -M virt -cpu cortex-a57 -nographic -smp 1 -kernel output/images/Image -append "root=/dev/vda console=ttyAMA0" -netdev user,id=eth0 -device virtio-net-device,netdev=eth0 -drive file=output/images/rootfs.ext4,if=none,format=raw,id=hd0 -device virtio-blk-device,drive=hd0
This repo basically wraps around that, and tries to make everything even more awesome for kernel developers.
The downsides of Buildroot are:
-
the first build takes a while, but it is well worth it
-
the selection of software packages is relatively limited if compared to Debian, e.g. no Java or Python package in guest out of the box.
In theory, any software can be packaged, and the Buildroot side is easy.
The hard part is dealing with crappy third party build systems and huge dependency chains.
19.2. Custom Buildroot configs
We provide the following mechanisms:
-
./build-buildroot --config-fragment data/br2: append the Buildroot configuration filedata/br2to a single build. Must be passed every time you run./build. The format is the same as buildroot_config/default. -
./build-buildroot --config 'BR2_SOME_OPTION="myval"': append a single option to a single build.
For example, if you decide to Enable Buildroot compiler optimizations after an initial build is finished, you must Clean the build and rebuild:
./build-buildroot \ --config 'BR2_OPTIMIZE_3=y' \ --config 'BR2_PACKAGE_SAMPLE_PACKAGE=y' \ -- sample_package-dirclean \ sample_package-reconfigure \ ;
as explained at: https://buildroot.org/downloads/manual/manual.html#rebuild-pkg
The clean is necessary because the source files didn’t change, so make would just check the timestamps and not build anything.
You will then likely want to make those more permanent as explained at: Section 29.4, “Default command line arguments”.
19.2.1. Enable Buildroot compiler optimizations
If you are benchmarking compiled programs instead of hand written assembly, remember that we configure Buildroot to disable optimizations by default with:
BR2_OPTIMIZE_0=y
to improve the debugging experience.
You will likely want to change that to:
BR2_OPTIMIZE_3=y
Our buildroot_packages/sample_package package correctly forwards the Buildroot options to the build with $(TARGET_CONFIGURE_OPTS), so you don’t have to do any extra work.
Don’t forget to do that if you are adding a new package with your own build system.
Then, you have two choices:
-
if you already have a full
-O0build, you can choose to rebuild just your package of interest to save some time as described at: Section 19.2, “Custom Buildroot configs”./build-buildroot \ --config 'BR2_OPTIMIZE_3=y' \ --config 'BR2_PACKAGE_SAMPLE_PACKAGE=y' \ -- \ sample_package-dirclean \ sample_package-reconfigure \ ;
However, this approach might not be representative since calls to an unoptimized libc and other libraries will have a negative performance impact.
Maybe you can get away with rebuilding libc, but I’m not sure that it will work properly.
Kernel-wise it should be fine though as mentioned at: Section 2.1.2, “Disable kernel compiler optimizations”
-
clean the build and rebuild from scratch:
mv out out~ ./build-buildroot --config 'BR2_OPTIMIZE_3=y'
19.3. Find Buildroot options with make menuconfig
make menuconfig is a convenient way to find Buildroot configurations:
cd "$(./getvar buildroot_build_dir)" make menuconfig
Hit / and search for the settings.
Save and quit.
diff -u .config.olg .config
Then copy and paste the diff additions to buildroot_config/default to make them permanent.
19.4. Change user
At startup, we login automatically as the root user.
If you want to switch to another user to test some permissions, we have already created an user0 user through the user_table file, and you can just login as that user with:
login user0
and password:
a
Then test that the user changed with:
id
which gives:
uid=1000(user0) gid=1000(user0) groups=1000(user0)
19.4.1. Login as a non-root user without password
Replace on inittab:
::respawn:-/bin/sh
with:
::respawn:-/bin/login -f user0
-f forces login without asking for the password.
19.5. Add new Buildroot packages
First, see if you can’t get away without actually adding a new package, for example:
-
if you have a standalone C file with no dependencies besides the C standard library to be compiled with GCC, just add a new file under buildroot_packages/sample_package and you are done
-
if you have a dependency on a library, first check if Buildroot doesn’t have a package for it already with
ls buildroot/package. If yes, just enable that package as explained at: Section 19.2, “Custom Buildroot configs”
If none of those methods are flexible enough for you, you can just fork or hack up buildroot_packages/sample_package the sample package to do what you want.
For how to use that package, see: Section 29.12.2, “buildroot_packages directory”.
Then iterate trying to do what you want and reading the manual until it works: https://buildroot.org/downloads/manual/manual.html
19.6. Remove Buildroot packages
Once you’ve built a package in to the image, there is no easy way to remove it.
Documented at: https://github.com/buildroot/buildroot/blob/2017.08/docs/manual/rebuilding-packages.txt#L90
Also mentioned at: https://stackoverflow.com/questions/47320800/how-to-clean-only-target-in-buildroot
See this for a sample manual workaround: Section 18.2.3.4.4, “PARSEC uninstall”.
19.7. BR2_TARGET_ROOTFS_EXT2_SIZE
When adding new large package to the Buildroot root filesystem, it may fail with the message:
Maybe you need to increase the filesystem size (BR2_TARGET_ROOTFS_EXT2_SIZE)
The solution is to simply add:
./build-buildroot --config 'BR2_TARGET_ROOTFS_EXT2_SIZE="512M"'
where 512Mb is "large enough".
Note that dots cannot be used as in 1.5G, so just use Megs as in 1500M instead.
Unfortunately, TODO we don’t have a perfect way to find the right value for BR2_TARGET_ROOTFS_EXT2_SIZE. One good heuristic is:
du -hsx "$(./getvar --arch arm buildroot_target_dir)"
Some promising ways to overcome this problem include:
-
SquashFS TODO benchmark: would gem5 suffer a considerable disk read performance hit due to decompressing SquashFS?
-
libguestfs: https://serverfault.com/questions/246835/convert-directory-to-qemu-kvm-virtual-disk-image/916697#916697, in particular
vfs-minimum-size -
use methods described at: Section 18.5.2, “gem5 checkpoint restore and run a different script” instead of putting builds on the root filesystem
Bibliography: https://stackoverflow.com/questions/49211241/is-there-a-way-to-automatically-detect-the-minimum-required-br2-target-rootfs-ex
19.7.1. SquashFS
SquashFS creation with mksquashfs does not take fixed sizes, and I have successfully booted from it, but it is readonly, which is unacceptable.
But then we could mount ramfs on top of it with OverlayFS to make it writable, but my attempts failed exactly as mentioned at OverlayFS.
This is the exact unanswered question: https://unix.stackexchange.com/questions/343484/mounting-squashfs-image-with-read-write-overlay-for-rootfs
19.8. Buildroot rebuild is slow when the root filesystem is large
Buildroot is not designed for large root filesystem images, and the rebuild becomes very slow when we add a large package to it.
This is due mainly to the pkg-generic GLOBAL_INSTRUMENTATION_HOOKS sanitation which go over the entire tree doing complex operations… I no like, in particular check_bin_arch and check_host_rpath
We have applied 983fe7910a73923a4331e7d576a1e93841d53812 to out Buildroot fork which removes part of the pain by not running:
>>> Sanitizing RPATH in target tree
which contributed to a large part of the slowness.
Test how Buildroot deals with many files with:
./build-buildroot \ --config 'BR2_PACKAGE_LKMC_MANY_FILES=y' \ -- \ lkmc_many_files-reconfigure \ |& \ ts -i '%.s' \ ; ./build-buildroot |& ts -i '%.s'
and notice how the second build, which does not rebuilt the package at all, still gets stuck in the RPATH check forever without our Buildroot patch.
19.9. Report upstream bugs
When asking for help on upstream repositories outside of this repository, you will need to provide the commands that you are running in detail without referencing our scripts.
For example, QEMU developers will only want to see the final QEMU command that you are running.
For the configure and build, search for the Building and Configuring parts of the build log, then try to strip down all Buildroot related paths, to keep only options that seem to matter.
We make that easy by building commands as strings, and then echoing them before evaling.
So for example when you run:
./run --arch arm
the very first stdout output of that script is the actual QEMU command that is being run.
The command is also saved to a file for convenience:
cat "$(./getvar --arch arm run_cmd_file)"
which you can manually modify and execute during your experiments later:
vim "$(./getvar --arch arm run_cmd_file)" ./"$(./getvar --arch arm run_cmd_file)"
If you are not already on the master of the given component, you can do that neatly with Build variants.
E.g., to check if a QEMU bug is still present on master, you can do as explained at QEMU build variants:
git -C "$(./getvar qemu_source_dir)" checkout master ./build-qemu --clean --qemu-build-id master ./build-qemu --qemu-build-id master git -C "$(./getvar qemu_source_dir)" checkout - ./run --qemu-build-id master
Then, you will also want to do a Bisection to pinpoint the exact commit to blame, and CC that developer.
Finally, give the images you used save upstream developers' time as shown at: Section 29.17.2, “release-zip”.
For Buildroot problems, you should wither provide the config you have:
./getvar buildroot_config_file
or try to reproduce with a minimal config, see: https://github.com/cirosantilli/buildroot/tree/in-tree-package-master
19.10. libc choice
Buildroot supports several libc implementations, including:
We currently use glibc, which is selected by:
BR2_TOOLCHAIN_BUILDROOT_GLIBC=y
Ideally we would like to use uClibc, as it is more minimal and easier to understand, but unfortunately there are some very few packages that use some weird glibc extension that uClibc hasn’t implemented yet, e.g.:
-
SELinux. Trivial unmerged fix at: http://lists.busybox.net/pipermail/buildroot/2017-July/197793.html just missing the uClibc option to expose
fts.h…
The full list of unsupported packages can be found by grepping the Buildroot source:
git -C "$(./getvar buildroot_source_dir)" grep 'depends on BR2_TOOLCHAIN_USES_GLIBC'
One "downside" of glibc is that it exercises much more kernel functionality on its more bloated pre-main init, which breaks user mode C hello worlds more often, see: Section 10.4, “User mode simulation with glibc”. I quote "downside" because glibc is actually exposing emulator bugs which we should actually go and fix.
20. Userland content
Getting started at: Section 1.6, “Userland setup”
Userland assembly content is located at: Section 21, “Userland assembly”. It was split from this section basically because we were hitting the HTML h6 limit, stupid web :-)
This content makes up the bulk of the userland/ directory.
The quickest way to run the arch agnostic examples, which comprise the majority of the examples, is natively as shown at: Section 1.6.2.1, “Userland setup getting started natively”
This section was originally moved in here from: https://github.com/cirosantilli/cpp-cheat
20.1. C
Programs under userland/c/ are examples of ANSI C programming:
-
mainand environment -
Standard library
-
assert.h -
stdlib.h-
exit
-
malloc
-
-
stdio.h
-
-
Fun
20.1.1. GCC C extensions
20.1.1.2. OpenMP
GCC implements the OpenMP threading implementation: https://stackoverflow.com/questions/3949901/pthreads-vs-openmp
Example: userland/gcc/openmp.c
The implementation is built into GCC itself. It is enabled at GCC compile time by BR2_GCC_ENABLE_OPENMP=y on Buildroot, and at program compile time by -fopenmp.
It seems to be easier to use for compute parallelism and more language agnostic than POSIX threads.
pthreads are more versatile though and allow for a superset of OpenMP.
The implementation lives under libgomp in the GCC tree, and is documented at: https://gcc.gnu.org/onlinedocs/libgomp/
strace shows that OpenMP makes clone() syscalls in Linux. TODO: does it actually call pthread_ functions, or does it make syscalls directly? Or in other words, can it work on Freestanding programs? A quick grep shows many references to pthreads.
20.2. C++
Programs under userland/cpp/ are examples of ISO C programming.
20.2.1. C++ multithreading
-
-
userland/cpp/count.cpp Exemplifies:
std::this_thread::sleep_for -
userland/cpp/thread_hardware_concurrency.cpp
std::thread::hardware_concurrency
-
-
<atomic>: C++17 N4659 standards draft 32 "Atomic operations library"
20.2.2. C++ standards
Like for C, you have to pay for the standards… insane. So we just use the closest free drafts instead.
20.3. POSIX
Programs under userland/posix/ are examples of POSIX C programming.
These links provide a clear overview of what POSIX is:
20.3.1. unistd.h
-
userland/posix/count.c illustrates
sleep() -
userland/posix/count_to.c minor variation of userland/posix/count.c
20.3.2. pthreads
POSIX' multithreading API. This was for a looong time the only "portable" multithreading alternative, until C++11 finally added threads, thus also extending the portability to Windows.
20.3.3. sysconf
Examples:
-
userland/linux/sysconf.c showcases Linux extensions to POSIX
Get lots of info on the system configuration.
The constants can also be viewed accessed on my Ubuntu 18.04 host with:
getconf -a
getconf is also specified by POSIX at: https://pubs.opengroup.org/onlinepubs/9699919799/utilities/getconf.html but not the -a option which shows all configurations.
20.4. Userland multithreading
The following sections are related to multithreading in userland:
-
language topics:
-
ISA topics:
-
emulator topics:
21. Userland assembly
Programs under userland/arch/<arch>/ are examples of userland assembly programming.
This section will document ISA agnostic concepts, and you should read it first.
ISA specifics are covered at:
-
x86 userland assembly under userland/arch/x86_64/, originally migrated from: https://github.com/cirosantilli/x86-assembly-cheat
-
ARM userland assembly originally migrated from https://github.com/cirosantilli/arm-assembly-cheat under:
Like other userland programs, these programs can be run as explained at: Section 1.6, “Userland setup”.
As a quick reminder, the fastest setups to get started are:
-
Userland setup getting started natively if your host can run the examples, e.g. x86 example on an x86 host:
-
Userland setup getting started with prebuilt toolchain and QEMU user mode otherwise
However, as usual, it is saner to build your toolchain as explained at: Section 10.1, “QEMU user mode getting started”.
The first examples you should look into are:
-
add
-
mov between register and memory
-
addressing modes
-
registers, see: Section 21.1, “Assembly registers”
-
jumping:
-
SIMD
The add examples in particular:
-
introduce the basics of how a given assembly works: how many inputs / outputs, who is input and output, can it use memory or just registers, etc.
It is then a big copy paste for most other data instructions.
-
verify that the venerable ADD instruction and our assertions are working
Now try to modify modify the x86_64 add program to see the assertion fail:
LKMC_ASSERT_EQ(%rax, $4)
because 1 + 2 tends to equal 3 instead of 4.
And then watch the assertion fail:
./build-userland ./run --userland userland/arch/x86_64/add.S
with error message:
assert_eq_64 failed val1 0x3 val2 0x4 error: asm_main returned 1 at line 8
and notice how the error message gives both:
-
the actual assembly source line number where the failing assert was
-
the actual and expected values
Other infrastructure sanity checks that you might want to look into include:
-
LKMC_FAILtests -
LKMC_ASSERT_EQtests -
LKMC_ASSERT_MEMCMPtests
21.1. Assembly registers
After seeing an ADD hello world, you need to learn the general registers:
-
x86, see: Section 22.1, “x86 registers”
-
arm
-
aarch64
Bibliography: ARMv7 architecture reference manual A2.3 "ARM core registers".
21.1.1. ARMv8 aarch64 x31 register
Example: userland/arch/aarch64/x31.S
There is no X31 name, and the encoding can have two different names depending on the instruction:
-
XZR: zero register:
-
SP: stack pointer
To make things more confusing, some aliases can take either name, which makes them alias to different things, e.g. MOV accepts both:
mov x0, sp mov x0, xzr
and the first one is an alias to ADD while the second an alias to ORR.
The difference is documented on a per instruction basis. Instructions that encode 31 as SP say:
if d == 31 then SP[] = result; else X[d] = result;
And then those that don’t say that, B1.2.1 "Registers in AArch64 state" implies the zero register:
In instruction encodings, the value 0b11111 (31) is used to indicate the ZR (zero register). This indicates that the argument takes the value zero, but does not indicate that the ZR is implemented as a physical register.
This is also described on ARMv8 architecture reference manual C1.2.5 "Register names":
There is no register named W31 or X31.
The name SP represents the stack pointer for 64-bit operands where an encoding of the value 31 in the corresponding register field is interpreted as a read or write of the current stack pointer. When instructions do not interpret this operand encoding as the stack pointer, use of the name SP is an error.
The name XZR represents the zero register for 64-bit operands where an encoding of the value 31 in the corresponding register field is interpreted as returning zero when read or discarding the result when written. When instructions do not interpret this operand encoding as the zero register, use of the name XZR is an error
21.2. Floating point assembly
Keep in mind that many ISAs started floating point as an optional thing, and it later got better integrated into the main CPU, side by side with SIMD.
For this reason, there are sometimes multiple ways to do floating point operations in each ISA.
Let’s start as usual with floating point addition + register file:
21.3. SIMD assembly
Much like ADD for non-SIMD, start learning SIMD instructions by looking at the integer and floating point SIMD ADD instructions of each ISA:
-
x86
-
arm
-
aarch64
Then it is just a huge copy paste of infinite boring details:
To debug these instructoins, you can see the register values in GDB with:
info registers float
or alternatively with register names (here the ARMv8 V0 register):
print $v0
as mentioned at:
Bibliography: https://stackoverflow.com/questions/1389712/getting-started-with-intel-x86-sse-simd-instructions/56409539#56409539
21.3.1. FMA instruction
Fused multiply add:
Bibliography:
Particularly important numerical analysis instruction, that is used in particular for;
-
Dot product
-
Matrix multiplication
FMA is so important that IEEE 754 specifies it with single precision drop compared to a separate add and multiply!
Historically, FMA instructions have been added relatively late to instruction sets.
21.4. User vs system assembly
By "userland assembly", we mean "the parts of the ISA which can be freely used from userland".
Most ISAs are divided into a system and userland part, and to running the system part requires elevated privileges such as ring0 in x86.
One big difference between both is that we can run userland assembly on Userland setup, which is easier to get running and debug.
In particular, most userland assembly examples link to the C standard library, see: Section 21.5, “Userland assembly C standard library”.
Userland assembly is generally simpler, and a pre-requisite for Baremetal setup.
System-land assembly cheats will be put under: Section 1.7, “Baremetal setup”.
21.5. Userland assembly C standard library
All examples except the Freestanding programs link to the C standard library.
This allows using the C standard library for IO, which is very convenient and portable across host OSes.
It also exposes other non-IO functionality that is very convenient such as memcmp.
The C standard library infrastructure is implemented in the common userland / baremetal source files:
21.5.1. Freestanding programs
Unlike most our other assembly examples, which use the C standard library for portability, examples under freestanding/ directories don’t link to the C standard library.
As a result, those examples cannot do IO portably, and so they make raw system calls and only be run on one given OS, e.g. Linux system calls.
Such executables are called freestanding because they don’t execute the glibc initialization code, but rather start directly on our custom hand written assembly.
In order to GDB step debug those executables, you will want to use --no-continue, e.g.:
./run --arch aarch64 --userland userland/arch/aarch64/freestanding/linux/hello.S --gdb-wait ./run-gdb --arch aarch64 --no-continue --userland userland/arch/aarch64/freestanding/linux/hello.S
You are now left on the very first instruction of our tiny executable!
21.6. GCC inline assembly
Examples under arch/<arch>/c/ directories show to how use inline assembly from higher level languages such as C:
-
x86_64
-
userland/arch/x86_64/inline_asm/sqrt_x87.c Shows how to use the x86 x87 FPU instructions from inline assembly. Bibliography: https://stackoverflow.com/questions/6514537/how-do-i-specify-immediate-floating-point-numbers-with-inline-assembly/52906126#52906126
-
arm
-
aarch64
21.6.1. GCC inline assembly register variables
Used notably in some of the Linux system calls setups:
In x86, makes it possible to access variables not exposed with the one letter register constraints.
In arm, it is the only way to achieve this effect: https://stackoverflow.com/questions/10831792/how-to-use-specific-register-in-arm-inline-assembler
This feature notably useful for making system calls from C, see: Section 21.7, “Linux system calls”.
21.6.2. GCC inline assembly scratch registers
How to use temporary registers in inline assembly:
21.6.3. GCC inline assembly early-clobbers
An example of using the & early-clobber modifier: link:userland/arch/aarch64/earlyclobber.c
More details at: https://stackoverflow.com/questions/15819794/when-to-use-earlyclobber-constraint-in-extended-gcc-inline-assembly/54853663#54853663
The assertion may fail without it. It actually does fail in GCC 8.2.0.
21.6.4. GCC inline assembly floating point ARM
Not documented as of GCC 8.2, but possible: https://stackoverflow.com/questions/53960240/armv8-floating-point-output-inline-assembly
21.6.5. GCC intrinsics
Pre-existing C wrappers using inline assembly, this is what production programs should use instead of inline assembly for SIMD:
-
x86_64
-
userland/arch/x86_64/intrinsics/paddq.c. Intrinsics version of userland/arch/x86_64/paddq.S
-
userland/arch/x86_64/intrinsics/addpd.c. Intrinsics version of userland/arch/x86_64/addpd.S
-
21.6.5.1. GCC x86 intrinsics
Good official cheatsheet with all intrinsics and what they expand to: https://software.intel.com/sites/landingpage/IntrinsicsGuide
The functions use the the following naming convention:
<vector_size>_<intrin_op>_<suffix>
where:
-
<vector_size>:-
mm: 128-bit vectors (SSE) -
mm256: 256-bit vectors (AVX and AVX2) -
mm512: 512-bit vectors (AVX512)
-
-
<intrin_op>: operation of the intrinsic function, e.g. add, sub, mul, etc. -
<suffix>: data type:-
ps: 4 floats (Packed Single) -
pd: 2 doubles (Packed Double) -
ss: 1 float (Single Single), often the lowest order one -
sd: 1 double (Single Double) -
si128: 128-bits of integers of any size -
ep<int_type>integer types, e.g.:-
epi32: 32 bit signed integers -
epu16: 16 bit unsigned integers
-
-
Data types:
-
__m128: four floats -
__m128d: two doubles -
__m128i: integers: 8 x 16-bit, 4 x 32-bit, 2 x 64-bit
The headers to include are clarified at: https://stackoverflow.com/questions/11228855/header-files-for-x86-simd-intrinsics
x86intrin.h everything mmintrin.h MMX xmmintrin.h SSE emmintrin.h SSE2 pmmintrin.h SSE3 tmmintrin.h SSSE3 smmintrin.h SSE4.1 nmmintrin.h SSE4.2 ammintrin.h SSE4A wmmintrin.h AES immintrin.h AVX zmmintrin.h AVX512
Present in gcc-7_3_0-release tree at: gcc/config/i386/x86intrin.h.
Bibliography:
21.7. Linux system calls
The following Userland setup programs illustrate how to make system calls:
-
x86_64
-
arm
-
aarch64
Determining the ARM syscall numbers:
Determining the ARM syscall interface:
Questions about the C inline assembly examples:
21.8. Linux calling conventions
A summary of results is shown at: Table 3, “Summary of Linux calling conventions for several architectures”.
| arch | arguments | return value | callee saved registers |
|---|---|---|---|
x86_64 |
rdi, rsi, rdx, rcx, r8, r9, xmm0–7 |
rax, rdx |
rbx, rbp, r12–r15 |
arm |
r0-r3 |
r0-r3 |
r4-r11 |
aarch64 |
x0-x7 |
x0-x7 |
x19-x29 |
21.8.1. x86_64 calling convention
Examples:
-
lkmc/x86_64.h
ENTRYandEXIT
One important catch is that the stack must always be aligned to 16-bits before making calls: https://stackoverflow.com/questions/56324948/why-does-calling-the-c-abort-function-from-an-x86-64-assembly-function-lead-to
Bibliography:
21.8.2. ARM calling convention
Call C standard library functions from assembly and vice versa.
-
arm
-
lkmc/arm.h
ENTRYandEXIT
-
-
aarch64
ARM Architecture Procedure Call Standard (AAPCS) is the name that ARM Holdings gives to the calling convention.
Official specification: http://infocenter.arm.com/help/topic/com.arm.doc.ihi0042f/IHI0042F_aapcs.pdf
Bibliography:
-
https://en.wikipedia.org/wiki/Calling_convention#ARM_(A32) Wiki contains the master list as usual.
-
https://stackoverflow.com/questions/8422287/calling-c-functions-from-arm-assembly
-
https://stackoverflow.com/questions/261419/arm-to-c-calling-convention-registers-to-save
-
https://stackoverflow.com/questions/10494848/arm-whats-the-difference-between-apcs-and-aapcs-abi
21.9. GNU GAS assembler
GNU GAS is the default assembler used by GDB, and therefore it completely dominates in Linux.
The Linux kernel in particular uses GNU GAS assembly extensively for the arch specific parts under arch/.
21.9.1. GNU GAS assembler comments
In this tutorial, we use exclusively C Preprocessor /**/ comments because:
-
they are the same for all archs
-
we are already stuck to the C Preprocessor because GNU GAS macros are unusable so we need
#define -
mixing
#GNU GAS comments and#defineis a bad idea ;-)
But just in case you want to suffer, see this full explanation of GNU GAS comments: https://stackoverflow.com/questions/15663280/how-to-make-the-gnu-assembler-use-a-slash-for-comments/51991349#51991349
Examples:
21.9.2. GNU GAS assembler immediates
Summary:
-
x86 always dollar
$everywhere. -
ARM: can use either
#,$or nothing depending on v7 vs v8 and.syntax unified.
Examples:
21.9.3. GNU GAS assembler data sizes
Let’s see how many bytes go into each data type:
The results are shown at: Table 4, “Summary of GNU GAS assembler data sizes”.
| .byte | .word | .long | .quad | .octa |
|---|---|---|---|---|
x86 |
1 |
2 |
4 |
8 |
16 |
arm |
1 |
4 |
4 |
8 |
16 |
aarch64 |
1 |
4 |
and also keep in mind that according to the manual:
-
.intis the same as.long -
.hwordis the same as.shortwhich is usually the same as.word
Bibliography:
21.9.3.1. GNU GAS assembler ARM specifics
21.9.3.1.1. GNU GAS assembler ARM unified syntax
There are two types of ARMv7 assemblies:
-
.syntax divided -
.syntax unified
They are very similar, but unified is the new and better one, which we use in this tutorial.
Unfortunately, for backwards compatibility, GNU AS 2.31.1 and GCC 8.2.0 still use .syntax divided by default.
The concept of unified assembly is mentioned in ARM’s official assembler documentation: http://infocenter.arm.com/help/index.jsp?topic=/com.arm.doc.dui0473c/BABJIHGJ.html and is often called Unified Assembly Language (UAL).
Some of the differences include:
-
#is optional in unified syntax int literals, see GNU GAS assembler immediates -
many mnemonics changed:
-
most of them are condition code position changes, e.g. ANDSEQ vs ANDEQS: https://stackoverflow.com/questions/51184921/wierd-gcc-behaviour-with-arm-assembler-andseq-instruction
-
but there are some more drastic ones, e.g. SWI vs SVC: https://stackoverflow.com/questions/8459279/are-arm-instructuons-swi-and-svc-exactly-same-thing/54078731#54078731
-
-
cannot have implicit destination with shift, see: Section 23.4.4.1, “ARM shift suffixes”
21.9.3.2. GNU GAS assembler ARM .n and .w suffixes
When reading disassembly, many instructions have either a .n or .w suffix.
.n means narrow, and stands for the Thumb encoding of an instructions, while .w means wide and stands for the ARM encoding.
21.9.4. GNU GAS assembler char literals
This syntax plays horribly with the C preprocessor:
MACRO($'a)
fails because cpp treats string and char literals magically.
21.10. NOP instructions
-
x86: NOP
No OPeration.
Does nothing except take up one processor cycle and occupy some instruction memory.
22. x86 userland assembly
Arch agnostic infrastructure getting started at: Section 21, “Userland assembly”.
22.1. x86 registers
link:userland/arch/x86_64/registers.S
|-----------------------------------------------| | 7 | 6 | 5 | 4 | 3 | 2 | 1 | 0 | |-----------------------------------------------| | | | AH | AL | |-----------------------------------------------| | | | AX | |-----------------------------------------------| | | EAX | |-----------------------------------------------| | RAX | |-----------------------------------------------|
For the newer x86_64 registers, the naming convention is somewhat saner:
|-----------------------------------------------| | 7 | 6 | 5 | 4 | 3 | 2 | 1 | 0 | |-----------------------------------------------| | | |R12H |R12L | |-----------------------------------------------| | | | R12W | |-----------------------------------------------| | | R12D | |-----------------------------------------------| | R12 | |-----------------------------------------------|
Most of the 8 older x86 general purpose registers are not "really" general purpose in the sense that a few instructions magically use them without an explicit encoding. This is reflected in their names:
-
RAX: Accumulator. The general place where you add, subtract and otherwise manipulate results in-place. Magic for example for MUL.
-
RCX, RSI, RDI: Counter, Source and Destination. Used in x86 string instructions
22.1.1. x86 FLAGS registers
TODO: add some more info here. Just need a link placeholder for now.
22.2. x86 addressing modes
Example: userland/arch/x86_64/address_modes.S
Several x86 instructions can calculate addresses of a complex form:
s:a(b, c, d)
which expands to:
a + b + c * d
Where the instruction encoding allows for:
-
a: any 8 or 32-bit general purpose register -
b: any 32-bit general purpose register except ESP -
c: 1, 2, 4 or 8 (encoded in 2 SIB bits) -
d: immediate constant -
s: a segment register. Cannot be tested simply from userland, so we won’t talk about them here. See: https://github.com/cirosantilli/x86-bare-metal-examples/blob/6606a2647d44bc14e6fd695c0ea2b6b7a5f04ca3/segment_registers_real_mode.S
The common compiler usage is:
-
a: base pointer -
b: array offset -
candd: struct offset
Bibliography:
22.3. x86 data transfer instructions
5.1.1 "Data Transfer Instructions"
-
Integer typecasts
-
userland/arch/x86_64/movzx.S: MOVZX
-
userland/arch/x86_64/movsx.S: MOVSX
-
-
userland/arch/x86_64/bswap.S: BSWAP: convert between little endian and big endian
-
userland/arch/x86_64/pushf.S PUSHF: push and pop the x86 FLAGS registers to / from the stack
22.3.1. x86 exchange instructions
Intel 64 and IA-32 Architectures Software Developer’s Manuals Volume 1 7.3.1.2 "Exchange Instructions":
-
userland/arch/x86_64/xadd.S XADD: exchange and add. This is how C `<atomic>`'s' `` is implemented in GCC 5.1. TODO: why is the exchange part needed?
-
userland/arch/x86_64/xchg.S XCHG: exchange two values
TODO: concrete multi-thread GCC inline assembly examples of how all those instructions are normally used as synchronization primitives.
22.3.1.1. x86 CMPXCHG instruction
CMPXCHG: compare and exchange. cmpxchg a, b does:
if (RAX == b) {
ZF = 1
b = a
} else {
ZF = 0
RAX = b
}
TODO application: https://stackoverflow.com/questions/6935442/x86-spinlock-using-cmpxchg
22.3.2. x86 PUSH and POP instructions
push %rax is basically equivalent to:
sub $8, %rsp mov %rax, (%rsp)
and pop %rax:
mov (%rsp), %rax add $8, %rsp
Why do those instructions exist at all vs MOV / ADD / SUB: https://stackoverflow.com/questions/4584089/what-is-the-function-of-push-pop-registers-in-x86-assembly/33583134#33583134
22.3.3. x86 CQTO and CLTQ instructions
Examples:
Instructions without E suffix: sign extend RAX into RDX:RAX.
Instructions E suffix: sign extend withing RAX itself.
Common combo with IDIV 32-bit, which takes the input from EDX:EAX: so you need to set up EDX before calling it.
Has some Intel vs AT&T name overload hell:
GNU GAS accepts both syntaxes, see: Table 5, “CQTO and CLTQ family Intel vs AT&T”.
| Intel | AT&T | From |
|---|---|---|
To |
CBW |
CBTW |
AL |
AX |
CWDE |
CWTL |
AX |
EAX |
CWD |
CWTD |
AX |
DX:AX |
CDQ |
CLTD |
EAX |
EDX:EAX |
CDQE |
CLTQ |
EAX |
RAX |
CQO |
CQTO |
RAX |
22.3.4. x86 CMOVcc instructions
-
userland/arch/x86_64/cmovcc.S: CMOVcc
mov if a condition is met:
CMOVcc a, b
Equals:
if(flag) a = b
where cc are the same flags as Jcc.
Vs jmp:
Not necessarily faster because of branch prediction.
This is partly why the ternary ? C operator exists: https://stackoverflow.com/questions/3565368/ternary-operator-vs-if-else
It is interesting to compare this with ARMv7 conditional execution: which is available for all instructions, as shown at: Section 23.2.5, “ARM conditional execution”.
22.4. x86 binary arithmetic instructions
Intel 64 and IA-32 Architectures Software Developer’s Manuals Volume 1 5.1.2 "Binary Arithmetic Instructions":
-
userland/arch/x86_64/div.S: DIV
-
userland/arch/x86_64/div_overflow.S: DIV overflow
-
userland/arch/x86_64/div_zero.S: DIV zero
-
22.5. x86 logical instructions
Intel 64 and IA-32 Architectures Software Developer’s Manuals Volume 1 5.1.4 "Logical Instructions"
22.6. x86 shift and rotate instructions
Intel 64 and IA-32 Architectures Software Developer’s Manuals Volume 1 5.1.5 "Shift and Rotate Instructions"
-
SHift left or Right and insert 0.
CF == the bit that got shifted out.
Application: quick unsigned multiply and divide by powers of 2.
-
Application: signed multiply and divide by powers of 2.
Mnemonics: Shift Arithmetic Left and Right
Keeps the same sign on right shift.
Not directly exposed in C, for which signed shift is undetermined behavior, but does exist in Java via the
>>>operator. C compilers can omit it however.SHL and SAL are exactly the same and have the same encoding: https://stackoverflow.com/questions/8373415/difference-between-shl-and-sal-in-80x86/56621271#56621271
-
userland/arch/x86_64/rol.S: ROL and ROR
Rotates the bit that is going out around to the other side.
-
userland/arch/x86_64/rol.S: RCL and RCR
Like ROL and ROR, but insert the carry bit instead, which effectively generates a rotation of 8 + 1 bits. TODO application.
22.7. x86 bit and byte instructions
Intel 64 and IA-32 Architectures Software Developer’s Manuals Volume 1 5.1.6 "Bit and Byte Instructions"
-
Bit test: test if the Nth bit a bit of a register is set and store the result in the CF FLAG.
CF = reg[N]
-
userland/arch/x86_64/btr.S: BTR
Do a BT and then set the bit to 0.
-
userland/arch/x86_64/btc.S: BTC
Do a BT and then swap the value of the tested bit.
-
userland/arch/x86_64/setcc.S: SETcc
Set a byte of a register to 0 or 1 depending on the cc condition.
-
userland/arch/x86_64/popcnt.S: POPCNT
Count the number of 1 bits.
-
userland/arch/x86_64/test.S: TEST
Like CMP but does AND instead of SUB:
ZF = (!(X && Y)) ? 1 : 0
22.8. x86 control transfer instructions
Intel 64 and IA-32 Architectures Software Developer’s Manuals Volume 1 5.1.7 "Control Transfer Instructions"
-
userland/arch/x86_64/jmp.S: JMP
-
userland/arch/x86_64/jmp_indirect.S: JMP indirect
-
22.8.1. x86 Jcc instructions
Jump if certain conditions of the flags register are met.
Jcc includes the instructions:
-
JZ, JNZ
-
JE, JNE: same as JZ, with two separate manual entries that say almost the same thing, lol: https://stackoverflow.com/questions/14267081/difference-between-je-jne-and-jz-jnz/14267662#14267662
-
-
JG: greater than, signed
-
JA: Above: greater than, unsigned
-
-
JL: less than, signed
-
JB below: less than, unsigned
-
-
JC: carry
-
JO: overflow
-
JP: parity. Why it exists: https://stackoverflow.com/questions/25707130/what-is-the-purpose-of-the-parity-flag-on-a-cpu
-
JPE: parity even
-
JPO: parity odd
JG vs JA and JL vs JB:
22.8.3. x86 string instructions
Intel 64 and IA-32 Architectures Software Developer’s Manuals Volume 1 5.1.8 "String Instructions"
These instructions do some operation on an array item, and automatically update the index to the next item:
-
First example explained in more detail
-
userland/arch/x86_64/stos.S: STOS: STOre String: store register to memory. STOSD is called STOSL in GNU GAS as usual: https://stackoverflow.com/questions/6211629/gcc-inline-assembly-error-no-such-instruction-stosd
-
-
Further examples
-
userland/arch/x86_64/cmps.S: CMPS: CoMPare Strings: compare two values in memory with addresses given by RSI and RDI. Could be used to implement
memcmp. Store the result in JZ as usual. -
userland/arch/x86_64/lods.S: LODS: LOaD String: load from memory to register.
-
userland/arch/x86_64/movs.S: MOVS: MOV String: move from one memory to another with addresses given by RSI and RDI. Could be used to implement
memmov. -
userland/arch/x86_64/scas.S: SCAS: SCan String: compare memory to the value in a register. Could be used to implement
strchr.
-
The RSI and RDI registers are actually named after these intructions! S is the source of string instructions, D is the destination of string instructions: https://stackoverflow.com/questions/1856320/purpose-of-esi-edi-registers
The direction of the index increment depends on the direction flag of the FLAGS register: 0 means forward and 1 means backward: https://stackoverflow.com/questions/9636691/what-are-cld-and-std-for-in-x86-assembly-language-what-does-df-do
These instructions were originally developed to speed up "string" operations such as those present in the <string.h> header of the C standard library.
However, as computer architecture evolved, those instructions might not offer considerable speedups anymore, and modern glibc such as 2.29 just uses x86 SIMD operations instead:, see also: https://stackoverflow.com/questions/33480999/how-can-the-rep-stosb-instruction-execute-faster-than-the-equivalent-loop
22.8.3.1. x86 REP prefix
Example: userland/arch/x86_64/rep.S
Repeat a string instruction RCX times:
As the repetitions happen:
-
RCX decreases, until it reaches 0
-
RDI and RSI increase
The variants: REPZ, REPNZ (alias REPE, REPNE) repeat a given instruction until something happens.
REP and REPZ also additionally stop if the comparison operation they repeat fails.
-
REP: INS, OUTS, MOVS, LODS, and STOS
-
REPZ: CMPS and SCAS
22.8.4. x86 ENTER and LEAVE instructions
These instructions were designed to allocate and deallocate function stack frames in the prologue and epilogue: https://stackoverflow.com/questions/5959890/enter-vs-push-ebp-mov-ebp-esp-sub-esp-imm-and-leave-vs-mov-esp-ebp
ENTER appears obsolete and is kept mostly for backwards compatibility. LEAVE is still emitted by some compilers.
ENTER A, B is basically equivalent to:
push %rbp mov %rsp, %rbp sub %rsp, A
which implies an allocation of:
-
one dword to remember EBP
-
A bytes for local function variables
I didn’t have the patience to study the B parameter, and it does not seem to be used often: https://stackoverflow.com/questions/26323215/do-any-languages-compilers-utilize-the-x86-enter-instruction-with-a-nonzero-ne
LEAVE is equivalent to:
mov %rbp, %rsp pop %rbp
which restores RSP and RBP to the values they had before the prologue.
22.9. x86 miscellaneous instructions
Intel 64 and IA-32 Architectures Software Developer’s Manuals Volume 1 5.1.13 "Miscellaneous Instructions"
22.10. x86 random number generator instructions
Intel 64 and IA-32 Architectures Software Developer’s Manuals Volume 1 5.1.15 Random Number Generator Instructions
Example: userland/arch/x86_64/rdrand.S: RDRAND
If you run that executable multiple times, it prints a random number every time to stdout.
RDRAND is a true random number generator!
This Intel engineer says its based on quantum effects: https://stackoverflow.com/questions/17616960/true-random-numbers-with-c11-and-rdrand/18004959#18004959
Generated some polemic when kernel devs wanted to use it as part of /dev/random, because it could be used as a cryptographic backdoor by Intel since it is a black box.
RDRAND sets the carry flag when data is ready so we must loop if the carry flag isn’t set.
22.10.1. x86 CPUID instruction
Example: userland/arch/x86_64/cpuid.S
Fills EAX, EBX, ECX and EDX with CPU information.
The exact data to show depends on the value of EAX, and for a few cases instructions ECX. When it depends on ECX, it is called a sub-leaf. Out test program prints eax == 0.
On P51 for example the output EAX, EBX, ECX and EDX are:
0x00000016 0x756E6547 0x6C65746E 0x49656E69
EBX and ECX are easy to interpret:
-
EBX: 75 6e 65 47 == 'u', 'n', 'e', 'G' in ASCII
-
ECX: 6C 65 74 6E == 'l', 'e', 't', 'n'
so we see the string Genu ntel which is a shorthand for "Genuine Intel". Ha, I wonder if they had serious CPU pirating problems in the past? :-)
Information available includes:
-
vendor
-
version
-
features (mmx, simd, rdrand, etc.) <http://en.wikipedia.org/wiki/CPUID# EAX.3D1:_Processor_Info_and_Feature_Bits>
-
caches
-
tlbs http://en.wikipedia.org/wiki/Translation_lookaside_buffer
The cool thing about this instruction is that it allows you to check the CPU specs and take alternative actions based on that inside your program.
On Linux, the capacity part of this information is parsed and made available at cat /proc/cpuinfo. See: http://unix.stackexchange.com/questions/43539/what-do-the-flags-in-proc-cpuinfo-mean
There is also the cpuinfo command line tool that parses the CPUID instruction from the command line. Source: http://www.etallen.com/cpuid.html
22.11. x86 x87 FPU instructions
Intel 64 and IA-32 Architectures Software Developer’s Manuals Volume 1 5.2 "X87 FPU INSTRUCTIONS"
Old floating point unit that you should likely not use anymore, prefer instead the newer x86 SIMD instructions.
-
FPU basic examples, start here
-
userland/arch/x86_64/fadd.S FADD. The x76 FPU works on a stack of floating point numbers.
-
userland/arch/x86_64/faddp.S FADDP. Instructions with the P suffix also Pop the stack. This is often what you want for most computations, where the intermediate results don’t matter.
-
userland/arch/x86_64/fldl_literal.S FLDL literal. It does not seem possible to either https://stackoverflow.com/questions/6514537/how-do-i-specify-immediate-floating-point-numbers-with-inline-assembly
-
load floating point immediates into x86 x87 FPU registers
-
encode floating point literals in x86 instructions, including MOV
-
-
-
Bulk instructions
-
userland/arch/x86_64/fabs.S FABS: absolute value:
ST0 = |ST0| -
userland/arch/x86_64/fchs.S FCHS: change sign:
ST0 = -ST0 -
userland/arch/x86_64/fild.S FILD: Integer Load. Convert integer to float.
-
userland/arch/x86_64/fld1.S FLD1: Push 1.0 to ST0. CISC!
-
userland/arch/x86_64/fldz.S FLDZ: Push 0.0 to ST0.
-
userland/arch/x86_64/fscale.S FSCALE:
ST0 = ST0 * 2 ^ RoundTowardZero(ST1) -
userland/arch/x86_64/fsqrt.S FSQRT: square root
-
userland/arch/x86_64/fxch.S FXCH: swap ST0 and another register
-
The ST0-ST7 x87 FPU registers are actually 80-bits wide, this can be seen from GDB with:
i r st0 st1
By counting the number of hex digits, we have 20 digits instead of 16!
Instructions such as FLDL convert standard IEEE 754 64-bit values from memory into this custom 80-bit format.
22.11.1. x86 x87 FPU vs SIMD
Modern x86 has two main ways of doing floating point operations:
Advantages of FPU:
-
present in old CPUs, while SSE2 is only required in x86-64
-
contains some instructions no present in SSE, e.g. trigonometric
-
higher precision: FPU holds 80 bit Intel extension, while SSE2 only does up to 64 bit operations despite having the 128-bit register
In GCC, you can choose between them with -mfpmath=.
22.12. x86 SIMD
Parent section: Section 21.3, “SIMD assembly”
History:
-
MMX: MultiMedia eXtension (unofficial name). 1997. MM0-MM7 64-bit registers.
-
SSE: Streaming SIMD Extensions. 1999. XMM0-XMM7 128-bit registers, XMM0-XMM15 for AMD in 64-bit mode.
-
SSE2: 2004
-
SSE3: 2006
-
SSE4: 2006
-
AVX: Advanced Vector Extensions. 2011. YMM0–YMM15 256-bit registers in 64-bit mode. Extension of XMM.
-
AVX2:2013
-
AVX-512: 2016. 512-bit ZMM registers. Extension of YMM.
22.12.1. x86 SSE instructions
Intel 64 and IA-32 Architectures Software Developer’s Manuals Volume 1 5.5 "SSE INSTRUCTIONS"
22.12.1.1. x86 SSE data transfer instructions
Intel 64 and IA-32 Architectures Software Developer’s Manuals Volume 1 5.5.1.1 "SSE Data Transfer Instructions"
-
userland/arch/x86_64/movaps.S: MOVAPS: move 4 x 32-bits between two XMM registeres or XMM registers and 16-byte aligned memory
-
userland/arch/x86_64/movaps.S: MOVUPS: like MOVAPS but also works for unaligned memory
-
userland/arch/x86_64/movss.S: MOVSS: move 32-bits between two XMM registeres or XMM registers and memory
22.12.1.2. x86 SSE packed arithmetic instructions
Intel 64 and IA-32 Architectures Software Developer’s Manuals Volume 1 5.5.1.2 "SSE Packed Arithmetic Instructions"
-
userland/arch/x86_64/addpd.S: ADDPS, ADDPD: good first instruction to learn SIMD assembly.
22.12.1.3. x86 SSE conversion instructions
Intel 64 and IA-32 Architectures Software Developer’s Manuals Volume 1 5.5.1.6 "SSE Conversion Instructions"
22.12.2. x86 SSE2 instructions
Intel 64 and IA-32 Architectures Software Developer’s Manuals Volume 1 5.6 "SSE2 INSTRUCTIONS"
-
userland/arch/x86_64/cvttss2si.S: CVTTSS2SI: convert 32-bit floating point to 32-bit integer, store the result in a general purpose register. Round towards 0.
22.12.2.1. x86 PADDQ instruction
userland/arch/x86_64/paddq.S: PADDQ, PADDL, PADDW, PADDB
Good first instruction to learn SIMD assembly.
22.12.3. x86 fused multiply add (FMA)
Intel 64 and IA-32 Architectures Software Developer’s Manuals Volume 1 5.15 "FUSED-MULTIPLY-ADD (FMA)"
-
userland/arch/x86_64/vfmadd132pd.S: VFMADD132PD: "Multiply packed double-precision floating-point values from xmm1 and xmm3/mem, add to xmm2 and put result in xmm1." TODO: but I don’t understand the manual, experimentally on P51 Ubuntu 19.04 host the result is stored in XMM2!
These instructions were not part of any SSEn set: they actually have a dedicated CPUID flag for it! It appears under /proc/cpuinfo as fma. They were introduced into AVX512F however.
They are also unusual for x86 instructions in that they take 3 operands, as you would intuitively expect from the definition of FMA.
22.13. x86 system instructions
Intel 64 and IA-32 Architectures Software Developer’s Manuals Volume 1 5.20 "SYSTEM INSTRUCTIONS"
22.13.1. x86 RDTSC instruction
Sources:
Try running the programs multiple times, and watch the value increase, and then try to correlate it with /proc/cpuinfo frequency!
while true; do sleep 1 && ./userland/arch/x86_64/rdtsc.out; done
RDTSC stores its output to EDX:EAX, even in 64-bit mode, top bits are zeroed out.
TODO: review this section, make a more controlled userland experiment with m5ops instrumentation.
Let’s have some fun and try to correlate the gem5 gem5 stats.txt system.cpu.numCycles cycle count with the x86 RDTSC instruction that is supposed to do the same thing:
./build-userland --static userland/arch/x86_64/inline_asm/rdtsc.S ./run --eval './arch/x86_64/rdtsc.out;m5 exit;' --emulator gem5 ./gem5-stat
RDTSC outputs a cycle count which we compare with gem5’s gem5-stat:
-
3828578153: RDTSC -
3830832635:gem5-stat
which gives pretty close results, and serve as a nice sanity check that the cycle counter is coherent.
It is also nice to see that RDTSC is a bit smaller than the stats.txt value, since the latter also includes the exec syscall for m5.
Bibliography:
22.13.1.1. x86 RDTSCP instruction
RDTSCP is like RDTSP, but it also stores the CPU ID into ECX: this is convenient because the value of RDTSC depends on which core we are currently on, so you often also want the core ID when you want the RDTSC.
Sources:
We can observe its operation with the good and old taskset, for example:
taskset -c 0 ./userland/arch/x86_64/rdtscp.out | tail -n 1 taskset -c 1 ./userland/arch/x86_64/rdtscp.out | tail -n 1
produces:
0x00000000 0x00000001
There is also the RDPID instruction that reads just the processor ID, but it appears to be very new for QEMU 4.0.0 or P51, as it fails with SIGILL on both.
22.13.1.2. ARM PMCCNTR register
TODO We didn’t manage to find a working ARM analogue to x86 RDTSC instruction: kernel_modules/pmccntr.c is oopsing, and even it if weren’t, it likely won’t give the cycle count since boot since it needs to be activate before it starts counting anything:
22.14. x86 thread synchronization primitives
22.14.1. x86 LOCK prefix
Inline assembly example at: userland/cpp/atomic.cpp
Ensures that memory modifications are visible across all CPUs, which is fundamental for thread synchronization.
Apparently already automatically implied by some of the x86 exchange instructions
Bibliography:
22.15. x86 assembly bibliography
22.15.1. x86 official bibliography
22.15.1.1. Intel 64 and IA-32 Architectures Software Developer’s Manuals
We are using the May 2019 version unless otherwise noted.
There are a few download forms at: https://software.intel.com/en-us/articles/intel-sdm
The single PDF one is useless however because it does not have a unified ToC nor inter Volume links, so I just download the 4-part one.
The Volumes are well split, so it is usually easy to guess where you should look into.
Also I can’t find older versions on the website easily, so I just web archive everything.
23. ARM userland assembly
Arch general getting started at: Section 21, “Userland assembly”.
Instructions here loosely grouped based on that of the ARMv7 architecture reference manual Chapter A4 "The Instruction Sets".
We cover here mostly ARMv7, and then treat aarch64 differentially, since much of the ARMv7 userland is the same in aarch32.
23.1. Introduction to the ARM architecture
The ARM architecture is has been used on the vast majority of mobile phones in the 2010’s, and on a large fraction of micro controllers.
It competes with x86 userland assembly because its implementations are designed for low power consumption, which is a major requirement of the cell phone market.
ARM is generally considered a RISC instruction set, although there are some more complex instructions which would not generally be classified as purely RISC.
ARM is developed by the British funded company ARM Holdings: https://en.wikipedia.org/wiki/Arm_Holdings which originated as a joint venture between Acorn Computers, Apple and VLSI Technology in 1990.
ARM Holdings was bought by the Japanese giant SoftBank in 2016.
23.1.1. ARMv8 vs ARMv7 vs AArch64 vs AArch32
ARMv7 is the older architecture described at: ARMv7 architecture reference manual.
ARMv8 is the newer architecture ISA released in 2013 and described at: ARMv8 architecture reference manual. It can be in either of two states:
-
aarch64
In the lose terminology of this repository:
-
armmeans basically AArch32 -
aarch64means ARMv8 AArch64
ARMv8 has had several updates since its release:
-
v8.1: 2014
-
v8.2: 2016
-
v8.3: 2016
-
v8.4: TODO
-
v8.5: 2018
They are described at: ARMv8 architecture reference manual A1.7 "ARMv8 architecture extensions".
23.1.1.1. AArch32
32-bit mode of operation of ARMv8.
Userland is highly / fully backwards compatible with ARMv7:
For this reason, QEMU and GAS seems to enable both AArch32 and ARMv7 under arm rather than aarch64.
There are however some extensions over ARMv7, many of them are functionality that ARMv8 has and that designers decided to backport on AArch32 as well, e.g.:
23.1.1.2. AArch32 vs AArch64
A great summary of differences can be found at: https://en.wikipedia.org/wiki/ARM_architecture#AArch64_features
Some random ones:
-
aarch32 has two encodings: Thumb and ARM: Section 23.1.3, “ARM instruction encodings”
-
in ARMv8, the stack can be enforced to 16-byte alignment: Section 23.3.2.2.1, “ARMV8 aarch64 stack alignment”
23.1.2. Free ARM implementations
The ARM instruction set is itself protected by patents / copyright / whatever, and you have to pay ARM Holdings a licence to implement it, even if you are creating your own custom Verilog code.
ARM has already sued people in the past for implementing ARM ISA: http://www.eetimes.com/author.asp?section_id=36&doc_id=1287452
Asanovic joked that the shortest unit of time is not the moment between a traffic light turning green in New York City and the cab driver behind the first vehicle blowing the horn; it’s someone announcing that they have created an open-source, ARM-compatible core and receiving a “cease and desist” letter from a law firm representing ARM.
This licensing however does have the following fairness to it: ARM Holdings invents a lot of money in making a great open source software environment for the ARM ISA, so it is only natural that it should be able to get some money from hardware manufacturers for using their ISA.
Patents for very old ISAs however have expired, Amber is one implementation of those: https://en.wikipedia.org/wiki/Amber_%28processor_core%29 TODO does it have any application?
Generally, it is mostly large companies that implement the CPUs themselves. For example, the Apple A12 chip, which is used in iPhones, has verilog designs:
The A12 features an Apple-designed 64-bit ARMv8.3-A six-core CPU, with two high-performance cores running at 2.49 GHz called Vortex and four energy-efficient cores called Tempest.
ARM designed CPUs however are mostly called Coretx-A<id>: https://en.wikipedia.org/wiki/List_of_applications_of_ARM_cores Vortex and Tempest are Apple designed ones.
Bibliography: https://www.quora.com/Why-is-it-that-you-need-a-license-from-ARM-to-design-an-ARM-CPU-How-are-the-instruction-sets-protected
23.1.3. ARM instruction encodings
Understanding the basics of instruction encodings is fundamental to help you to remember what instructions do and why some things are possible or not, notably the ARM LDR pseudo-instruction and the ADRP instruction.
aarch32 has two "instruction sets", which to look just like encodings.
The encodings are:
-
A32: every instruction is 4 bytes long. Can encode every instruction.
-
T32: most common instructions are 2 bytes long. Many others less common ones are 4 bytes long.
T stands for "Thumb", which is the original name for the technology, ARMv8 architecture reference manual A1.3.2 "The ARM instruction sets" says:
In previous documentation, these instruction sets were called the ARM and Thumb instruction sets
See also: ARMv8 architecture reference manual F2.1.3 "Instruction encodings".
Within each instruction set, there can be multiple encodings for a given function, and they are noted simply as:
-
A1, A2, …: A32 encodings
-
T1, T2, ..m: T32 encodings
The state bit PSTATE.T determines if the processor is in thumb mode or not. ARMv8 architecture reference manual says that this bit it can only be read from ARM BX instruction
https://stackoverflow.com/questions/22660025/how-can-i-tell-if-i-am-in-arm-mode-or-thumb-mode-in-gdb
TODO: details: https://stackoverflow.com/questions/22660025/how-can-i-tell-if-i-am-in-arm-mode-or-thumb-mode-in-gdb says it is 0x20 & CPSR.
This RISC-y mostly fixed instruction length design likely makes processor design easier and allows for certain optimizations, at the cost of slightly more complex assembly, as you can’t encode 4 / 8 byte addresses in a single instruction. Totally worth it IMHO.
This design can be contrasted with x86, which has widely variable instruction length.
We can swap between A32 and T32 with the BX and BLX instructions: http://infocenter.arm.com/help/index.jsp?topic=/com.arm.doc.kui0100a/armasm_cihfddaf.htm puts it really nicely:
The BL and BLX instructions copy the address of the next instruction into lr (r14, the link register).
The BX and BLX instructions can change the processor state from ARM to Thumb, or from Thumb to ARM.
BLX label always changes the state.
BX Rm and BLX Rm derive the target state from bit[0] of Rm:
if bit[0] of Rm is 0, the processor changes to, or remains in, ARM state
if bit[0] of Rm is 1, the processor changes to, or remains in, Thumb state.
The BXJ instruction changes the processor state to Jazelle.
Bibliography:
23.1.3.1. ARM Thumb encoding
Thumb examples are available at:
For both of them, we can check that we are in thumb from inside GDB with:
-
disassemble, and observe that some of the instructions are only 2 bytes long instead of always 4 as in ARM -
print $cpsr & 0x20which is1on thumb and0otherwise
You should contrast those examples with similar non-thumb ones of course.
We also note that thumbness of those sources is determined solely by the .thumb_func directive, which implies that there must be some metadata to allow the linker to decide how that code should be called:
-
for the freestanding example, this is determined by the first bit of the entry address ELF header as mentioned at: https://stackoverflow.com/questions/20369440/can-start-be-the-thumb-function/20374451#20374451
We verify that with:
./run-toolchain --arch arm readelf -- -h "$(./getvar --arch arm userland_build_dir)/arch/arm/freestanding/linux/hello_thumb.out"
The Linux kernel must use that to decide put the CPU in thumb mode: that could be done simply with a regular BX.
-
on the non-freestanding one, the linker uses some ELF metadata to decide that
mainis thumb and jumps to it appropriately: https://reverseengineering.stackexchange.com/questions/6080/how-to-detect-thumb-mode-in-arm-disassemblyTODO details. Does the linker then resolve thumbness with address relocation? Doesn’t this imply that the compiler cannot generate BL (never changes) or BLX (always changes) across object files, only BX (target state controlled by lower bit)?
23.1.3.2. ARM big endian mode
ARM can switch between big and little endian mode on the fly!
However, everyone only uses little endian, so the big endian ecosystem is not as supported.
TODO is there any advantage of using big endian?
Here Peter mentions that QEMU does "support" big endian in theory, but that there are no machines for it not sure what that implies: https://stackoverflow.com/questions/41571643/emulatin-big-endian-arm-system-with-qemu
We can try it out quickly in user mode with:
touch userland/arch/aarch64/freestanding/linux/hello.S ./build-userland --arch aarch64 --ccflags=-mbig-endian userland/arch/aarch64/freestanding/linux/hello.S ./run --arch aarch64 --userland userland/arch/aarch64/freestanding/linux/hello.S
and it fails with:
Invalid ELF image for this architecture
From this we can guess that the big endian metadata is actually stored in the ELF file, and confirm that with:
./run-toolchain \ --arch aarch64 \ readelf \ -- \ --file-header "$(./getvar --arch aarch64 userland_build_dir)/arch/aarch64/freestanding/linux/hello.out" \ ;
which contains:
Data: 2's complement, big endian
instead of the default:
Data: 2's complement, little endian
TODO does the Linux kernel support running big endian executables? I tried after building the big endian executable:
./build-buildroot --arch aarch64 ./run --arch aarch64 --eval-after ./arch/aarch64/freestanding/linux/hello.out
but that failed with:
/lkmc/arch/aarch64/freestanding/linux/hello.out: line 1: ELF@x@0@8@: not found /lkmc/arch/aarch64/freestanding/linux/hello.out: line 2: @@: not found /lkmc/arch/aarch64/freestanding/linux/hello.out: line 3: syntax error: unexpected ")"
TODO:
-
can you compile the Linux kernel itself as big endian? Looks like yes since there is a
config CPU_BIG_ENDIANSee also: https://unix.stackexchange.com/questions/378829/getting-big-endian-linux-build-to-boot-on-arm-with-u-boot -
how can be is the endianess be checked and modified in the CPU?
23.2. ARM branch instructions
23.2.1. ARM B instruction
Unconditional branch.
Example: userland/arch/arm/b.S
The encoding stores PC offsets in 24 bits. The destination must be a multiple of 4, which is easy since all instructions are 4 bytes.
This allows for 26 bit long jumps, which is 64 MiB.
TODO: what to do if we want to jump longer than that?
23.2.2. ARM BEQ instruction
Branch if equal based on the status registers.
Examples:
The family of instructions includes:
-
BEQ: branch if equal
-
BNE: branch if not equal
-
BLE: less or equal
-
BGE: greater or equal
-
BLT: less than
-
BGT: greater than
23.2.3. ARM BL instruction
Branch with link, i.e. branch and store the return address on the RL register.
Example: userland/arch/arm/bl.S
This is the major way to make function calls.
The current ARM / Thumb mode is encoded in the least significant bit of lr.
23.2.3.2. ARMv8 aarch64 ret instruction
Example: userland/arch/aarch64/ret.S
ARMv8 AArch64 only:
-
there is no BX in AArch64 since no Thumb to worry about, so it is called just BR
-
the RET instruction was added in addition to BR, with the following differences:
-
provides a hint that this is a function call return
-
has a default argument X30 if none is given. This is where BL puts the return value.
-
23.2.4. ARM CBZ instruction
Compare and branch if zero.
Example: userland/arch/aarch64/cbz.S
Only in ARMv8 and ARMv7 Thumb mode, not in armv7 ARM mode.
Very handy!
23.2.5. ARM conditional execution
Weirdly, ARM B instruction and family are not the only instructions that can execute conditionally on the flags: the same also applies to most instructions, e.g. ADD.
Example: userland/arch/arm/cond.S
Just add the usual eq, ne, etc. suffixes just as for B.
The list of all extensions is documented at ARMv7 architecture reference manual "A8.3 Conditional execution".
23.3. ARM load and store instructions
In ARM, there are only two instruction families that do memory access:
-
ARM LDR instruction to load from memory to registers
-
ARM STR instruction to store from registers to memory
Everything else works on register and immediates.
This is part of the RISC-y beauty of the ARM instruction set, unlike x86 in which several operations can read from memory, and helps to predict how to optimize for a given CPU pipeline.
This kind of architecture is called a Load/store architecture.
23.3.1. ARM LDR instruction
23.3.1.1. ARM LDR pseudo-instruction
LDR can be either a regular instruction that loads stuff into memory, or also a pseudo-instruction (assembler magic): http://infocenter.arm.com/help/index.jsp?topic=/com.arm.doc.dui0041c/Babbfdih.html
The pseudo instruction version is when an equal sign appears on one of the operators.
The LDR pseudo instruction can automatically create hidden variables in a place called the "literal pool", and load them from memory with PC relative loads.
Example: userland/arch/arm/ldr_pseudo.S
This is done basically because all instructions are 32-bit wide, and there is not enough space to encode 32-bit addresses in them.
Bibliography:
23.3.1.2. ARM addressing modes
Example: userland/arch/arm/address_modes.S
Load and store instructions can update the source register with the following modes:
-
offset: add an offset, don’t change the address register. Notation:
ldr r1, [r0, 4]
-
pre-indexed: change the address register, and then use it modified. Notation:
ldr r1, [r0, 4]!
-
post-indexed: use the address register unmodified, and then modify it. Notation:
ldr r1, [r0], 4
The offset itself can come from the following sources:
-
immediate
-
register
-
scaled register: left shift the register and use that as an offset
The indexed modes are convenient to loop over arrays.
Bibliography: ARMv7 architecture reference manual:
-
A4.6.5 "Addressing modes"
-
A8.5 "Memory accesses"
ARMv8 architecture reference manual: C1.3.3 "Load/Store addressing modes"
23.3.1.2.1. ARM loop over array
As an application of the post-indexed addressing mode, let’s increment an array.
Example: userland/arch/arm/inc_array.S
23.3.1.3. ARM LDRH and LDRB instructions
There are LDR variants that load less than full 4 bytes:
-
userland/arch/arm/ldrb.S: load byte
-
userland/arch/arm/ldrh.S: load half word
23.3.2. ARM STR instruction
Store from memory into registers.
Example: userland/arch/arm/str.S
Basically everything that applies to ARM LDR instruction also applies here so we won’t go into much detail.
23.3.2.1. ARMv8 aarch64 STR instruction
PC-relative STR is not possible in aarch64.
For LDR it works as in aarch32.
As a result, it is not possible to load from the literal pool for STR.
Example: userland/arch/aarch64/str.S
This can be seen from ARMv8 architecture reference manual C3.2.1 "Load/Store register": LDR simply has on extra PC encoding that STR does not.
23.3.2.2. ARMv8 aarch64 LDP and STP instructions
Push a pair of registers to the stack.
TODO minimal example. Currently used in LKMC_PROLOGUE at lkmc/aarch64.h since it is the main way to restore register state.
23.3.2.2.1. ARMV8 aarch64 stack alignment
In ARMv8, the stack can be enforced to 16-byte alignment.
This is why the main way to push things to stack is with 8-byte pair pushes with the ARMv8 aarch64 LDP and STP instructions.
ARMv8 architecture reference manual db C1.3.3 "Load/Store addressing modes" says:
When stack alignment checking is enabled by system software and the base register is the SP, the current stack pointer must be initially quadword aligned, that is aligned to 16 bytes. Misalignment generates a Stack Alignment fault. The offset does not have to be a multiple of 16 bytes unless the specific Load/Store instruction requires this. SP cannot be used as a register offset.
ARMv8 architecture reference manual db C3.2 "Loads and stores" says:
The additional control bits SCTLR_ELx.SA and SCTLR_EL1.SA0 control whether the stack pointer must be quadword aligned when used as a base register. See SP alignment checking on page D1-2164. Using a misaligned stack pointer generates an SP alignment fault exception.
ARMv8 architecture reference manual db D1.8.2 "SP alignment checking" is then the main section.
TODO: what does the ABI say on this? Why don’t I observe faults on QEMU as mentioned at: https://stackoverflow.com/questions/212466/what-is-a-bus-error/31877230#31877230
See also:
23.3.3. ARM LDMIA instruction
Pop values form stack into the register and optionally update the address register.
STMDB is the push version.
Example: userland/arch/arm/ldmia.S
The mnemonics stand for:
-
STMDB: STore Multiple Decrement Before
-
LDMIA: LoaD Multiple Increment After
Example: userland/arch/arm/push.S
PUSH and POP are just mnemonics STDMDB and LDMIA using the stack pointer SP as address register:
stmdb sp!, reglist ldmia sp!, reglist
The ! indicates that we want to update the register.
The registers are encoded as single bits inside the instruction: each bit represents one register.
As a consequence, the push order is fixed no matter how you write the assembly instruction: there is just not enough space to encode ordering.
AArch64 loses those instructions, likely because it was not possible anymore to encode all registers: https://stackoverflow.com/questions/27941220/push-lr-and-pop-lr-in-arm-arch64 and replaces them with the ARMv8 aarch64 LDP and STP instructions
23.4. ARM data processing instructions
Arithmetic:
-
userland/arch/arm/mul.S: multiply
-
userland/arch/arm/sub.S: subtract
-
userland/arch/arm/rbit.S: reverse bit order
-
userland/arch/arm/rev.S: reverse byte order
23.4.1. ARM CSET instruction
Example: userland/arch/aarch64/cset.S
Set a register conditionally depending on the condition flags:
ARMv8-only, likely because in ARMv8 you can’t have conditional suffixes for every instruction.
23.4.2. ARM bitwise instructions
-
EOR: exclusive OR
-
ORR: OR
-
userland/arch/arm/clz.S: count leading zeroes
23.4.2.1. ARM BIC instruction
Bitwise Bit Clear: clear some bits.
dest = left & ~right
Example: userland/arch/arm/bic.S
23.4.2.2. ARM UBFM instruction
Unsigned Bitfield Move.
copies any number of low-order bits from a source register into the same number of adjacent bits at any position in the destination register, with zeros in the upper and lower bits.
Example: userland/arch/aarch64/ubfm.S
TODO: explain full behaviour. Very complicated. Has several simpler to understand aliases.
23.4.2.2.1. ARM UBFX instruction
Alias for:
UBFM <Wd>, <Wn>, #<lsb>, #(<lsb>+<width>-1)
Example: userland/arch/aarch64/ubfx.S
The operation:
UBFX dest, src, lsb, width
does:
dest = (src & ((1 << width) - 1)) >> lsb;
23.4.2.3. ARM BFM instruction
TODO: explain. Similar to UBFM but leave untouched bits unmodified.
23.4.2.3.1. ARM BFI instruction
Examples:
Move the lower bits of source register into any position in the destination:
-
ARMv8: an alias for ARM BFM instruction
-
ARMv7: a real instruction
23.4.3. ARM MOV instruction
Move an immediate to a register, or a register to another register.
Cannot load from or to memory, since only the LDR and STR instruction families can do that in ARM as mentioned at: Section 23.3, “ARM load and store instructions”.
Example: userland/arch/arm/mov.S
Since every instruction has a fixed 4 byte size, there is not enough space to encode arbitrary 32-bit immediates in a single instruction, since some of the bits are needed to actually encode the instruction itself.
The solutions to this problem are mentioned at:
Summary of solutions:
-
place it in memory. But then how to load the address, which is also a 32-bit value?
-
use pc-relative addressing if the memory is close enough
-
use ORR encodable shifted immediates
-
The blog article summarizes nicely which immediates can be encoded and the design rationale:
An Operand 2 immediate must obey the following rule to fit in the instruction: an 8-bit value rotated right by an even number of bits between 0 and 30 (inclusive). This allows for constants such as 0xFF (0xFF rotated right by 0), 0xFF00 (0xFF rotated right by 24) or 0xF000000F (0xFF rotated right by 4).
In software - especially in languages like C - constants tend to be small. When they are not small they tend to be bit masks. Operand 2 immediates provide a reasonable compromise between constant coverage and encoding space; most common constants can be encoded directly.
Assemblers however support magic memory allocations which may hide what is truly going on: https://stackoverflow.com/questions/14046686/why-use-ldr-over-mov-or-vice-versa-in-arm-assembly Always ask your friendly disassembly for a good confirmation.
23.4.3.1. ARM movw and movt instructions
Set the higher or lower 16 bits of a register to an immediate in one go.
Example: userland/arch/arm/movw.S
The armv8 version analogue is ARMv8 aarch64 movk instruction.
23.4.3.2. ARMv8 aarch64 movk instruction
Fill a 64 bit register with 4 16-bit instructions one at a time.
Similar to ARM movw and movt instructions in v7.
Example: userland/arch/aarch64/movk.S
23.4.3.3. ARMv8 aarch64 movn instruction
Set 16-bits negated and the rest to 1.
Example: userland/arch/aarch64/movn.S
23.4.4. ARM data processing instruction suffixes
23.4.4.1. ARM shift suffixes
Most data processing instructions can also optionally shift the second register operand.
Example: userland/arch/arm/shift.S
The shift types are:
-
LSR and LFL: Logical Shift Right / Left. Insert zeroes.
-
ROR: Rotate Right / Left. Wrap bits around.
-
ASR: Arithmetic Shift Right. Keep sign.
Documented at: ARMv7 architecture reference manual "A4.4.1 Standard data-processing instructions"
23.4.4.2. ARM S suffix
Example: userland/arch/arm/s_suffix.S
The S suffix, present on most ARM data processing instructions, makes the instruction also set the Status register flags that control conditional jumps.
If the result of the operation is 0, then it triggers BEQ, since comparison is a subtraction, with success on 0.
CMP sets the flags by default of course.
23.4.5. ARM ADR instruction
Similar rationale to the ARM LDR pseudo-instruction, allowing to easily store a PC-relative reachable address into a register in one go, to overcome the 4-byte fixed instruction size.
Examples:
23.5. ARM miscellaneous instructions
23.5.1. ARM NOP instruction
Parent section: Section 21.10, “NOP instructions”
There are a few different ways to encode NOP, notably MOV a register into itself, and a dedicated miscellaneous instruction.
Example: userland/arch/arm/nop.S
Try disassembling the executable to see what the assembler is emitting:
gdb-multiarch -batch -ex 'arch arm' -ex "file v7/nop.out" -ex "disassemble/rs asm_main_after_prologue"
23.5.2. ARM UDF instruction
Guaranteed undefined! Therefore raise illegal instruction signal. Used by GCC __builtin_trap apparently: https://stackoverflow.com/questions/16081618/programmatically-cause-undefined-instruction-exception
Why GNU GAS 2.29 does not have a mnemonic for it in A64 because it is very recent: shows in ARMv8 architecture reference manual db but not ca.
23.6. ARM SIMD
Parent section: Section 21.3, “SIMD assembly”
23.6.1. ARM VFP
The name for the ARMv7 and AArch32 floating point and SIMD instructions / registers.
Vector Floating Point extension.
TODO I think it was optional in ARMv7, find quote.
VFP has several revisions, named as VFPv1, VFPv2, etc. TODO: announcement dates.
As mentioned at: https://stackoverflow.com/questions/37790029/what-is-difference-between-arm64-and-armhf/48954012#48954012 the Linux kernel shows those capabilities in /proc/cpuinfo with flags such as vfp, vfpv3 and others, see:
When a certain version of VFP is present on a CPU, the compiler prefix typically contains the hf characters which stands for Hard Float, e.g.: arm-linux-gnueabihf. This means that the compiler will emit VFP instructions instead of just using software implementations.
Bibliography:
-
ARMv7 architecture reference manual Appendix D6 "Common VFP Subarchitecture Specification". It is not part of the ISA, but just an extension. TODO: that spec does not seem to have the instructions documented, and instruction like VMOV just live with the main instructions. Is VMOV part of VFP?
-
https://mindplusplus.wordpress.com/2013/06/25/arm-vfp-vector-programming-part-1-introduction/
-
https://en.wikipedia.org/wiki/ARM_architecture#Floating-point_(VFP)
23.6.1.1. ARM VFP registers
TODO example
ARMv8 architecture reference manual E1.3.1 "The SIMD and floating-point register file" Figure E1-1 "SIMD and floating-point register file, AArch32 operation":
+-----+-----+-----+ | S0 | | | +-----+ D0 + | | S1 | | | +-----+-----+ Q0 | | S2 | | | +-----+ D1 + | | S3 | | | +-----+-----+-----+ | S4 | | | +-----+ D2 + | | S5 | | | +-----+-----+ Q1 | | S6 | | | +-----+ D3 + | | S7 | | | +-----+-----+-----+
Note how Sn is weirdly packed inside Dn, and Dn weirdly packed inside Qn, likely for historical reasons.
And you can’t access the higher bytes at D16 or greater with Sn.
23.6.1.3. ARM VCVT instruction
Example: userland/arch/arm/vcvt.S
Convert between integers and floating point.
ARMv7 architecture reference manual on rounding:
The floating-point to fixed-point operation uses the Round towards Zero rounding mode. The fixed-point to floating-point operation uses the Round to Nearest rounding mode.
Notice how the opcode takes two types.
E.g., in our 32-bit float to 32-bit unsigned example we use:
vld1.32.f32
23.6.1.3.1. ARM VCVTR instruction
Example: userland/arch/arm/vcvtr.S
Like ARM VCVT instruction, but the rounding mode is selected by the FPSCR.RMode field.
Selecting rounding mode explicitly per instruction was apparently not possible in ARMv7, but was made possible in AArch32 e.g. with ARMv8 AArch32 VCVTA instruction.
Rounding mode selection is exposed in the ANSI C standard through fesetround.
TODO: is the initial rounding mode specified by the ELF standard? Could not find a reference.
23.6.1.3.2. ARMv8 AArch32 VCVTA instruction
Example: userland/arch/arm/vcvt.S
Added in ARMv8 AArch32 only, not present in ARMv7.
In ARMv7, to use a non-round-to-zero rounding mode, you had to set the rounding mode with FPSCR and use the R version of the instruction e.g. ARM VCVTR instruction.
Now in AArch32 it is possible to do it explicitly per-instruction.
Also there was no ties to away mode in ARMv7. This mode does not exist in C99 either.
23.6.2. ARMv8 Advanced SIMD and floating-point support
The ARMv8 architecture reference manual specifies floating point and SIMD support in the main architecture at A1.5 "Advanced SIMD and floating-point support".
The feature is often refered to simply as "SIMD&FP" throughout the manual.
The Linux kernel shows /proc/cpuinfo compatibility as neon, which is yet another intermediate name that came up at some point, see: Section 23.6.2.2, “ARM NEON”.
Vs ARM VFP: https://stackoverflow.com/questions/4097034/arm-cortex-a8-whats-the-difference-between-vfp-and-neon
23.6.2.1. ARMv8 floating point availability
Support is semi-mandatory. ARMv8 architecture reference manual A1.5 "Advanced SIMD and floating-point support":
ARMv8 can support the following levels of support for Advanced SIMD and floating-point instructions:
Full SIMD and floating-point support without exception trapping.
Full SIMD and floating-point support with exception trapping.
No floating-point or SIMD support. This option is licensed only for implementations targeting specialized markets.
Note: All systems that support standard operating systems with rich application environments provide hardware support for Advanced SIMD and floating-point. It is a requirement of the ARM Procedure Call Standard for AArch64, see Procedure Call Standard for the ARM 64-bit Architecture.
Therefore it is in theory optional, but highly available.
This is unlike ARMv7, where floating point is completely optional through ARM VFP.
23.6.2.2. ARM NEON
Just an informal name for the "Advanced SIMD instructions"? Very confusing.
ARMv8 architecture reference manual F2.9 "Additional information about Advanced SIMD and floating-point instructions" says:
The Advanced SIMD architecture, its associated implementations, and supporting software, are commonly referred to as NEON technology.
https://developer.arm.com/technologies/neon mentions that is is present on both ARMv7 and ARMv8:
NEON technology was introduced to the Armv7-A and Armv7-R profiles. It is also now an extension to the Armv8-A and Armv8-R profiles.
23.6.3. ARMv8 AArch64 floating point registers
TODO example.
ARMv8 architecture reference manual B1.2.1 "Registers in AArch64 state" describes the registers:
32 SIMD&FP registers, V0 to V31. Each register can be accessed as:
A 128-bit register named Q0 to Q31.
A 64-bit register named D0 to D31.
A 32-bit register named S0 to S31.
A 16-bit register named H0 to H31.
An 8-bit register named B0 to B31.
Notice how Sn is very different between v7 and v8! In v7 it goes across Dn, and in v8 inside each Dn.
23.6.3.1. ARMv8 aarch64 add vector instruction
Good first instruction to learn SIMD: SIMD assembly.
23.6.3.2. ARMv8 aarch64 FADD instruction
23.6.3.2.1. ARM FADD vs VADD
It is very confusing, but FADDS and FADDD in Aarch32 are pre-UAL for vadd.f32 and vadd.f64 which we use in this tutorial, see: Section 23.6.1.2, “ARM VADD instruction”
The same goes for most ARMv7 mnemonics: f* is old, and v* is the newer better syntax.
But then, in ARMv8, they decided to use ARMv8 aarch64 FADD instruction as the main floating point add name, and get rid of VADD!
Also keep in mind that fused multiply add is FMADD.
Examples at: Section 21.3, “SIMD assembly”
23.6.3.3. ARMv8 aarch64 ld2 instruction
Example: userland/arch/aarch64/ld2.S
We can load multiple vectors interleaved from memory in one single instruction!
This is why the ldN instructions take an argument list denoted by {} for the registers, much like armv7 ARM LDMIA instruction.
There are analogous LD3 and LD4 instruction.
23.6.4. ARM SIMD bibliography
-
GNU GAS tests under
gas/testsuite/gas/aarch64 -
https://stackoverflow.com/questions/2851421/is-there-a-good-reference-for-arm-neon-intrinsics
-
assembly optimized libraries:
23.6.5. ARM SVE
Example: userland/arch/aarch64/sve.S
Scalable Vector Extension.
aarch64 only, newer than ARM NEON.
It is called Scalable because it does not specify the vector width! Therefore we don’t have to worry about new vector width instructions every few years! Hurray!
The instructions then allow implicitly tracking the loop index without knowing the actual vector length.
Added to QEMU use mode in 3.0.0.
TODO announcement date. Possibly 2017: https://alastairreid.github.io/papers/sve-ieee-micro-2017.pdf There is also a 2016 mention: https://community.arm.com/tools/hpc/b/hpc/posts/technology-update-the-scalable-vector-extension-sve-for-the-armv8-a-architecture
The Linux kernel shows /proc/cpuinfo compatibility as sve.
23.6.5.1. SVE bibliography
-
https://www.rico.cat/files/ICS18-gem5-sve-tutorial.pdf step by step of a complete code execution examples, the best initial tutorial so far
-
https://alastairreid.github.io/papers/sve-ieee-micro-2017.pdf paper with some nice few concrete examples, illustrations and rationale
-
https://static.docs.arm.com/dui0965/c/DUI0965C_scalable_vector_extension_guide.pdf
-
https://developer.arm.com/products/software-development-tools/hpc/documentation/writing-inline-sve-assembly quick inlining guide
23.6.5.1.1. SVE spec
ARMv8 architecture reference manual A1.7 "ARMv8 architecture extensions" says:
SVE is an optional extension to ARMv8.2. That is, SVE requires the implementation of ARMv8.2.
A1.7.8 "The Scalable Vector Extension (SVE)": then says that only changes to the existing registers are described in that manual, and that you should look instead at the "ARM Architecture Reference Manual Supplement, The Scalable Vector Extension (SVE), for ARMv8-A."
We then download the zip from: https://developer.arm.com/docs/ddi0584/latest/arm-architecture-reference-manual-supplement-the-scalable-vector-extension-sve-for-armv8-a and it contains the PDF: DDI0584A_d_SVE_supp_armv8A.pdf which we use here.
That document then describes the SVE instructions and registers.
23.7. ARMv8 architecture extensions
23.7.1. ARMv8.1 architecture extension
ARMv8 architecture reference manual db A1.7.3 "The ARMv8.1 architecture extension"
23.7.1.1. ARM Large System Extensions (LSE)
ARMv8 architecture reference manual db "ARMv8.1-LSE, ARMv8.1 Large System Extensions"
-
LDADD: userland/cpp/atomic.cpp
Bibliography:
23.8. ARM assembly bibliography
23.8.1. ARM non-official bibliography
Good getting started tutorials:
23.8.2. ARM official bibliography
The official manuals were stored in http://infocenter.arm.com but as of 2017 they started to slowly move to https://developer.arm.com.
Each revision of a document has a "ARM DDI" unique document identifier.
The "ARM Architecture Reference Manuals" are the official canonical ISA documentation document. In this repository, we always reference the following revisions:
Bibliography: https://www.quora.com/Where-can-I-find-the-official-documentation-of-ARM-instruction-set-architectures-ISAs
23.8.2.1. ARMv7 architecture reference manual
The official comprehensive ARMv7 reference.
We use by default: DDI 0406C.d: https://static.docs.arm.com/ddi0406/cd/DDI0406C_d_armv7ar_arm.pdf
23.8.2.2. ARMv8 architecture reference manual
Latest version: https://developer.arm.com/docs/ddi0487/latest/arm-architecture-reference-manual-armv8-for-armv8-a-architecture-profile
Versions are determined by two letteres in lexicographical order, e.g.:
-
a
-
af
-
aj
-
aj
-
b
-
ba
-
bb
-
ca
The link: https://static.docs.arm.com/ddi0487/ca/DDI0487C_a_armv8_arm.pdf is the ca version for example.
The official comprehensive ARMv8 reference.
ISA quick references can be found in some places:
23.8.2.4. Programmer’s Guide for ARMv8-A
A more terse human readable introduction to the ARM architecture than the reference manuals.
Does not have as many assembly code examples as you’d hope however…
Latest version at: https://developer.arm.com/docs/den0024/latest/preface
23.8.2.5. Arm A64 Instruction Set Architecture: Future Architecture Technologies in the A architecture profile Documentation
This page contains the documentation of architecture features that were publicly announced but haven’t been merged into the main spec yet.
23.8.2.6. ARM processor documentation
ARM also releases documentation specific to each given processor.
This adds extra details to the more portable ARMv8 architecture reference manual ISA documentation.
24. ELF
This is the main format for executables, object files (.o) and shared libraries (.so) in Linux.
An introduction to the format can be found at: https://cirosantilli.com/elf-hello-world
25. IEEE 754
26. Baremetal
Getting started at: Section 1.7, “Baremetal setup”
26.1. Baremetal GDB step debug
GDB step debug works on baremetal exactly as it does on the Linux kernel, which is described at: Section 2, “GDB step debug”.
Except that is is even cooler here since we can easily control and understand every single instruction that is being run!
For example, on the first shell:
./run --arch arm --baremetal userland/c/hello.c --gdb-wait
then on the second shell:
./run-gdb --arch arm --baremetal userland/c/hello.c -- main
Or if you are a tmux pro, do everything in one go with:
./run --arch arm --baremetal userland/c/hello.c --gdb
Alternatively, to start from the very first executed instruction of our tiny Baremetal bootloaders:
./run \ --arch arm \ --baremetal userland/c/hello.c \ --gdb-wait \ --tmux-args=--no-continue \ ;
Now you can just stepi to when jumping into main to go to the C code in userland/c/hello.c.
This is specially interesting for the executables that don’t use the bootloader from under baremetal/arch/<arch>/no_bootloader/*.S, e.g.:
./run \ --arch arm \ --baremetal baremetal/arch/arm/no_bootloader/semihost_exit.S \ --gdb-wait \ --tmux-args=--no-continue \ ;
The cool thing about those examples is that you start at the very first instruction of your program, which gives more control.
26.2. Baremetal bootloaders
As can be seen from Baremetal GDB step debug, all examples under baremetal/, with the exception of baremetal/arch/<arch>/no_bootloader, start from our tiny bootloaders:
Out simplistic bootloaders basically setup up just enough system state to allow calling:
-
C functions such as
exitfrom the assembly examples -
the
mainof C examples itself
The most important things that we setup in the bootloaders are:
-
the stack pointer
-
TODO: we don’t do this currently but maybe we should setup BSS
The C functions that become available as a result are:
-
Newlib functions implemented at baremetal/lib/syscalls.c
-
lkmc_non-Newlib functions implemented at lkmc.c
It is not possible to call those C functions from the examples that don’t use a bootloader.
For this reason, we tend to create examples with bootloaders, as it is easier to write them portably.
26.3. Semihosting
Semihosting is a publicly documented interface specified by ARM Holdings that allows us to do some magic operations very useful in development.
Semihosting is implemented both on some real devices and on simulators such as QEMU and gem5 semihosting.
It is documented at: https://developer.arm.com/docs/100863/latest/introduction
For example, the following code makes QEMU exit:
./run --arch arm --baremetal baremetal/arch/arm/semihost_exit.S
That program program contains the code:
mov r0, #0x18 ldr r1, =#0x20026 svc 0x00123456
and we can see from the docs that 0x18 stands for the SYS_EXIT command.
This is also how we implement the exit(0) system call in C for QEMU, which is used for example at userland/c/exit0.c through the Newlib via the _exit function at baremetal/lib/syscalls.c.
Other magic operations we can do with semihosting besides exiting the on the host include:
-
read and write to host stdin and stdout
-
read and write to host files
Alternatives exist for some semihosting operations, e.g.:
The big advantage of semihosting is that it is standardized across all ARM boards, and therefore allows you to make a single image that does those magic operations instead of having to compile multiple images with different magic addresses.
The downside of semihosting is that it is ARM specific. TODO is it an open standard that other vendors can implement?
In QEMU, we enable semihosting with:
-semihosting
Newlib 9c84bfd47922aad4881f80243320422b621c95dc already has a semi-hosting implementation at:
newlib/libc/sys/arm/syscalls.c
TODO: how to use it? Possible through crosstool-NG? In the worst case we could just copy it.
Bibliography:
26.3.1. gem5 semihosting
For gem5, you need:
patch -d "$(./getvar gem5_source_dir)" -p 1 < patches/manual/gem5-semihost.patch
26.4. gem5 baremetal carriage return
TODO: our example is printing newlines without automatic carriage return \r as in:
enter a character
got: a
We use m5term by default, and if we try telnet instead:
telnet localhost 3456
it does add the carriage returns automatically.
26.5. Baremetal host packaged toolchain
For arm, some baremetal examples compile fine with:
sudo apt-get install gcc-arm-none-eabi qemu-system-arm ./build-baremetal --arch arm --gcc-which host-baremetal ./run --arch arm --baremetal userland/c/hello.c --qemu-which host
However, there are as usual limitations to using prebuilts:
-
certain examples fail to build with the Ubuntu packaged toolchain. E.g.: userland/c/exit0.c fails with:
/usr/lib/gcc/arm-none-eabi/6.3.1/../../../arm-none-eabi/lib/libg.a(lib_a-fini.o): In function `__libc_fini_array': /build/newlib-8gJlYR/newlib-2.4.0.20160527/build/arm-none-eabi/newlib/libc/misc/../../../../../newlib/libc/misc/fini.c:33: undefined reference to `_fini' collect2: error: ld returned 1 exit status
with the prebuilt toolchain, and I’m lazy to debug.
-
there seems to to be no analogous
aarch64Ubuntu package togcc-arm-none-eabi: https://askubuntu.com/questions/1049249/is-there-a-package-with-the-aarch64-version-of-gcc-arm-none-eabi-for-bare-metal
26.6. Baremetal C++
TODO not working as of 8825222579767f2ee7e46ffd8204b9e509440759 + 1. Not yet properly researched / reported upstream yet.
Should not be hard in theory since libstdc++ is just part of GCC, as shown at: https://stackoverflow.com/questions/21872229/how-to-edit-and-re-build-the-gcc-libstdc-c-standard-library-source/51946224#51946224
To test it out, I first hack common.py to enable C++:
consts['baremetal_build_in_exts'] = consts['build_in_exts']
and then I hack userland/arch/aarch64/inline_asm/multiline.cpp to consist only of an empty main:
int main() {}
then for example:
./build-baremetal --arch aarch64 ./run --arch aarch64 --baremetal userland/arch/aarch64/inline_asm/multiline.cpp
fails with:
rom: requested regions overlap (rom dtb. free=0x00000000000000a0, addr=0x0000000000000000) qemu-system-aarch64: rom check and register reset failed
and the gem5 build fails completely:
./build-baremetal --arch aarch64 --emulator gem5 userland/arch/aarch64/inline_asm/multiline.cpp
fails with:
/tmp/ccFd2YIB.o:(.eh_frame+0x1c): relocation truncated to fit: R_AARCH64_PREL32 against `.text' collect2: error: ld returned 1 exit status
26.7. GDB builtin CPU simulator
It is incredible, but GDB also has a CPU simulator inside of it as documented at: https://sourceware.org/gdb/onlinedocs/gdb/Target-Commands.html
TODO: any advantage over QEMU? I doubt it, mostly using it as as toy for now:
Without running ./run, do directly:
./run-gdb --arch arm --baremetal userland/c/hello.c --sim
Then inside GDB:
load starti
and now you can debug normally.
Enabled with the crosstool-NG configuration:
CT_GDB_CROSS_SIM=y
which by grepping crosstool-NG we can see does on GDB:
./configure --enable-sim
Those are not set by default on gdb-multiarch in Ubuntu 16.04.
Bibliography:
26.7.1. GDB builtin CPU simulator userland
Since I had this compiled, I also decided to try it out on userland.
I was also able to run a freestanding Linux userland example on it: https://github.com/cirosantilli/arm-assembly-cheat/blob/cd232dcaf32c0ba6399b407e0b143d19b6ec15f4/v7/linux/hello.S
It just ignores the ARM SVC instruction however, and does not forward syscalls to the host like QEMU does.
Then I tried a glibc example: https://github.com/cirosantilli/arm-assembly-cheat/blob/cd232dcaf32c0ba6399b407e0b143d19b6ec15f4/v7/mov.S
First it wouldn’t break, so I added -static to the Makefile, and then it started failing with:
Unhandled v6 thumb insn
Doing:
help architecture
shows ARM version up to armv6, so maybe armv6 is not implemented?
26.8. ARM baremetal
In this section we will focus on learning ARM architecture concepts that can only learnt on baremetal setups.
Userland information can be found at: https://github.com/cirosantilli/arm-assembly-cheat
26.8.1. ARM exception levels
ARM exception levels are analogous to x86 rings.
The current EL can be determined by reading from certain registers, which we do with bit disassembly at:
./run --arch arm --baremetal userland/arch/arm/dump_regs.c ./run --arch aarch64 --baremetal baremetal/arch/aarch64/dump_regs.c
The relevant bits are:
-
arm:
CPSR.M -
aarch64:
CurrentEl.EL. This register is not accessible from EL0 for some weird reason however.
Sources:
The instructions that find the ARM EL are explained at: https://stackoverflow.com/questions/31787617/what-is-the-current-execution-mode-exception-level-etc
The lower ELs are not mandated by the architecture, and can be controlled through command line options in QEMU and gem5.
In QEMU, you can configure the lowest EL as explained at https://stackoverflow.com/questions/42824706/qemu-system-aarch64-entering-el1-when-emulating-a53-power-up
./run --arch arm --baremetal userland/arch/arm/dump_regs.c | grep CPSR.M ./run --arch arm --baremetal userland/arch/arm/dump_regs.c -- -machine virtualization=on | grep CPSR.M ./run --arch arm --baremetal userland/arch/arm/dump_regs.c -- -machine secure=on | grep CPSR.M ./run --arch aarch64 --baremetal baremetal/arch/aarch64/dump_regs.c | grep CurrentEL.EL ./run --arch aarch64 --baremetal baremetal/arch/aarch64/dump_regs.c -- -machine virtualization=on | grep CurrentEL.EL ./run --arch aarch64 --baremetal baremetal/arch/aarch64/dump_regs.c -- -machine secure=on | grep CurrentEL.EL
outputs respectively:
CPSR.M 0x3 CPSR.M 0x3 CPSR.M 0x3 CurrentEL.EL 0x1 CurrentEL.EL 0x2 CurrentEL.EL 0x3
TODO: why is arm CPSR.M stuck at 0x3 which equals Supervisor mode?
In gem5, you can configure the lowest EL with:
./run --arch arm --baremetal userland/arch/arm/dump_regs.c --emulator gem5 grep CPSR.M "$(./getvar --arch arm --emulator gem5 gem5_guest_terminal_file)" ./run --arch arm --baremetal userland/arch/arm/dump_regs.c --emulator gem5 -- --param 'system.have_virtualization = True' grep CPSR.M "$(./getvar --arch arm --emulator gem5 gem5_guest_terminal_file)" ./run --arch arm --baremetal userland/arch/arm/dump_regs.c --emulator gem5 -- --param 'system.have_security = True' grep CPSR.M "$(./getvar --arch arm --emulator gem5 gem5_guest_terminal_file)" ./run --arch aarch64 --baremetal baremetal/arch/aarch64/dump_regs.c --emulator gem5 grep CurrentEL.EL "$(./getvar --arch aarch64 --emulator gem5 gem5_guest_terminal_file)" ./run --arch aarch64 --baremetal baremetal/arch/aarch64/dump_regs.c --emulator gem5 -- --param 'system.have_virtualization = True' grep CurrentEL.EL "$(./getvar --arch aarch64 --emulator gem5 gem5_guest_terminal_file)" ./run --arch aarch64 --baremetal baremetal/arch/aarch64/dump_regs.c --emulator gem5 -- --param 'system.have_security = True' grep CurrentEL.EL "$(./getvar --arch aarch64 --emulator gem5 gem5_guest_terminal_file)"
output:
CPSR.M 0x3 CPSR.M 0xA CPSR.M 0x3 CurrentEL.EL 0x1 CurrentEL.EL 0x2 CurrentEL.EL 0x3
TODO: the call:
./run --arch arm --baremetal userland/arch/arm/dump_regs.c --emulator gem5 -- --param 'system.have_virtualization = True'
started failing with an exception since https://github.com/cirosantilli/linux-kernel-module-cheat/commit/add6eedb76636b8f443b815c6b2dd160afdb7ff4 at the instruction:
vmsr fpexc, r0
in baremetal/lib/arm.S. That patch however enables SIMD in baremetal, which I feel is more important.
According to ARMv7 architecture reference manual, access to that register is controlled by other registers NSACR.{CP11, CP10} and HCPTR so those must be turned off, but I’m lazy to investigate now, even just trying to dump those registers in userland/arch/arm/dump_regs.c also leads to exceptions…
26.8.2. ARM SVC instruction
This is the most basic example of exception handling we have.
We a handler for SVC, do an SVC, and observe that the handler got called and returned from C and assembly:
./run --arch aarch64 --baremetal baremetal/arch/aarch64/svc.c ./run --arch aarch64 --baremetal baremetal/arch/aarch64/svc_asm.S
Sources:
Sample output for the C one:
DAIF 0x3C0 SPSEL 0x1 VBAR_EL1 0x40000800 after_svc 0x4000209c lkmc_vector_trap_handler exc_type 0x11 exc_type is LKMC_VECTOR_SYNC_SPX ESR 0x5600ABCD ESR.EC 0x15 ESR.EC.ISS.imm16 0xABCD SP 0x4200C510 ELR 0x4000209C SPSR 0x600003C5 x0 0x0 x1 0x1 x2 0x15 x3 0x15 x4 0x4000A178 x5 0xFFFFFFF6 x6 0x4200C390 x7 0x78 x8 0x1 x9 0x14 x10 0x0 x11 0x0 x12 0x0 x13 0x0 x14 0x0 x15 0x0 x16 0x0 x17 0x0 x18 0x0 x19 0x0 x20 0x0 x21 0x0 x22 0x0 x23 0x0 x24 0x0 x25 0x0 x26 0x0 x27 0x0 x28 0x0 x29 0x4200C510 x30 0x40002064
The C code does an:
svc 0xABCD
and the value 0xABCD appears at the bottom of ARM ESR register:
ESR 0x5600ABCD ESR.EC 0x15 ESR.EC.ISS.imm16 0xABCD
The other important register is the ARM ELR register, which contains the return address after the exception.
From the output, we can see that it matches the value as obtained by taking the address of a label placed just after the SVC:
after_svc 0x4000209c ELR 0x4000209C
Both QEMU and gem5 are able to trace interrupts in addition to instructions, and it is instructive to enable both and have a look at the traces.
With QEMU -d tracing:
./run \ --arch aarch64 \ --baremetal baremetal/arch/aarch64/svc_asm.S -- -d in_asm,int \ ;
the output contains:
---------------- IN: 0x40002060: d4000001 svc #0 Taking exception 2 [SVC] ...from EL1 to EL1 ...with ESR 0x15/0x56000000 ...with ELR 0x40002064 ...to EL1 PC 0x40000a00 PSTATE 0x3c5 ---------------- IN: 0x40000a00: 14000225 b #0x40001294
And with gem5 tracing:
./run \ --arch aarch64 \ --baremetal baremetal/arch/aarch64/svc_asm.S \ --trace ExecAll,Faults \ --trace-stdout \ ;
the output contains:
4000: system.cpu A0 T0 : @main+8 : svc #0x0 : IntAlu : flags=(IsSerializeAfter|IsNonSpeculative|IsSyscall) 4000: Supervisor Call: Invoking Fault (AArch64 target EL):Supervisor Call cpsr:0x3c5 PC:0x80000808 elr:0x8000080c newVec: 0x80001200 4500: system.cpu A0 T0 : @vector_table+512 : b <_curr_el_spx_sync> : IntAlu : flags=(IsControl|IsDirectControl|IsUncondControl)
So we see in both cases that the SVC is done, then an exception happens, and then we just continue running from the exception handler address.
The vector table format is described on ARMv8 architecture reference manual Table D1-7 "Vector offsets from vector table base address".
A good representation of the format of the vector table can also be found at Programmer’s Guide for ARMv8-A Table 10-2 "Vector table offsets from vector table base address".
The first part of the table contains: Table 6, “Summary of ARMv8 vector handlers”.
| Address | Exception type | Description |
|---|---|---|
VBAR_ELn + 0x000 |
Synchronous |
Current EL with SP0 |
VBAR_ELn + 0x080 |
IRQ/vIRQ + 0x100 |
Current EL with SP0 |
VBAR_ELn + 0x100 |
FIQ/vFIQ |
Current EL with SP0 |
VBAR_ELn + 0x180 |
SError/vSError |
Current EL with SP0 |
and the following other parts are analogous, but referring to SPx and lower ELs.
We are going to do everything in EL1 for now.
On the terminal output, we observe the initial values of:
-
DAIF: 0x3c0, i.e. 4 bits (6 to 9) set to 1, which means that exceptions are masked for each exception type: Synchronous, System error, IRQ and FIQ.
This reset value is defined by ARMv8 architecture reference manual C5.2.2 "DAIF, Interrupt Mask Bits".
-
SPSel: 0x1, which means: use SPx instead of SP0.
This reset value is defined by ARMv8 architecture reference manual C5.2.16 "SPSel, Stack Pointer Select".
-
VBAR_EL1: 0x0 holds the base address of the vector table
This reset value is defined UNKNOWN by ARMv8 architecture reference manual D10.2.116 "VBAR_EL1, Vector Base Address Register (EL1)", so we must set it to something ourselves to have greater portability.
Bibliography:
-
https://github.com/torvalds/linux/blob/v4.20/arch/arm64/kernel/entry.S#L430 this is where the kernel defines the vector table
-
https://github.com/dwelch67/qemu_arm_samples/tree/07162ba087111e0df3f44fd857d1b4e82458a56d/swi01
-
https://stackoverflow.com/questions/24162109/arm-assembly-code-and-svc-numbering/57064062#57064062
-
https://stackoverflow.com/questions/44991264/armv8-exception-vectors-and-handling
26.8.2.1. ARM ESR register
Exception Syndrome Register.
See example at: Section 26.8.2, “ARM SVC instruction”
Documentation: ARMv8 architecture reference manual db D12.2.36 "ESR_EL1, Exception Syndrome Register (EL1)".
26.8.2.2. ARM ELR register
Exception Link Register.
See the example at: Section 26.8.2, “ARM SVC instruction”
26.8.3. ARM multicore
./run --arch aarch64 --baremetal baremetal/arch/aarch64/multicore.S --cpus 2 ./run --arch aarch64 --baremetal baremetal/arch/aarch64/multicore.S --cpus 2 --emulator gem5 ./run --arch arm --baremetal baremetal/arch/aarch64/multicore.S --cpus 2 ./run --arch arm --baremetal baremetal/arch/aarch64/multicore.S --cpus 2 --emulator gem5
Sources:
CPU 0 of this program enters a spinlock loop: it repeatedly checks if a given memory address is 1.
So, we need CPU 1 to come to the rescue and set that memory address to 1, otherwise CPU 0 will be stuck there forever!
Don’t believe me? Then try:
./run --arch aarch64 --baremetal baremetal/arch/aarch64/multicore.S --cpus 1
and watch it hang forever.
Note that if you try the same thing on gem5:
./run --arch aarch64 --baremetal baremetal/arch/aarch64/multicore.S --cpus 1 --emulator gem5
then the gem5 actually exits, but with a different message:
Exiting @ tick 18446744073709551615 because simulate() limit reached
as opposed to the expected:
Exiting @ tick 36500 because m5_exit instruction encountered
since gem5 is able to detect when nothing will ever happen, and exits.
When GDB step debugging, switch between cores with the usual thread commands, see also: Section 2.9, “GDB step debug multicore userland”.
Bibliography: https://stackoverflow.com/questions/980999/what-does-multicore-assembly-language-look-like/33651438#33651438
26.8.3.1. ARM WFE and SEV instructions
The WFE and SEV instructions are just hints: a compliant implementation can treat them as NOPs.
However, likely no implementation likely does (TODO confirm), since:
-
WFE puts the core in a low power mode
-
SEV wakes up cores from a low power mode
and power consumption is key in ARM applications.
In QEMU 3.0.0, SEV is a NOPs, and WFE might be, but I’m not sure, see: https://github.com/qemu/qemu/blob/v3.0.0/target/arm/translate-a64.c#L1423
case 2: /* WFE */
if (!(tb_cflags(s->base.tb) & CF_PARALLEL)) {
s->base.is_jmp = DISAS_WFE;
}
return;
case 4: /* SEV */
case 5: /* SEVL */
/* we treat all as NOP at least for now */
return;
TODO: what does the WFE code do? How can it not be a NOP if SEV is a NOP? https://github.com/qemu/qemu/blob/v3.0.0/target/arm/translate.c#L4609 might explain why, but it is Chinese to me (I only understand 30% ;-)):
* For WFI we will halt the vCPU until an IRQ. For WFE and YIELD we * only call the helper when running single threaded TCG code to ensure * the next round-robin scheduled vCPU gets a crack. In MTTCG mode we * just skip this instruction. Currently the SEV/SEVL instructions * which are *one* of many ways to wake the CPU from WFE are not * implemented so we can't sleep like WFI does. */
For gem5 however, if we comment out the SVE instruction, then it actually exits with simulate() limit reached, so the CPU truly never wakes up, which is a more realistic behaviour.
The following Raspberry Pi bibliography helped us get this sample up and running:
26.8.3.2. ARM PSCI
In QEMU, CPU 1 starts in a halted state. This can be observed from GDB, where:
info threads
shows something like:
* 1 Thread 1 (CPU#0 [running]) lkmc_start 2 Thread 2 (CPU#1 [halted ]) lkmc_start
To wake up CPU 1 on QEMU, we must use the Power State Coordination Interface (PSCI) which is documented at: https://developer.arm.com/docs/den0022/latest/arm-power-state-coordination-interface-platform-design-document.
This interface uses HVC calls, and the calling convention is documented at "SMC CALLING CONVENTION" https://developer.arm.com/docs/den0028/latest.
If we boot the Linux kernel on QEMU and dump the auto-generated device tree, we observe that it contains the address of the PSCI CPU_ON call:
psci {
method = "hvc";
compatible = "arm,psci-0.2", "arm,psci";
cpu_on = <0xc4000003>;
migrate = <0xc4000005>;
cpu_suspend = <0xc4000001>;
cpu_off = <0x84000002>;
};
The Linux kernel wakes up the secondary cores in this exact same way at: https://github.com/torvalds/linux/blob/v4.19/drivers/firmware/psci.c#L122 We first actually got it working here by grepping the kernel and step debugging that call :-)
In gem5, CPU 1 starts woken up from the start, so PSCI is not needed. TODO gem5 actually blows up if we try to do the HVC call, understand why.
26.8.3.3. ARM DMB instruction
TODO: create and study a minimal examples in gem5 where the DMB instruction leads to less cycles: https://stackoverflow.com/questions/15491751/real-life-use-cases-of-barriers-dsb-dmb-isb-in-arm
26.8.4. ARM timer
TODO get working. Attempt at: baremetal/arch/aarch64/timer.c
The timer is documented at: ARMv8 architecture reference manual db Chapter D10 "The Generic Timer in AArch64 state"
The key registers to keep in mind are:
-
CNTVCT_EL0: "Counter-timer Virtual Count register". The increasing current counter value. -
CNTFRQ_EL0: "Counter-timer Frequency register". "Indicates the system counter clock frequency, in Hz." -
CNTV_CTL_EL0: "Counter-timer Virtual Timer Control register" -
CNTV_CVAL_EL0: "Counter-timer Virtual Timer CompareValue register". The interrupt happens whenCNTVCT_EL0reaches the value in this register.
Bibliography:
26.8.5. ARM paging
TODO create a minimal working aarch64 example analogous to the x86 one at: https://github.com/cirosantilli/x86-bare-metal-examples/blob/6dc9a73830fc05358d8d66128f740ef9906f7677/paging.S
A general introduction to paging with x86 examples can be found at: https://cirosantilli.com/x86-paging.
ARM paging is documented at ARMv8 architecture reference manual db Chapter D5 and is mostly called VMSAv8 in the ARMv8 manual (Virtual Memory System Architecture).
Paging is enabled by the SCTLR_EL1.M bit.
The base table address is selected by the register documented at ARMv8 architecture reference manual db D12.2.111 "TTBR0_EL1, Translation Table Base Register 0 (EL1)".
There is also a TTBR1_EL1 register, which is for the second translation stage to speed up virtualization: https://en.wikipedia.org/wiki/Second_Level_Address_Translation and will not be used in this section.
The translation types are described at: ARMv8 architecture reference manual db D5.2.4 "Memory translation granule size".
From this we can see that the translation scheme uses up to 4 levels (0 to 3) and has possible granule sizes 4KiB, 16KiB and 64KiB.
Page table formats are described at ARMv8 architecture reference manual db D5.3.1 "VMSAv8-64 translation table level 0, level 1, and level 2 descriptor formats".
26.8.6. ARM baremetal bibliography
First, also consider the userland bibliography: Section 23.8, “ARM assembly bibliography”.
The most useful ARM baremetal example sets we’ve seen so far are:
-
https://github.com/dwelch67/raspberrypi real hardware
-
https://github.com/dwelch67/qemu_arm_samples QEMU
-m vexpress -
https://github.com/bztsrc/raspi3-tutorial real hardware + QEMU
-m raspi -
https://github.com/LdB-ECM/Raspberry-Pi real hardware
26.8.6.1. NienfengYao/armv8-bare-metal
The only QEMU -m virt aarch64 example set that I can find on the web. Awesome.
A large part of the code is taken from the awesome educational OS under 2-clause BSD as can be seen from file headers: https://github.com/takeharukato/sample-tsk-sw/tree/ce7973aa5d46c9eedb58309de43df3b09d4f8d8d/hal/aarch64 but Nienfeng largely minimized it.
I needed the following minor patches: https://github.com/NienfengYao/armv8-bare-metal/pull/1
Handles an SVC and setups and handles the timer about once per second.
The source claims GICv3, however if I try to add -machine gic_version=3 on their command line with our QEMU v4.0.0, then it blows up at:
static void init_gicc(void)
{
uint32_t pending_irq;
/* Disable CPU interface */
*REG_GIC_GICC_CTLR = GICC_CTLR_DISABLE;
which tries to write to 0x8010000 according to GDB.
Without -machine, QEMU’s DTB clearly states GICv2, so I’m starting to wonder if Nienfeng just made a mistake there? The QEMU GICv3 dtb contains:
reg = <0x0 0x8000000 0x0 0x10000 0x0 0x80a0000 0x0 0xf60000>;
and the GICv2 one:
reg = <0x0 0x8000000 0x0 0x10000 0x0 0x8010000 0x0 0x10000>;
which further confirms that the exception is correct: v2 has a register range at 0x8010000 while in v3 it moved to 0x80a0000 and 0x8010000 is empty.
The original source does not mention GICv3 anywhere, only pl390, which is a specific GIC model that predates the GICv2 spec I believe.
TODO if I hack #define GIC_GICC_BASE (GIC_BASE + 0xa0000), then it goes a bit further, but the next loop never ends.
26.8.6.2. tukl-msd/gem5.bare-metal
Reiterated at: https://stackoverflow.com/questions/43682311/uart-communication-in-gem5-with-arm-bare-metal
Basic gem5 aarch64 baremetal setup that just works. Does serial IO and timer through GICv2. Usage:
# Build gem5. git clone https://gem5.googlesource.com/public/gem5 cd gem5 git checkout 60600f09c25255b3c8f72da7fb49100e2682093a scons --ignore-style -j`nproc` build/ARM/gem5.opt cd .. # Build example. sudo apt-get install gcc-arm-none-eabi git clone https://github.com/tukl-msd/gem5.bare-metal cd gem5.bare-metal git checkout 6ad1069d4299b775b5491e9252739166bfac9bfe cd Simple make CROSS_COMPILE_DIR=/usr/bin # Run example. ../../gem5/default/build/ARM/gem5.opt' \ ../../gem5/configs/example/fs.py' \ --bare-metal \ --disk-image="$(pwd)/../common/fake.iso" \ --kernel="$(pwd)/main.elf" \ --machine-type=RealView_PBX \ --mem-size=256MB \ ;
26.9. How we got some baremetal stuff to work
It is nice when thing just work.
But you can also learn a thing or two from how I actually made them work in the first place.
26.9.1. Find the UART address
Enter the QEMU console:
Ctrl-X C
Then do:
info mtree
And look for pl011:
0000000009000000-0000000009000fff (prio 0, i/o): pl011
On gem5, it is easy to find it on the source. We are using the machine RealView_PBX, and a quick grep leads us to: https://github.com/gem5/gem5/blob/a27ce59a39ec8fa20a3c4e9fa53e9b3db1199e91/src/dev/arm/RealView.py#L615
class RealViewPBX(RealView):
uart = Pl011(pio_addr=0x10009000, int_num=44)
26.9.2. aarch64 baremetal NEON setup
Inside baremetal/lib/aarch64.S there is a chunk of code that enables floating point operations:
mov x1, 0x3 << 20 msr cpacr_el1, x1 isb
cpacr_el1 is documented at ARMv8 architecture reference manual D10.2.29 "CPACR_EL1, Architectural Feature Access Control Register".
Here we touch the FPEN bits to 3, which enable floating point operations:
11 This control does not cause any instructions to be trapped.
Without that, the printf:
printf("got: %c\n", c);
compiled to a:
str q0, [sp, #80]
which uses NEON registers, and goes into an exception loop.
It was a bit confusing because there was a previous printf:
printf("enter a character\n");
which did not blow up because GCC compiles it into puts directly since it has no arguments, and that does not generate NEON instructions.
The last instructions ran was found with:
while(1) stepi end
or by hacking the QEMU CLI to contain:
-D log.log -d in_asm
I could not find any previous NEON instruction executed so this led me to suspect that some NEON initialization was required:
-
http://infocenter.arm.com/help/topic/com.arm.doc.dai0527a/DAI0527A_baremetal_boot_code_for_ARMv8_A_processors.pdf "Bare-metal Boot Code for ARMv8-A Processors"
-
https://community.arm.com/processors/f/discussions/5409/how-to-enable-neon-in-cortex-a8
-
https://stackoverflow.com/questions/19231197/enable-neon-on-arm-cortex-a-series
We then tried to copy the code from the "Bare-metal Boot Code for ARMv8-A Processors" document:
// Disable trapping of accessing in EL3 and EL2. MSR CPTR_EL3, XZR MSR CPTR_EL3, XZR // Disable access trapping in EL1 and EL0. MOV X1, #(0x3 << 20) // FPEN disables trapping to EL1. MSR CPACR_EL1, X1 ISB
but it entered an exception loop at MSR CPTR_EL3, XZR.
We then found out that QEMU <starts in EL1, and so we kept just the EL1 part, and it worked. Related:
26.10. Baremetal tests
Baremetal tests work exactly like User mode tests, except that you have to add the --mode baremetal option, for example:
./test-executables --mode baremetal --arch aarch64
In baremetal, we detect if tests failed by parsing logs for the Magic failure string.
See: Section 29.13, “Test this repo” for more useful testing tips.
27. Android
Remember: Android AOSP is a huge undocumented piece of bloatware. It’s integration into this repo will likely never be super good.
Verbose setup description: https://stackoverflow.com/questions/1809774/how-to-compile-the-android-aosp-kernel-and-test-it-with-the-android-emulator/48310014#48310014
Download, build and run with the prebuilt AOSP QEMU emulator and the AOSP kernel:
./build-android \ --android-base-dir /path/to/your/hd \ --android-version 8.1.0_r60 \ download \ build \ ; ./run-android \ --android-base-dir /path/to/your/hd \ --android-version 8.1.0_r60 \ ;
Sources:
TODO how to hack the AOSP kernel, userland and emulator?
Other archs work as well as usual with --arch parameter. However, running in non-x86 is very slow due to the lack of KVM.
Tested on: 8.1.0_r60.
27.1. Android image structure
The messy AOSP generates a ton of images instead of just one.
When the emulator launches, we can see them through QEMU -drive arguments:
emulator: argv[21] = "-initrd" emulator: argv[22] = "/data/aosp/8.1.0_r60/out/target/product/generic_x86_64/ramdisk.img" emulator: argv[23] = "-drive" emulator: argv[24] = "if=none,index=0,id=system,file=/path/to/aosp/8.1.0_r60/out/target/product/generic_x86_64/system-qemu.img,read-only" emulator: argv[25] = "-device" emulator: argv[26] = "virtio-blk-pci,drive=system,iothread=disk-iothread,modern-pio-notify" emulator: argv[27] = "-drive" emulator: argv[28] = "if=none,index=1,id=cache,file=/path/to/aosp/8.1.0_r60/out/target/product/generic_x86_64/cache.img.qcow2,overlap-check=none,cache=unsafe,l2-cache-size=1048576" emulator: argv[29] = "-device" emulator: argv[30] = "virtio-blk-pci,drive=cache,iothread=disk-iothread,modern-pio-notify" emulator: argv[31] = "-drive" emulator: argv[32] = "if=none,index=2,id=userdata,file=/path/to/aosp/8.1.0_r60/out/target/product/generic_x86_64/userdata-qemu.img.qcow2,overlap-check=none,cache=unsafe,l2-cache-size=1048576" emulator: argv[33] = "-device" emulator: argv[34] = "virtio-blk-pci,drive=userdata,iothread=disk-iothread,modern-pio-notify" emulator: argv[35] = "-drive" emulator: argv[36] = "if=none,index=3,id=encrypt,file=/path/to/aosp/8.1.0_r60/out/target/product/generic_x86_64/encryptionkey.img.qcow2,overlap-check=none,cache=unsafe,l2-cache-size=1048576" emulator: argv[37] = "-device" emulator: argv[38] = "virtio-blk-pci,drive=encrypt,iothread=disk-iothread,modern-pio-notify" emulator: argv[39] = "-drive" emulator: argv[40] = "if=none,index=4,id=vendor,file=/path/to/aosp/8.1.0_r60/out/target/product/generic_x86_64/vendor-qemu.img,read-only" emulator: argv[41] = "-device" emulator: argv[42] = "virtio-blk-pci,drive=vendor,iothread=disk-iothread,modern-pio-notify"
The root directory is the initrd given on the QEMU CLI, which /proc/mounts reports at:
rootfs on / type rootfs (ro,seclabel,size=886392k,nr_inodes=221598)
This contains the Android init, which through .rc must be mounting mounts the drives int o the right places TODO find exact point.
The drive order is:
system cache userdata encryptionkey vendor-qemu
Then, on the terminal:
mount | grep vd
gives:
/dev/block/vda1 on /system type ext4 (ro,seclabel,relatime,data=ordered) /dev/block/vde1 on /vendor type ext4 (ro,seclabel,relatime,data=ordered) /dev/block/vdb on /cache type ext4 (rw,seclabel,nosuid,nodev,noatime,errors=panic,data=ordered)
and we see that the order of vda, vdb, etc. matches that in which -drive were given to QEMU.
Tested on: 8.1.0_r60.
27.1.1. Android images read-only
From mount, we can see that some of the mounted images are ro.
Basically, every image that was given to QEMU as qcow2 is writable, and that qcow2 is an overlay over the actual original image.
In order to make /system and /vendor writable by using qcow2 for them as well, we must use the -writable-system option:
./run-android -- -writable-system
then:
su mount -o rw,remount /system date >/system/a
Now reboot, and relaunch with -writable-system once again to pick up the modified qcow2 images:
./run-android -- -writable-system
and the newly created file is still there:
date >/system/a
/system and /vendor can be nuked quickly with:
./build-android --extra-args snod ./build-android --extra-args vnod
as mentioned at: https://stackoverflow.com/questions/29023406/how-to-just-build-android-system-image and on:
./build-android --extra-args help
Tested on: 8.1.0_r60.
27.1.2. Android /data partition
When I install an app like F-Droid, it goes under /data according to:
find / -iname '*fdroid*'
and it persists across boots.
/data is behind a RW LVM device:
/dev/block/dm-0 on /data type ext4 (rw,seclabel,nosuid,nodev,noatime,errors=panic,data=ordered)
but TODO I can’t find where it comes from since I don’t have the CLI tools mentioned at:
However, by looking at:
./run-android -- -help
we see:
-data <file> data image (default <datadir>/userdata-qemu.img
which confirms the suspicion that this data goes in userdata-qemu.img.
To reset images to their original state, just remove the qcow2 overlay and regenerate it: https://stackoverflow.com/questions/54446680/how-to-reset-the-userdata-image-when-building-android-aosp-and-running-it-on-the
Tested on: 8.1.0_r60.
27.2. Install Android apps
I don’t know how to download files from the web on Vanilla android, the default browser does not download anything, and there is no wget:
Installing with adb install does however work: https://stackoverflow.com/questions/7076240/install-an-apk-file-from-command-prompt
F-Droid installed fine like that, however it does not have permission to install apps: https://www.maketecheasier.com/install-apps-from-unknown-sources-android/
And the Settings app crashes so I can’t change it, logcat contains:
No service published for: wifip2p
which is mentioned at: https://stackoverflow.com/questions/47839955/android-8-settings-app-crashes-on-emulator-with-clean-aosp-build
We also tried to enable it from the command line with:
settings put secure install_non_market_apps 1
as mentioned at: https://android.stackexchange.com/questions/77280/allow-unknown-sources-from-terminal-without-going-to-settings-app but it didn’t work either.
No person alive seems to know how to pre-install apps on AOSP: https://stackoverflow.com/questions/6249458/pre-installing-android-application
Tested on: 8.1.0_r60.
27.3. Android init
For Linux in general, see: Section 6, “init”.
The /init executable interprets the /init.rc files, which is in a custom Android init system language: https://android.googlesource.com/platform/system/core/+/ee0e63f71d90537bb0570e77aa8a699cc222cfaf/init/README.md
The top of that file then sources other .rc files present on the root directory:
import /init.environ.rc
import /init.usb.rc
import /init.${ro.hardware}.rc
import /vendor/etc/init/hw/init.${ro.hardware}.rc
import /init.usb.configfs.rc
import /init.${ro.zygote}.rc
TODO: how is ro.hardware determined? https://stackoverflow.com/questions/20572781/android-boot-where-is-the-init-hardware-rc-read-in-init-c-where-are-servic It is a system property and can be obtained with:
getprop ro.hardware
This gives:
ranchu
which is the codename for the QEMU virtual platform we are running on: https://www.oreilly.com/library/view/android-system-programming/9781787125360/9736a97c-cd09-40c3-b14d-955717648302.xhtml
TODO: is it possible to add a custom .rc file without modifying the initrd that gets mounted on root? https://stackoverflow.com/questions/9768103/make-persistent-changes-to-init-rc
Tested on: 8.1.0_r60.
28. Benchmark this repo
TODO: didn’t fully port during refactor after 3b0a343647bed577586989fb702b760bd280844a. Reimplementing should not be hard.
In this section document how benchmark builds and runs of this repo, and how to investigate what the bottleneck is.
Ideally, we should setup an automated build server that benchmarks those things continuously for us, but our Travis attempt failed.
So currently, we are running benchmarks manually when it seems reasonable and uploading them to: https://github.com/cirosantilli/linux-kernel-module-cheat-regression
All benchmarks were run on the P51 machine, unless stated otherwise.
Run all benchmarks and upload the results:
cd .. git clone https://github.com/cirosantilli/linux-kernel-module-cheat-regression cd - ./bench-all -A
28.1. Continuous integraion
We have exploreed a few Continuous integration solutions.
We haven’t setup any of them yet.
28.1.1. Travis
We tried to automate it on Travis with .travis.yml but it hits the current 50 minute job timeout: https://travis-ci.org/cirosantilli/linux-kernel-module-cheat/builds/296454523 And I bet it would likely hit a disk maxout either way if it went on.
28.1.2. CircleCI
This setup sucessfully built gem5 on every commit: .circleci/config.yml
Enabling it is however blocked on: https://github.com/cirosantilli/linux-kernel-module-cheat/issues/79 so we disabled the builds on the web UI.
If that ever gets done, we will also need to:
-
convert this to a nightly with a workflow, to save server resources: https://circleci.com/docs/2.0/configuration-reference/#triggers
-
download the prebuilt disk images and enable caches to save the images across runs
A build took about 1 hour of a core, and the free tier allows for 1000 minutes per month: https://circleci.com/pricing/ so about 17 hours. The cheapest non-free setup seems to be 50 dollars per month gets us infinite build minutes per month and 2 containers, so we could scale things to run in under 24 hours.
There is no result reporting web UI however… but neither does GitLab CI: https://gitlab.com/gitlab-org/gitlab-ce/issues/17081
28.2. Benchmark this repo benchmarks
28.2.1. Benchmark Linux kernel boot
Run all kernel boot benchmarks for one arch:
./build-test-boot --size 3 && ./test-boot --all-archs --all-emulators --size 3 cat "$(./getvar test_boot_benchmark_file)"
Sample results at 8fb9db39316d43a6dbd571e04dd46ae73915027f:
cmd ./run --arch x86_64 --eval './linux/poweroff.out' time 8.25 exit_status 0 cmd ./run --arch x86_64 --eval './linux/poweroff.out' --kvm time 1.22 exit_status 0 cmd ./run --arch x86_64 --eval './linux/poweroff.out' --trace exec_tb time 8.83 exit_status 0 instructions 2244297 cmd ./run --arch x86_64 --eval 'm5 exit' --emulator gem5 time 213.39 exit_status 0 instructions 318486337 cmd ./run --arch arm --eval './linux/poweroff.out' time 6.62 exit_status 0 cmd ./run --arch arm --eval './linux/poweroff.out' --trace exec_tb time 6.90 exit_status 0 instructions 776374 cmd ./run --arch arm --eval 'm5 exit' --emulator gem5 time 118.46 exit_status 0 instructions 153023392 cmd ./run --arch arm --eval 'm5 exit' --emulator gem5 -- --cpu-type=HPI --caches --l2cache --l1d_size=1024kB --l1i_size=1024kB --l2_size=1024kB --l3_size=1024kB time 2250.40 exit_status 0 instructions 151981914 cmd ./run --arch aarch64 --eval './linux/poweroff.out' time 4.94 exit_status 0 cmd ./run --arch aarch64 --eval './linux/poweroff.out' --trace exec_tb time 5.04 exit_status 0 instructions 233162 cmd ./run --arch aarch64 --eval 'm5 exit' --emulator gem5 time 70.89 exit_status 0 instructions 124346081 cmd ./run --arch aarch64 --eval 'm5 exit' --emulator gem5 -- --cpu-type=HPI --caches --l2cache --l1d_size=1024kB --l1i_size=1024kB --l2_size=1024kB --l3_size=1024kB time 381.86 exit_status 0 instructions 124564620 cmd ./run --arch aarch64 --eval 'm5 exit' --emulator gem5 --gem5-build-type fast time 58.00 exit_status 0 instructions 124346081 cmd ./run --arch aarch64 --eval 'm5 exit' --emulator gem5 --gem5-build-type debug time 1022.03 exit_status 0 instructions 124346081
TODO: aarch64 gem5 and QEMU use the same kernel, so why is the gem5 instruction count so much much higher?
28.2.1.1. gem5 arm HPI boot takes much longer than aarch64
TODO 62f6870e4e0b384c4bd2d514116247e81b241251 takes 33 minutes to finish at 62f6870e4e0b384c4bd2d514116247e81b241251:
cmd ./run --arch arm --eval 'm5 exit' --emulator gem5 -- --caches --cpu-type=HPI
while aarch64 only 7 minutes.
I had previously documented on README 10 minutes at: 2eff007f7c3458be240c673c32bb33892a45d3a0 found with git log search for 10 minutes. But then I checked out there, run it, and kernel panics before any messages come out. Lol?
Logs of the runs can be found at: https://github.com/cirosantilli-work/gem5-issues/tree/0df13e862b50ae20fcd10bae1a9a53e55d01caac/arm-hpi-slow
The cycle count is higher for arm, 350M vs 250M for aarch64, not nowhere near the 5x runtime time increase.
A quick look at the boot logs show that they are basically identical in structure: the same operations appear more ore less on both, and there isn’t one specific huge time pit in arm: it is just that every individual operation seems to be taking a lot longer.
28.2.1.2. gem5 x86_64 DerivO3CPU boot panics
Kernel panic - not syncing: Attempted to kill the idle task!
28.2.2. Benchmark builds
The build times are calculated after doing ./configure and make source, which downloads the sources, and basically benchmarks the Internet.
Sample build time at 2c12b21b304178a81c9912817b782ead0286d282: 28 minutes, 15 with full ccache hits. Breakdown: 19% GCC, 13% Linux kernel, 7% uclibc, 6% host-python, 5% host-qemu, 5% host-gdb, 2% host-binutils
Buildroot automatically stores build timestamps as milliseconds since Epoch. Convert to minutes:
awk -F: 'NR==1{start=$1}; END{print ($1 - start)/(60000.0)}' "$(./getvar buildroot_build_build_dir)/build-time.log"
Or to conveniently do a clean build without affecting your current one:
./bench-all -b cat ../linux-kernel-module-cheat-regression/*/build-time.log
28.2.2.1. Find which packages are making the build slow and big
./build-buildroot -- graph-build graph-size graph-depends cd "$(./getvar buildroot_build_dir)/graphs" xdg-open build.pie-packages.pdf xdg-open graph-depends.pdf xdg-open graph-size.pdf
28.2.2.1.1. Buildroot use prebuilt host toolchain
The biggest build time hog is always GCC, and it does not look like we can use a precompiled one: https://stackoverflow.com/questions/10833672/buildroot-environment-with-host-toolchain
28.2.2.2. Benchmark Buildroot build baseline
This is the minimal build we could expect to get away with.
We will run this whenever the Buildroot submodule is updated.
On the upstream Buildroot repo at :
./bench-all -B
Sample time on 2017.08: 11 minutes, 7 with full ccache hits. Breakdown: 47% GCC, 15% Linux kernel, 9% uclibc, 5% host-binutils. Conclusions:
-
we have bloated our kernel build 3x with all those delicious features :-)
-
GCC time increased 1.5x by our bloat, but its percentage of the total was greatly reduced, due to new packages being introduced.
make graph-dependsshows that most new dependencies come from QEMU and GDB, which we can’t get rid of anyways.
A quick look at the system monitor reveals that the build switches between times when:
-
CPUs are at a max, memory is fine. So we must be CPU / memory speed bound. I bet that this happens during heavy compilation.
-
CPUs are not at a max, and memory is fine. So we are likely disk bound. I bet that this happens during configuration steps.
This is consistent with the fact that ccache reduces the build time only partially, since ccache should only overcome the CPU bound compilation steps, but not the disk bound ones.
The instructions counts varied very little between the baseline and LKMC, so runtime overhead is not a big deal apparently.
Size:
-
bzImage: 4.4M -
rootfs.cpio: 1.6M
Zipped: 4.9M, rootfs.cpio deflates 50%, bzImage almost nothing.
28.2.2.3. Benchmark gem5 build
How long it takes to build gem5 itself.
We will update this whenever the gem5 submodule is updated.
Sample results at gem5 2a9573f5942b5416fb0570cf5cb6cdecba733392: 10 to 12 minutes.
Get results with:
./bench-all --emulator gem5 tail -n+1 ../linux-kernel-module-cheat-regression/*/gem5-bench-build-*.txt
28.2.2.3.1. Benchmark gem5 single file change rebuild time
This is the critical development parameter, and is dominated by the link time of huge binaries.
In order to benchmark it better, make a comment only change to:
vim submodules/gem5/src/sim/main.cc
then rebuild with:
./build-gem5 --arch aarch64 --verbose
and then copy the link command to a separate Bash file. Then you can time and modify it easily.
Some approximate reference values on P51:
-
opt-
unmodified: 10 seconds
-
hack with
-fuse-ld=gold: 6 seconds. Huge improvement!
-
-
debug-
unmodified: 14 seconds. Why two times slower than unmodified?
-
hack with
-fuse-ld=gold:internal error in read_cie, at ../../gold/ehframe.cc:919on Ubuntu 18.04 all GCC. TODO report.
-
-
fast-
--force-lto: 1 minute. Slower as expected, since more optimizations are done at link time.--force-ltois only used forfast, and it adds-fltoto the build.
-
ramfs made no difference, the kernel must be caching files in memory very efficiently already.
Tested at: d4b3e064adeeace3c3e7d106801f95c14637c12f + 1.
28.3. Benchmark machines
28.3.1. P51
Lenovo ThinkPad P51 laptop:
-
2500 USD in 2018 (high end)
-
Intel Core i7-7820HQ Processor (8MB Cache, up to 3.90GHz) (4 cores 8 threads)
-
32GB(16+16) DDR4 2400MHz SODIMM
-
512GB SSD PCIe TLC OPAL2
-
NVIDIA Quadro M1200 Mobile, latest Ubuntu supported proprietary driver
-
Latest Ubuntu
28.4. Benchmark Internets
28.4.1. 38Mbps internet
2c12b21b304178a81c9912817b782ead0286d282:
-
shallow clone of all submodules: 4 minutes.
-
make source: 2 minutes
Google M-lab speed test: 36.4Mbps
28.5. Benchmark this repo bibliography
gem5:
-
https://www.mail-archive.com/gem5-users@gem5.org/msg15262.html which parts of the gem5 code make it slow
-
what are the minimum system requirements:
29. About this repo
29.1. Supported hosts
The host requirements depend a lot on which examples you want to run.
Some setups of this repository are very portable, notably setups under Userland setup, e.g. C, and will likely work on any host system with minimal modification.
The least portable setups are those that require Buildroot and crosstool-NG.
We tend to test this repo the most on the latest Ubuntu and on the latest Ubuntu LTS.
For other Linux distros, everything will likely also just work if you install the analogous required packages for your distro.
Find out the packages that we install with:
./build --download-dependencies --dry-run <some-target> | less
and then just look for the apt-get commands shown on the log.
After installing the missing packages for your distro, do the build with:
./build --download-dependencies --no-apt <some-target>
which does everything as normal, except that it skips any apt commands.
If something does not work however, Docker host setup should just work on any Linux distro.
Native Windows is unlikely feasible for Buildroot setups because Buildroot is a huge set of GNU Make scripts + host tools, just do everything from inside an Ubuntu in VirtualBox instance in that case.
Pull requests with ports to new host systems and reports on issues that things work or don’t work on your host are welcome.
29.2. Common build issues
29.2.1. You must put some 'source' URIs in your sources.list
If ./build --download-dependencies fails with:
E: You must put some 'source' URIs in your sources.list
see this: https://askubuntu.com/questions/496549/error-you-must-put-some-source-uris-in-your-sources-list/857433#857433 I don’t know how to automate this step. Why, Ubuntu, why.
29.2.2. Build from downloaded source zip files
It does not work if you just download the .zip with the sources for this repository from GitHub because we use Git submodules, you must clone this repo.
./build --download-dependencies then fetches only the required submodules for you.
29.3. Run command after boot
If you just want to run a command after boot ends without thinking much about it, just use the --eval-after option, e.g.:
./run --eval-after 'echo hello'
This option passes the command to our init scripts through Kernel command line parameters, and uses a few clever tricks along the way to make it just work.
See init for the gory details.
29.4. Default command line arguments
It gets annoying to retype --arch aarch64 for every single command, or to remember --config setups.
So simplify that, do:
cp config.py data/
and then edit the data/config file to your needs.
Source: config.py
You can also choose a different configuration file explicitly with:
./run --config data/config2.py
Almost all options names are automatically deduced from their command line --help name: just replace - with _.
More precisely, we use the dest= value of Python’s argparse module.
To get a list of all global options that you can use, try:
./getvar --type input
but note that this does not include script specific options.
29.5. Documentation
To learn how to build the documentation see: Section 1.8, “Build the documentation”.
29.5.1. Documentation verification
When running build-doc, we do the following checks:
-
<<>>inner links are not broken -
link:somefile[]links point to paths that exist via asciidoctor/extract-link-targets. Upstream wontfix at: https://github.com/asciidoctor/asciidoctor/issues/3210 -
all links in non-README files to README IDs exist via
git grep+ asciidoctor/extract-header-ids
The scripts prints what you have to fix and exits with an error status if there are any errors.
29.5.1.1. asciidoctor/extract-link-targets
Documentation for asciidoctor/extract-link-targets
Extract link targets from Asciidoctor document.
Usage:
./asciidoctor/extract-link-targets README.adoc
Output: one link target per line.
Hastily hacked from: https://asciidoctor.org/docs/user-manual/#inline-macro-processor-example
29.5.1.2. asciidoctor/extract-header-ids
Documentation for asciidoctor/extract-header-ids
Extract header IDs, both auto-generated and manually given.
E.g., for the document test.adoc:
= Auto generated [[explicitly-given]] == La la
the script:
./asciidoctor/extract-header-ids test.adoc
produces:
auto-generated explicitly-given
One application we have in mind for this is that as of 2.0.10 Asciidoctor does not warn on header ID collisions between auto-generated IDs: https://github.com/asciidoctor/asciidoctor/issues/3147 But this script doesn’t solve that yet as it would require generating the section IDs without the -N suffix. Section generation happens at Section.generate_id in Asciidoctor code.
29.6. asciidoctor/link-target-up.rb
The Asciidoctor extension scripts:
-
link:asciidoctor-link-up.rb
-
link:asciidoctor-link-github.rb
hack the README link: targets to make them work from:
-
inside the
out/directory with../ -
GitHub pages, with explicit GitHub blob URLs
29.6.1. GitHub pages
As mentioned before the TOC, we have to push this README to GitHub pages due to: https://github.com/isaacs/github/issues/1610
For now, instead of pushing with git push, I just remember to always push with:
./publish-gh-pages
Source: publish-gh-pages
I’m going this way for now because:
-
the Jekyll Asciidoctor plugin is not enabled by default on GitHub: https://webapps.stackexchange.com/questions/114606/can-github-pages-render-asciidoc
-
I’m lazy to setup a proper Travis CI push
-
I’m the only contributor essentially, so no problems with pull requests
The only files used by the GitHub pages are:
29.7. Clean the build
You did something crazy, and nothing seems to work anymore?
All our build outputs are stored under out/, so the coarsest and most effective thing you can do is:
rm -rf out
This implies a full rebuild for all archs however, so you might first want to explore finer grained cleans first.
All our individual build-* scripts have a --clean option to completely nuke their builds:
./build-gem5 --clean ./build-qemu --clean ./build-buildroot --clean
Verify with:
ls "$(./getvar qemu_build_dir)" ls "$(./getvar gem5_build_dir)" ls "$(./getvar buildroot_build_dir)"
Note that host tools like QEMU and gem5 store all archs in a single directory to factor out build objects, so cleaning one arch will clean all of them.
To only nuke only one Buildroot package, we can use the -dirclean Buildroot target:
./build-buildroot --no-all -- <package-name>-dirclean
e.g.:
./build-buildroot --no-all -- sample_package-dirclean
Verify with:
ls "$(./getvar buildroot_build_build_dir)"
29.8. ccache
ccache might save you a lot of re-build when you decide to Clean the build or create a new build variant.
We have ccache enabled for everything we build by default.
However, you likely want to add the following to your .bashrc to take better advantage of ccache:
export CCACHE_DIR=~/.ccache export CCACHE_MAXSIZE="20G"
We cannot automate this because you have to decide:
-
should I store my cache on my HD or SSD?
-
how big is my build, and how many build configurations do I need to keep around at a time?
If you don’t those variables it, the default is to use ~/.buildroot-ccache with 5G, which is a bit small for us.
To check if ccache is working, run this command while a build is running on another shell:
watch -n1 'make -C "$(./getvar buildroot_build_dir)" ccache-stats'
or if you have it installed on host and the environment variables exported simply with:
watch -n1 'ccache -s'
and then watch the miss or hit counts go up.
We have enabled ccached builds by default.
BR2_CCACHE_USE_BASEDIR=n is used for Buildroot, which means that:
-
absolute paths are used and GDB can find source files
-
but builds are not reused across separated LKMC directories
29.9. Rebuild Buildroot while running
It is not possible to rebuild the root filesystem while running QEMU because QEMU holds the file qcow2 file:
error while converting qcow2: Failed to get "write" lock
29.10. Simultaneous runs
When doing long simulations sweeping across multiple system parameters, it becomes fundamental to do multiple simulations in parallel.
This is specially true for gem5, which runs much slower than QEMU, and cannot use multiple host cores to speed up the simulation: https://github.com/cirosantilli-work/gem5-issues/issues/15, so the only way to parallelize is to run multiple instances in parallel.
This also has a good synergy with Build variants.
First shell:
./run
Another shell:
./run --run-id 1
and now you have two QEMU instances running in parallel.
The default run id is 0.
Our scripts solve two difficulties with simultaneous runs:
-
port conflicts, e.g. GDB and gem5-shell
-
output directory conflicts, e.g. traces and gem5 stats overwriting one another
Each run gets a separate output directory. For example:
./run --arch aarch64 --emulator gem5 --run-id 0 &>/dev/null & ./run --arch aarch64 --emulator gem5 --run-id 1 &>/dev/null &
produces two separate m5out directories:
echo "$(./getvar --arch aarch64 --emulator gem5 --run-id 0 m5out_dir)" echo "$(./getvar --arch aarch64 --emulator gem5 --run-id 1 m5out_dir)"
and the gem5 host executable stdout and stderr can be found at:
less "$(./getvar --arch aarch64 --emulator gem5 --run-id 0 termout_file)" less "$(./getvar --arch aarch64 --emulator gem5 --run-id 1 termout_file)"
Each line is prepended with the timestamp in seconds since the start of the program when it appeared.
To have more semantic output directories names for later inspection, you can use a non numeric string for the run ID, and indicate the port offset explicitly:
./run --arch aarch64 --emulator gem5 --run-id some-experiment --port-offset 1
--port-offset defaults to the run ID when that is a number.
Like CPU architecture, you will need to pass the -n option to anything that needs to know runtime information, e.g. GDB step debug:
./run --run-id 1 ./run-gdb --run-id 1
To run multiple gem5 checkouts, see: Section 29.11.3.1, “gem5 worktree”.
Implementation note: we create multiple namespaces for two things:
-
run output directory
-
ports
-
QEMU allows setting all ports explicitly.
If a port is not free, it just crashes.
We assign a contiguous port range for each run ID.
-
gem5 automatically increments ports until it finds a free one.
gem5 60600f09c25255b3c8f72da7fb49100e2682093a does not seem to expose a way to set the terminal and VNC ports from
fs.py, so we just let gem5 assign the ports itself, and use-nonly to match what it assigned. Those ports both appear on config.ini.The GDB port can be assigned on
gem5.opt --remote-gdb-port, but it does not appear onconfig.ini.
-
29.11. Build variants
It often happens that you are comparing two versions of the build, a good and a bad one, and trying to figure out why the bad one is bad.
Our build variants system allows you to keep multiple built versions of all major components, so that you can easily switching between running one or the other.
29.11.1. Linux kernel build variants
If you want to keep two builds around, one for the latest Linux version, and the other for Linux v4.16:
# Build master. ./build-linux # Build another branch. git -C "$(./getvar linux_source_dir)" fetch --tags --unshallow git -C "$(./getvar linux_source_dir)" checkout v4.16 ./build-linux --linux-build-id v4.16 # Restore master. git -C "$(./getvar linux_source_dir)" checkout - # Run master. ./run # Run another branch. ./run --linux-build-id v4.16
The git fetch --unshallow is needed the first time because ./build --download-dependencies only does a shallow clone of the Linux kernel to save space and time, see also: https://stackoverflow.com/questions/6802145/how-to-convert-a-git-shallow-clone-to-a-full-clone
The --linux-build-id option should be passed to all scripts that support it, much like --arch for the CPU architecture, e.g. to step debug:
./run-gdb --linux-build-id v4.16
To run both kernels simultaneously, one on each QEMU instance, see: Section 29.10, “Simultaneous runs”.
29.11.2. QEMU build variants
Analogous to the Linux kernel build variants but with the --qemu-build-id option instead:
./build-qemu git -C "$(./getvar qemu_source_dir)" checkout v2.12.0 ./build-qemu --qemu-build-id v2.12.0 git -C "$(./getvar qemu_source_dir)" checkout - ./run ./run --qemu-build-id v2.12.0
29.11.3. gem5 build variants
Analogous to the Linux kernel build variants but with the --gem5-build-id option instead:
# Build master. ./build-gem5 # Build another branch. git -C "$(./getvar gem5_source_dir)" checkout some-branch ./build-gem5 --gem5-build-id some-branch # Restore master. git -C "$(./getvar gem5_source_dir)" checkout - # Run master. ./run --emulator gem5 # Run another branch. git -C "$(./getvar gem5_source_dir)" checkout some-branch ./run --gem5-build-id some-branch --emulator gem5
Don’t forget however that gem5 has Python scripts in its source code tree, and that those must match the source code of a given build.
Therefore, you can’t forget to checkout to the sources to that of the corresponding build before running, unless you explicitly tell gem5 to use a non-default source tree with gem5 worktree. This becomes inevitable when you want to launch multiple simultaneous runs at different checkouts.
29.11.3.1. gem5 worktree
--gem5-build-id goes a long way, but if you want to seamlessly switch between two gem5 tress without checking out multiple times, then --gem5-worktree is for you.
# Build gem5 at the revision in the gem5 submodule. ./build-gem5 # Create a branch at the same revision as the gem5 submodule. ./build-gem5 --gem5-worktree my-new-feature cd "$(./getvar --gem5-worktree my-new-feature)" vim create-bugs git add . git commit -m 'Created a bug' cd - ./build-gem5 --gem5-worktree my-new-feature # Run the submodule. ./run --emulator gem5 --run-id 0 &>/dev/null & # Run the branch the need to check out anything. # With --gem5-worktree, we can do both runs at the same time! ./run --emulator gem5 --gem5-worktree my-new-feature --run-id 1 &>/dev/null &
--gem5-worktree <worktree-id> automatically creates:
-
a Git worktree of gem5 if one didn’t exit yet for
<worktree-id> -
a separate build directory, exactly like
--gem5-build-id my-new-featurewould
We promise that the scripts sill never touch that worktree again once it has been created: it is now up to you to manage the code manually.
--gem5-worktree is required if you want to do multiple simultaneous runs of different gem5 versions, because each gem5 build needs to use the matching Python scripts inside the source tree.
The difference between --gem5-build-id and --gem5-worktree is that --gem5-build-id specifies only the gem5 build output directory, while --gem5-worktree specifies the source input directory.
Each Git worktree needs a branch name, and we append the wt/ prefix to the --gem5-worktree value, where wt stands for WorkTree. This is done to allow us to checkout to a test some-branch branch under submodules/gem5 and still use --gem5-worktree some-branch, without conflict for the worktree branch, which can only be checked out once.
29.11.3.2. gem5 private source trees
Suppose that you are working on a private fork of gem5, but you want to use this repository to develop it as well.
Simply adding your private repository as a remote to submodules/gem5 is dangerous, as you might forget and push your private work by mistake one day.
Even removing remotes is not safe enough, since git submodule update and other submodule commands can restore the old public remote.
Instead, we provide the following safer process.
First do a separate private clone of you private repository outside of this repository:
git clone https://my.private.repo.com/my-fork/gem5.git gem5-internal gem5_internal="$(pwd)/gem5-internal"
Next, when you want to build with the private repository, use the --gem5-build-dir and --gem5-source-dir argument to override our default gem5 source and build locations:
cd linux-kernel-module-cheat
./build-gem5 \
--gem5-build-dir "${gem5_internal}/build" \
--gem5-source-dir "$gem5_internal" \
;
./run-gem5 \
--gem5-build-dir "${gem5_internal}/build" \
--gem5-source-dir "$gem5_internal" \
;
With this setup, both your private gem5 source and build are safely kept outside of this public repository.
29.11.4. Buildroot build variants
Allows you to have multiple versions of the GCC toolchain or root filesystem.
Analogous to the Linux kernel build variants but with the --build-id option instead:
./build-buildroot git -C "$(./getvar buildroot_source_dir)" checkout 2018.05 ./build-buildroot --buildroot-build-id 2018.05 git -C "$(./getvar buildroot_source_dir)" checkout - ./run ./run --buildroot-build-id 2018.05
29.12. Directory structure
29.12.1. lkmc directory
lkmc/ contains sources and headers that are shared across kernel modules, userland and baremetal examples.
We chose this awkward name so that our includes will have an lkmc/ prefix.
Another option would have been to name it as includes/lkmc, but that would make paths longer, and we might want to store source code in that directory as well in the future.
29.12.1.1. Userland objects vs header-only
When factoring out functionality across userland examples, there are two main options:
-
use header-only implementations
-
use separate C files and link to separate objects.
The downsides of the header-only implementation are:
-
slower compilation time, especially for C++
-
cannot call C implementations from assembly files
The advantages of header-only implementations are:
-
easier to use, just
#includeand you are done, no need to modify build metadata.
As a result, we are currently using the following rule:
-
if something is only going to be used from C and not assembly, define it in a header which is easier to use
The slower compilation should be OK as long as split functionality amongst different headers and only include the required ones.
Also we don’t have a choice in the case of C++ template, which must stay in headers.
-
if the functionality will be called from assembly, then we don’t have a choice, and must add it to a separate source file and link against it.
29.12.2. buildroot_packages directory
Source: buildroot_packages/
Every directory inside it is a Buildroot package.
Those packages get automatically added to Buildroot’s BR2_EXTERNAL, so all you need to do is to turn them on during build, e.g.:
./build-buildroot --config 'BR2_PACKAGE_SAMPLE_PACKAGE=y'
then test it out with:
./run --eval-after './sample_package.out'
and you should see:
hello sample_package
You can force a rebuild with:
./build-buildroot --config 'BR2_PACKAGE_SAMPLE_PACKAGE=y' -- sample_package-reconfigure
Buildroot packages are convenient, but in general, if a package if very important to you, but not really mergeable back to Buildroot, you might want to just use a custom build script for it, and point it to the Buildroot toolchain, and then use BR2_ROOTFS_OVERLAY, much like we do for Userland setup.
A custom build script can give you more flexibility: e.g. the package can be made work with other root filesystems more easily, have better 9P support, and rebuild faster as it evades some Buildroot boilerplate.
29.12.2.1. kernel_modules buildroot package
An example of how to use kernel modules in Buildroot.
Usage:
./build-buildroot \ --build-linux \ --config 'BR2_PACKAGE_KERNEL_MODULES=y' \ --no-overlay \ -- \ kernel_modules-reconfigure \ ;
Then test one of the modules with:
./run --buildroot-linux --eval-after 'modprobe buildroot_hello'
As you have just seen, this sets up everything so that modprobe can correctly find the module.
./build-buildroot --build-linux and ./run --buildroot-linux are needed because the Buildroot kernel modules must use the Buildroot Linux kernel at build and run time.
The --no-overlay is required otherwise our modules.order generated by ./build-linux and installed with BR2_ROOTFS_OVERLAY overwrites the Buildroot generated one.
29.12.3. patches directory
29.12.3.1. patches/global directory
Has the following structure:
package-name/00001-do-something.patch
The patches are then applied to the corresponding packages before build.
Uses BR2_GLOBAL_PATCH_DIR.
29.12.3.2. patches/manual directory
Patches in this directory are never applied automatically: it is up to users to manually apply them before usage following the instructions in this documentation.
These are typically patches that don’t contain fundamental functionality, so we don’t feel like forking the target repos.
29.12.4. rootfs_overlay
We use this directory for:
-
customized configuration files
-
userland module test scripts that don’t need to be compiled.
Contrast this with C examples that need compilation.
This directory is copied into the target filesystem by:
./copy-overlay ./build-buildroot
Source: copy-overlay
Build Buildroot is required for the same reason as described at: Section 1.1.2.2, “Your first kernel module hack”.
However, since the rootfs_overlay directory does not require compilation, unlike say kernel modules, we also make it 9P available to the guest directly even without ./copy-overlay at:
ls /mnt/9p/rootfs_overlay
This way you can just hack away the scripts and try them out immediately without any further operations.
29.12.5. lkmc.c
The files:
contain common C function helpers that can be used both in userland and baremetal. Oh, the infinite joys of Newlib.
Those files also contain arch specific helpers under ifdefs like:
#if defined(__aarch64__)
We try to keep as much as possible in those files. It bloats builds a little, but just makes everything simpler to understand.
29.12.6. rand_check.out
Print out several parameters that normally change randomly from boot to boot:
./run --eval-after './linux/rand_check.out;./linux/poweroff.out'
Source: userland/linux/rand_check.c
This can be used to check the determinism of:
29.12.7. lkmc_home
lkmc_home refers to the target base directory in which we put all our custom built stuff, such as userland executables and kernel modules.
The current value can be found with:
./getvar guest_lkmc_home
In the past, we used to dump everything into the root filesystem, but as the userland structure got more complex with subfolders, we decided that the risk of conflicting with important root files was becoming too great.
To save you from typing that path every time, we have made our most common commands cd into that directory by default for you, e.g.:
-
interactive shells
cdthere through BusyBox shell initrc files -
--evaland--eval-afterthrough Replace init and Run command at the end of BusyBox init
Whenever a relative path is used inside a guest sample command, e.g. insmod hello.ko or ./hello.out, it means that the path lives in lkmc_home unless stated otherwise.
29.13. Test this repo
29.13.1. Automated tests
Run almost all tests:
./build-test --all-archs --all-emulators --size 3 && \ ./test --size 3 echo $?
should output 0.
Sources:
The test script runs several different types of tests, which can also be run separately as explained at:
test does not all possible tests, because there are too many possible variations and that would take forever. The rationale is the same as for ./build all and is explained in ./build --help.
29.13.1.1. Test arch and emulator selection
You can select multiple archs and emulators of interest, as for an other command, with:
./test-executables \ --arch x86_64 \ --arch aarch64 \ --emulator gem5 \ --emulator qemu \ ;
You can also test all supported archs and emulators with:
./test-executables \ --all-archs \ --all-emulators \ ;
This command would run the test four times, using x86_64 and aarch64 with both gem5 and QEMU.
Without those flags, it defaults to just running the default arch and emulator once: x86_64 and qemu.
29.13.1.2. Quit on fail
By default, continue running even after the first failure happens, and they show a summary at the end.
You can make them exit immediately with the --no-quit-on-fail option, e.g.:
./test-executables --quit-on-fail
29.13.1.3. Test userland in full system
TODO: we really need a mechanism to automatically generate the test list automatically e.g. based on path_properties, currently there are many tests missing, and we have to add everything manually which is very annoying.
We could just generate it on the fly on the host, and forward it to guest through CLI arguments.
Run all userland tests from inside full system simulation (i.e. not User mode simulation):
./test-userland-full-system
This includes, in particular, userland programs that test the kernel modules, which cannot be tested in user mode simulation.
Basically just boots and runs: rootfs_overlay/lkmc/test_all.sh
Failure is detected by looking for the Magic failure string
Most userland programs that don’t rely on kernel modules can also be tested in user mode simulation as explained at: Section 10.2, “User mode tests”.
29.13.1.4. GDB tests
We have some pexpect automated tests for GDB for both userland and baremetal programs!
Run the userland tests:
./build --all-archs test-gdb && \ ./test-gdb --all-archs --all-emulators
Run the baremetal tests instead:
./test-gdb --all-archs --all-emulators --mode baremetal
Sources:
If a test fails, re-run the test commands manually and use --verbose to understand what happened:
./run --arch arm --background --baremetal baremetal/c/add.c --gdb-wait & ./run-gdb --arch arm --baremetal baremetal/c/add.c --verbose -- main
and possibly repeat the GDB steps manually with the usual:
./run-gdb --arch arm --baremetal baremetal/c/add.c --no-continue --verbose
To debug GDB problems on gem5, you might want to enable the following tracing options:
./run \ --arch arm \ --baremetal baremetal/c/add.c \ --gdb-wait \ --trace GDBRecv,GDBSend \ --trace-stdout \ ;
29.13.1.5. Magic failure string
We do not know of any way to set the emulator exit status in QEMU arm full system.
For other arch / emulator combinations, we know how to do it:
-
aarch64: aarch64 semihosting supports exit status
-
gem5: m5 fail works on all archs
-
user mode: QEMU forwards exit status, for gem5 we do some log parsing as described at: Section 10.6.1, “gem5 syscall emulation exit status”
Since we can’t do it for QEMU arm, the only reliable solution is to just parse the guest serial output for a magic failure string to check if tests failed.
Our run scripts parse the serial output looking for a line line containing only exactly the magic regular expression:
lkmc_exit_status_(\d+)
and then exit with the given regular expression, e.g.:
./run --arch aarch64 baremetal/return2.c echo $?
should output:
2
This magic output string is notably generated by:
-
rootfs_overlay/lkmc/test_fail.sh, which is used by Test userland in full system
-
the
exit()baremetal function whenstatus != 1.Unfortunately the only way we found to set this up was with
on_exit: https://github.com/cirosantilli/linux-kernel-module-cheat/issues/59.Trying to patch
_exitdirectly fails since at that point some de-initialization has already happened which prevents the print.So setup this
on_exitautomatically from all our Baremetal bootloaders, so it just works automatically for the examples that use the bootloaders: https://stackoverflow.com/questions/44097610/pass-parameter-to-atexit/49659697#49659697The following examples end up testing that our setup is working:
Beware that on Linux kernel simulations, you cannot even echo that string from userland, since userland stdout shows up on the serial.
29.13.2. Non-automated tests
29.13.2.1. Test GDB Linux kernel
For the Linux kernel, do the following manual tests for now.
Shell 1:
./run --gdb-wait
Shell 2:
./run-gdb start_kernel
Should break GDB at start_kernel.
Then proceed to do the following tests:
-
./count.shandbreak __x64_sys_write -
insmod timer.koandbreak lkmc_timer_callback
29.13.2.2. Test the Internet
You should also test that the Internet works:
./run --arch x86_64 --kernel-cli '- lkmc_eval="ifup -a;wget -S google.com;poweroff;"'
29.13.2.3. CLI script tests
build-userland and test-executables have a wide variety of target selection modes, and it was hard to keep them all working without some tests:
29.14. Bisection
When updating the Linux kernel, QEMU and gem5, things sometimes break.
However, for many types of crashes, it is trivial to bisect down to the offending commit, in particular because we can make QEMU and gem5 exit with status 1 on kernel panic as mentioned at: Section 15.7.1.3, “Exit emulator on panic”.
For example, when updating from QEMU v2.12.0 to v3.0.0-rc3, the Linux kernel boot started to panic for arm.
We then bisected it as explained at: https://stackoverflow.com/questions/4713088/how-to-use-git-bisect/22592593#22592593 with the bisect-qemu-linux-boot script:
root_dir="$(pwd)"
cd "$(./getvar qemu_source_dir)"
git bisect start
# Check that our test script fails on v3.0.0-rc3 as expected, and mark it as bad.
"${root_dir}/bisect-qemu-linux-boot"
# Should output 1.
echo #?
git bisect bad
# Same for the good end.
git checkout v2.12.0
"${root_dir}/bisect-qemu-linux-boot"
# Should output 0.
echo #?
git bisect good
# This leaves us at the offending commit.
git bisect run "${root_dir}/bisect-qemu-linux-boot"
# Clean up after the bisection.
git bisect reset
git submodule update
"${root_dir}/build-qemu" --clean --qemu-build-id bisect
Other bisection helpers include:
29.15. path_properties
In order to build and run each userland and baremetal example properly, we need per-file metadata such as compiler flags and required number of cores.
This data is stored is stored in path_properties.py at path_properties_tuples.
Maybe we should embed it magically into source files directories to make it easier to see? But one big Python dict was easier to implement so we started like this. And it allows factoring chunks out easily.
The format is as follows:
'path_component': (
{'property': value},
{
'child_path_component':
{
{'child_property': },
{}
}
}
)
and as a shortcut, paths that don’t have any children can be written directly as:
'path_component': {'property': value}
Properties of parent directories apply to all children.
Lists coming from parent directories are extended instead of overwritten by children, this is especially useful for C compiler flags.
29.16. Update a forked submodule
This is a template update procedure for submodules for which we have some patches on on top of mainline.
This example is based on the Linux kernel, for which we used to have patches, but have since moved to mainline:
# Last point before out patches.
last_mainline_revision=v4.15
next_mainline_revision=v4.16
cd "$(./getvar linux_source_dir)"
# Create a branch before the rebase in case things go wrong.
git checkout -b "lkmc-${last_mainline_revision}"
git remote set-url origin git@github.com:cirosantilli/linux.git
git push
git checkout master
git remote add up git://git.kernel.org/pub/scm/linux/kernel/git/stable/linux-stable.git
git fetch up
git rebase --onto "$next_mainline_revision" "$last_mainline_revision"
# And update the README to show off.
git commit -m "linux: update to ${next_mainline_revision}"
29.17. Release
29.17.1. Release procedure
Ensure that the Automated tests are passing on a clean build:
mv out out.bak ./build-test --size 3 && ./test --size 3
The ./build-test command builds a superset of what will be downloaded which also tests other things we would like to be working on the release. For the minimal build to generate the files to be uploaded, see: Section 29.17.2, “release-zip”
The clean build is necessary as it generates clean images since it is not possible to remove Buildroot packages
Run all tests in Non-automated tests just QEMU x86_64 and QEMU aarch64.
TODO: not working currently, so skipped: Ensure that the benchmarks look fine:
./bench-all -A
Create a release candidate and upload it:
git tag -a -m '' v3.0-rc1 git push --follow-tags ./release-zip --all-archs # export LKMC_GITHUB_TOKEN=<your-token> ./release-upload
Now let’s do an out-of-box testing for the release candidate:
cd .. git clone https://github.com/cirosantilli/linux-kernel-module-cheat linux-kernel-module-cheat-release cd linux-kernel-module-cheat-release
Test Prebuilt setup.
Clean up, and re-start from scratch:
cd .. rm -rf linux-kernel-module-cheat-release git clone https://github.com/cirosantilli/linux-kernel-module-cheat linux-kernel-module-cheat-release cd linux-kernel-module-cheat-release
Go through all the other Getting started sections in order.
Once everything looks fine, publish the release with:
git tag -a v3.0 # Describe the release int the tag message. git push --follow-tags ./release-zip --all-archs # export LKMC_GITHUB_TOKEN=<your-token> ./release-upload
29.17.2. release-zip
Create a zip containing all files required for Prebuilt setup:
./build --all-archs release && ./release-zip --all-archs
Source: release-zip
This generates a zip file:
echo "$(./getvar release_zip_file)"
which you can then upload somewhere.
29.17.3. release-upload
After:
-
running release-zip
-
creating and pushing a tag to GitHub
you can upload the release to GitHub automatically with:
# export LKMC_GITHUB_TOKEN=<your-token> ./release-upload
Source: release-upload
The HEAD of the local repository must be on top of a tag that has been pushed for this to work.
Create LKMC_GITHUB_TOKEN under: https://github.com/settings/tokens/new and save it to your .bashrc.
The implementation of this script is described at:
29.18. Design rationale
29.18.1. Design goals
This project was created to help me understand, modify and test low level system components by using system simulators.
System simulators are cool compared to real hardware because they are:
-
free
-
make experiments highly reproducible
-
give full visibility to the system: you can inspect any byte in memory, or the state of any hardware register. The laws of physics sometimes get in the way when doing that for real hardware.
The current components we focus the most on are:
-
Linux kernel and Linux kernel modules
-
Buildroot. We use and therefore document, a large part of its feature set.
The following components are not covered, but they would also benefit from this setup, and it shouldn’t be hard to add them:
-
C standard libraries
-
compilers. Project idea: add a new instruction to x86, then hack up GCC to actually use it, and make a C program that generates it.
The design goals are to provide setups that are:
-
highly automated: "just works"
-
thoroughly documented: you know what "just works" means
-
can be fully built from source: to give visibility and allow modifications
-
can also use prebuilt binaries as much as possible: in case you are lazy or unable to build from source
We aim to make a documentation that contains a very high runnable example / theory bullshit ratio.
Having at least one example per section is ideal, and it should be the very first thing in the section if possible.
29.18.2. Setup trade-offs
The trade-offs between the different setups are basically a balance between:
-
speed ans size: how long and how much disk space do the build and run take?
-
visibility: can you GDB step debug everything and read source code?
-
modifiability: can you modify the source code and rebuild a modified version?
-
portability: does it work on a Windows host? Could it ever?
-
accuracy: how accurate does the simulation represent real hardware?
-
compatibility: how likely is is that all the components will work well together: emulator, compiler, kernel, standard library, …
-
guest software availability: how wide is your choice of easily installed guest software packages? See also: Section 29.18.4, “Linux distro choice”
29.18.3. Resource tradeoff guidelines
Choosing which features go into our default builds means making tradeoffs, here are our guidelines:
-
keep the root filesystem as tiny as possible to make Prebuilt setup small: only add BusyBox to have a small interactive system.
It is easy to add new packages once you have the toolchain, and if you don’t there are infinitely many packages to cover and we can’t cover them all.
-
enable every feature possible on the toolchain (GCC, Binutils), because changes imply Buildroot rebuilds
-
runtime is sacred. Faster systems are:
-
easier to understand
-
run faster, which is specially for gem5 which is slow
Runtime basically just comes down to how we configure the Linux kernel, since in the root filesystem all that matters is
init=, and that is easy to control.One possibility we could play with is to build loadable modules instead of built-in modules to reduce runtime, but make it easier to get started with the modules.
-
In order to learn how to measure some of those aspects, see: Section 28, “Benchmark this repo”.
29.18.4. Linux distro choice
We haven’t found the ultimate distro yet, here is a summary table of trade-offs that we care about: Table 7, “Comparison of Linux distros for usage in this repository”.
| Distro | Packages in single Git tree | Git tracked docs | Cross build without QEMU | Prebuilt downloads | Number of packages |
|---|---|---|---|---|---|
Buildroot 2018.05 |
y |
y |
y |
n |
2k (1) |
Ubuntu 18.04 |
n |
n |
n |
y |
50k (3) |
Yocto 2.5 (8) |
? |
y (5) |
? |
y (6) |
400 (7) |
Alpine Linux 3.8.0 |
y |
n (1) |
? |
y |
2000 (4) |
-
(1): Wiki… https://wiki.alpinelinux.org/wiki/Main_Page
-
(2):
ls packages | wc -
(3): https://askubuntu.com/questions/120630/how-many-packages-are-in-the-main-repository
-
(4):
ls main community non-free | wc -
(5): yes, but on a separate Git tree… https://git.yoctoproject.org/cgit/cgit.cgi/yocto-docs/
-
(6): yes, but the initial Poky build / download still took 5 hours on 38Mbps internet, and QEMU failed to boot at the end… https://bugzilla.yoctoproject.org/show_bug.cgi?id=12953
-
(7):
ls recipes-* | wc -
(8): Poky reference system: http://git.yoctoproject.org/cgit/cgit.cgi/poky
Other interesting possibilities that I haven’t evaluated well:
-
NixOS https://nixos.org/ Seems to support full build from source well. Not much cross compilation information however.
-
Gentoo https://en.wikipedia.org/wiki/Gentoo_Linux Seems to support full build from source well.
29.19. Soft topics
29.19.1. Fairy tale
Once upon a time, there was a boy called Linus.
Linus made a super fun toy, and since he was not very humble, decided to call it Linux.
Linux was an awesome toy, but it had one big problem: it was very difficult to learn how to play with it!
As a result, only some weird kids who were very bored ended up playing with Linux, and everyone thought those kids were very cool, in their own weird way.
One day, a mysterious new kid called Ciro tried to play with Linux, and like many before him, got very frustrated, and gave up.
A few years later, Ciro had grown up a bit, and by chance came across a very cool toy made by the boy Petazzoni and his gang: it was called Buildroot.
Ciro noticed that if you used Buildroot together with Linux, and Linux suddenly became very fun to play with!
So Ciro decided to explain to as many kids as possible how to use Buildroot to play with Linux.
And so everyone was happy. Except some of the old weird kernel hackers who wanted to keep their mystique, but so be it.
THE END
29.19.2. Should you waste your life with systems programming?
Being the hardcore person who fully understands an important complex system such as a computer, it does have a nice ring to it doesn’t it?
But before you dedicate your life to this nonsense, do consider the following points:
-
almost all contributions to the kernel are done by large companies, and if you are not an employee in one of them, you are likely not going to be able to do much.
This can be inferred by the fact that the
devices/directory is by far the largest in the kernel.The kernel is of course just an interface to hardware, and the hardware developers start developing their kernel stuff even before specs are publicly released, both to help with hardware development and to have things working when the announcement is made.
Furthermore, I believe that there are in-tree devices which have never been properly publicly documented. Linus is of course fine with this, since code == documentation for him, but it is not as easy for mere mortals.
There are some less hardware bound higher level layers in the kernel which might not require being in a hardware company, and a few people must be living off it.
But of course, those are heavily motivated by the underlying hardware characteristics, and it is very likely that most of the people working there were previously at a hardware company.
In that sense, therefore, the kernel is not as open as one might want to believe.
-
it is impossible to become rich with this knowledge.
This is partly implied by the fact that you need to be in a big company to make useful low level things, and therefore you will only be a tiny cog in the engine.
The key problem is that the entry cost of hardware design is just too insanely high for startups in general.
-
Is learning this the most useful thing that you think can do for society?
Or are you just learning it for job security and having a nice sounding title?
I’m not a huge fan of the person, but I think Jobs said it right: https://www.youtube.com/watch?v=FF-tKLISfPE
First determine the useful goal, and then backtrack down to the most efficient thing you can do to reach it.
-
there are two things that sadden me compared to physics-based engineering:
-
you will never become eternally famous. All tech disappears sooner or later, while laws of nature, at least as useful approximations, stay unchanged.
-
every problem that you face is caused by imperfections introduced by other humans.
It is much easier to accept limitations of physics, and even natural selection in biology, which is are produced by a sentient being (?).
Physics-based engineering, just like low level hardware, is of course completely closed source however, since wrestling against the laws of physics is about the most expensive thing humans can do.
-
Are you fine with those points, and ready to continue wasting your life?
Good. In that case, read on, and let’s have some fun together ;-)
29.20. Bibliography
Runnable stuff:
-
https://lwn.net/Kernel/LDD3/ the best book, but outdated. Updated source: https://github.com/martinezjavier/ldd3 But examples non-minimal and take too much brain power to understand.
-
https://github.com/satoru-takeuchi/elkdat manual build process without Buildroot, very few and simple kernel modules. But it seem ktest + QEMU working, which is awesome.
./testthere patches ktest config dynamically based on CLI! Maybe we should just steal it since GPL licensed. -
https://github.com/tinyclub/linux-lab Buildroot based, no kernel modules?
-
https://github.com/linux-kernel-labs Yocto based, source inside a kernel fork subdir: https://github.com/linux-kernel-labs/linux/tree/f08b9e4238dfc612a9d019e3705bd906930057fc/tools/labs which the author would like to upstream https://www.reddit.com/r/programming/comments/79w2q9/linux_device_driver_labs_the_linux_kernel/dp6of43/
-
Android AOSP: https://stackoverflow.com/questions/1809774/how-to-compile-the-android-aosp-kernel-and-test-it-with-the-android-emulator/48310014#48310014 AOSP is basically a uber bloated Buildroot (2 hours build vs 30 minutes), Android is Linux based, and QEMU is the emulator backend. These instructions might work for debugging the kernel: https://github.com/Fuzion24/AndroidKernelExploitationPlayground
-
https://github.com/s-matyukevich/raspberry-pi-os Does both an OS from scratch, and annotates the corresponding kernel source code. For RPI3, no QEMU support: https://github.com/s-matyukevich/raspberry-pi-os/issues/8
-
https://github.com/pw4ever/linux-kernel-hacking-helper as of bd9952127e7eda643cbb6cb4c51ad7b5b224f438, Bash, Arch Linux rootfs
-
https://github.com/MichielDerhaeg/build-linux untested. Manually builds musl and BusyBox, no Buildroot. Seems to use host packaged toolchain and tested on x86_64 only. Might contain a minimized kernel config.
Theory:
-
http://nairobi-embedded.org you will fall here a lot when you start popping the hard QEMU Google queries. They have covered everything we do here basically, but with a more manual approach, while this repo automates everything.
I couldn’t find the markup source code for the tutorials, and as a result when the domain went down in May 2018, you have to use http://web.archive.org/ to see the pages…
-
https://balau82.wordpress.com awesome low level resource
-
https://rwmj.wordpress.com/ awesome red hatter
Awesome lists: